Cool mehndi designs look crispest when the paste, placement, and drying time work together. I learned that after wiping away a bold floral pattern too early and losing half its depth. Now I plan around natural henna paste, patient drying, and the rich reddish-brown color that arrives on the second day. Small choices matter!
Before You Start With Cool Mehndi
You’ll need a fresh mehndi cone, clean skin, tissues, and a place where your hands or feet can stay still for 1 to 2 hours while the paste dries. Keep your pattern reference nearby, because you won’t want to scroll with wet paste on your fingers.
– Fine-tip mehndi cone – Tissue paper – Lemon-sugar mixture – Eucalyptus oil, if your artist recommends it – Loose clothing – A cool, dry place
The paste should sit on the skin surface until it’s dry and firm. You don’t need to rush the color. A cool mehndi design usually deepens on the second day, then fades over 1 to 3 weeks as the outer skin naturally sheds.
If you’re choosing a motif for a celebration, save a few references first. These simple trendy mehndi designs show how minimal shapes can still feel expressive and polished. For a more traditional direction, Arabic mehndi designs are useful for comparing open spacing with denser detail.
A Quick Cost Snapshot
The cost depends on coverage, detail, location, and whether you’re working with an artist or applying the paste yourself. A small wrist pattern can offer excellent value when you want something meaningful without committing to full-hand coverage.
Prices vary widely by region, so ask for a clear quote before booking. If you’re comparing options, simple modern mehndi designs can help you see how a stylish pattern keeps detail focused without requiring full coverage.
- Start With Striking Floral Mehndi Linework: The Petal-Gap Rule
- Mandala Wrist Design: When Should the Center Lead?
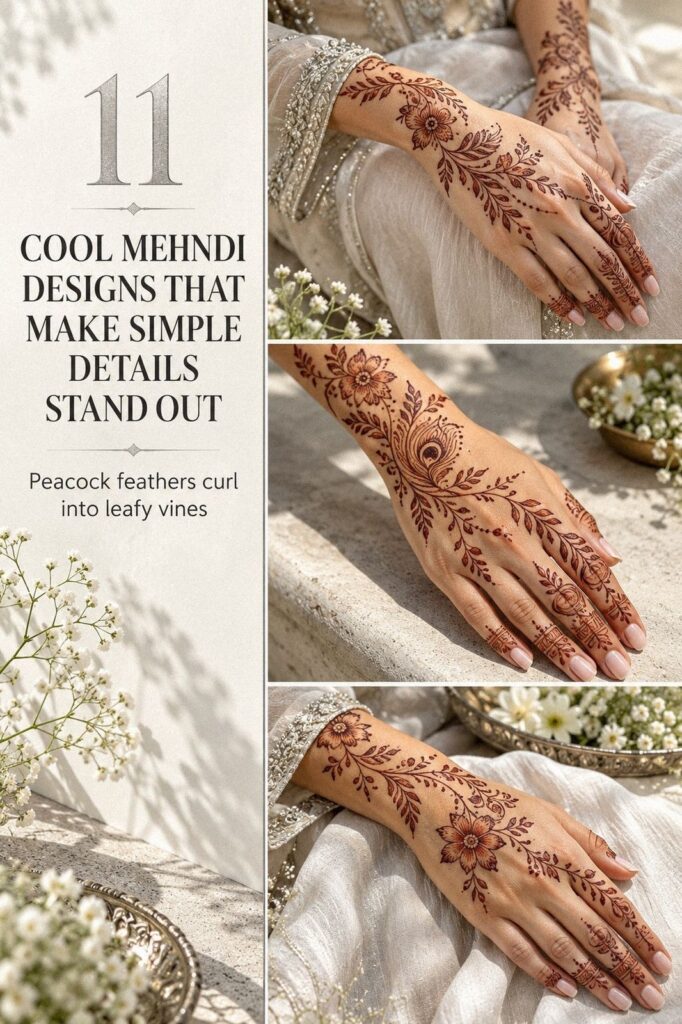
- Place Flowing Vines Along Your Forearm
- Keep Delicate Henna Details Crisp
- Let the Paisley Carry the Meaning
- Finger Mehndi Motifs: How Much Is Enough?
- Add Fierce Geometric Accents To Petals: The Rhythm Rule
- Bold Detail, Bare Skin: Balance Ornate Lines With Minimal Spaces
- Match Dainty Mehndi To Your Skin
- What Makes an Ankle Composition Playful?
- Protect Your Timeless Mehndi Stain While It Dries
1Start With Striking Floral Mehndi Linework: The Petal-Gap Rule

Begin with one striking floral motif at the center of the back of your hand, then let smaller petals travel toward your fingers. The reddish-brown pattern feels elegant because the flowers aren’t crowded. Give each petal a narrow pocket of bare skin so the design stays crisp and readable.
I’d choose a fine-tip cone for this look, especially around the knuckles and finger joints. Your artist can taper the outer petals and thicken the center, creating a bold focal point without making the whole hand heavy. A dainty flower beside a larger bloom gives your eye somewhere to rest.
The Petal-Gap Rule is simple: every ornate shape needs a small pause around it. If you’re drawing this at home, test one flower on paper first.
You’ll see whether your pressure creates a delicate line or a thick mark that spreads. That’s the whole trick!
For a more traditional direction, compare the open floral spacing in these traditional Arabic mehndi designs. They’re a strong reference when you want an intricate look that still feels sleek.
My first attempt was too dense near the wrist, and the flowers blurred into one dark patch. Don’t repeat that. Leave the wrist placement lighter, keep the fingers connected with tiny curves, and let the main bloom carry the composition.
2Mandala Wrist Design: When Should the Center Lead?

A bold mandala works best when you place the mandala center carefully before adding any outer rings. The design feels powerful because the center is stable, while the surrounding petals expand in a controlled rhythm.
Use a round mandala stencil only as a loose guide, not as a rigid shape. Your artist can draw the center first, then add scalloped petals, dots, and short arches around it. If you’re working on both palms, keep the scale similar but allow each side to have a slightly different outer edge.
The Center-Out Rule keeps the design from drifting. Start with a small dot, build the innermost flower, and check the balance before moving outward. You’ll want the mandala to sit comfortably when your wrist bends, so don’t place the widest ring directly across a deep wrist crease.
I’d skip a huge mandala on a narrow wrist. It can look crowded once your hand moves. A crisp center with two or three outer borders feels more refined and gives the stain room to deepen evenly.
For a front-hand reference, browse these simple stylish mehndi designs for front hand. The placement ideas are delicate, graceful, and easy to adapt.
3Place Flowing Vines Along Your Forearm

Flowing vines give you a graceful path from the wrist toward the forearm.

4Keep Delicate Henna Details Crisp

Delicate details need clean skin and steady pressure. If your skin has lotion or oil on it, the lines may slide instead of gripping the surface. Start with clean skin, then let it dry completely.
Wash with mild soap, dry thoroughly, and avoid applying hand cream immediately before the design. Your artist can test a small line near the wrist to check how the paste behaves. That quick test is worth it, especially if your skin is naturally dry or oily.
Keep the smallest details away from areas that bend constantly. Finger joints need slightly stronger shapes, while the center of the palm can hold intricate petals and lace-like curves. You’ll want contrast between crisp borders and softer open areas.
I’d skip ultra-thin details on every finger. They may look delicate at first, but a slightly stronger line is easier to read as the stain fades. A sharp outer border with tiny dots inside gives you a timeless result without making the hand look busy.
For an understated starting point, see these simple very simple mehndi designs. They show how minimal structure can still feel expressive and polished.
5Let the Paisley Carry the Meaning

Meaningful symbols work best when they’re woven into the pattern instead of placed like separate stickers. Choose one symbolic paisley, moon, flower, peacock, or leaf as your anchor.
Then ask your mehndi artist to repeat one small detail elsewhere, such as a curved feather or three-dot cluster. That repetition makes the whole design feel intentional. A sacred idea can still have a sleek, modern outline.
Your symbol doesn’t need a long explanation. A peacock may represent beauty or renewal, while a lotus can suggest calm strength. What matters is that the shape feels personal before the cone touches your skin.
I’d avoid combining five unrelated symbols in one small area. It can feel more like a chart than a flowing design. Pick one meaningful centerpiece, then let the surrounding vines and petals support it.
If you’re drawn to peacocks, these simple peacock mehndi designs can help you compare open feather shapes with more intricate versions. Save the one that feels personal, not merely ornate.
6Finger Mehndi Motifs: How Much Is Enough?

Finger motifs can be intricate without covering the entire hand.
7Add Fierce Geometric Accents To Petals: The Rhythm Rule

Geometric accents give floral mehndi a fierce, modern edge. Angular borders beside rounded petals make the pattern feel expressive rather than overly soft. The contrast is what makes the design memorable.
Use a geometric border around one or two petals, not every flower. Small triangles, chevrons, and diamond shapes can frame a bloom while keeping the main design graceful. Your artist should vary the spacing so the accents don’t look mechanically repeated.
The Rhythm Rule alternates rounded and angular shapes. One curved petal, one sharp border, then a line of dots gives your eye a steady pattern to follow. If you’re designing on paper first, mark the geometric accents separately so you can judge their weight.
Don’t make every line equally dark. A strong outer contour with delicate internal marks creates depth. You’ll want the stain to read as a layered composition once the color deepens on day two.
I’d skip heavy geometric blocks near the fingertips. They can overpower the floral center and make the design feel stiff.
A few crisp angles are enough to make the pattern edgy and polished. For a softer comparison, browse these simple peacock mehndi designs and notice how curved feathers can balance sharp fingertip accents.
8Bold Detail, Bare Skin: Balance Ornate Lines With Minimal Spaces

Ornate lines need minimal spaces around them. Start with the largest ornate palm motif, then leave clean channels between the petals, vines, and bands. Bare skin keeps the design from looking flat.
Your artist can use tiny dots to soften the transition, but the open channels should remain visible from a short distance. That separation gives each motif room to breathe and keeps the composition crisp.
If you’re choosing a palm design for an event, think about how your hands will look when held together. Matching motifs can be romantic and iconic, while mirrored designs feel more dramatic. They don’t need to be identical to look related.
I’ve seen people fill every blank area because they’re afraid the design won’t feel finished. That usually makes the pattern less readable. You’ll get more impact from one bold centerpiece and a few delicate supporting marks.
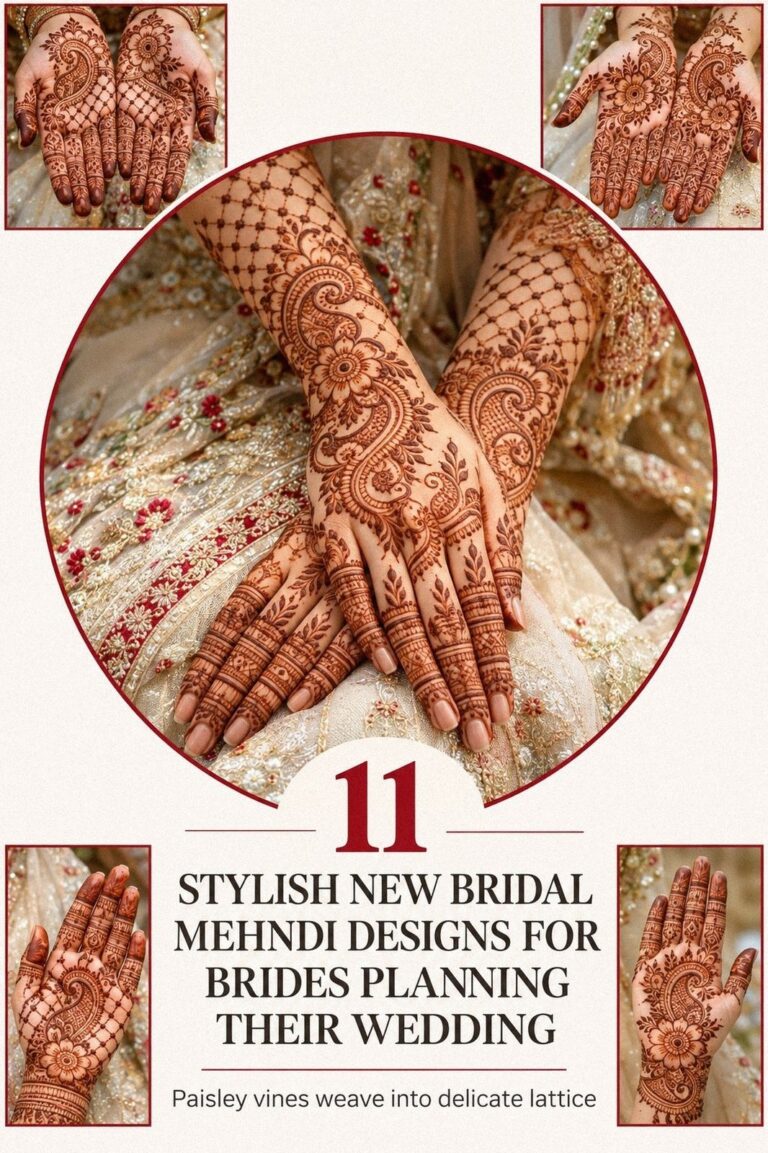
For an elaborate reference, look through these simple new bridal mehndi designs. Borrow the spacing, not the full coverage, unless your budget and drying window support bridal coverage.
9Match Dainty Mehndi To Your Skin

A dainty design should complement your natural skin tone rather than compete with it. On medium olive skin, the reddish-brown stain can look especially vibrant, while open areas keep the result bright and elegant.
Choose a dainty floral chain if you want something subtle on the wrist or hand. Your artist can use graceful leaves, tiny dots, and thin curves instead of a large central flower. That approach works well when you want the pattern visible but understated.
Don’t judge the finished color while the paste is still on your skin. The initial stain may look orange, then deepen toward brown over the next day. You’ll want to wait before deciding whether the design needs more contrast.
If your skin is deep brown, wider petals and confident curves often read better than extremely fine details. The goal isn’t to copy someone else’s design; it’s to choose a scale that stays expressive on you.
These simple modern mehndi designs show how a minimal pattern can still feel stylish and personal. I’d choose one with clear shapes and a little breathing room.
10What Makes an Ankle Composition Playful?

An ankle composition can feel playful when the pattern wraps gently instead of forming a heavy band.
11Protect Your Timeless Mehndi Stain While It Dries

Protect the paste while it dries, because this is where a timeless design can lose its sharpness. Keep the area away from water, fabric friction, and accidental smudges until the raised dried paste feels firm.
Use a lemon-sugar sealant only if your mehndi artist recommends it for the paste and placement. A tiny amount can help the dried design stay attached, but too much moisture can make the lines run. You’ll want a light touch, not a wet coating.
Once the paste has dried, let it remain on the skin as long as comfortably possible. Don’t scrape aggressively, and don’t wash the area immediately.
The stain will continue developing after the flakes come away, becoming darker on the second day. Worth the wait!
For aftercare, wash gently, moisturize when needed, and avoid prolonged sun exposure and swimming while you want the stain to last. A soft natural oil can help reduce dryness, but your artist’s advice should guide the final choice.
I made the mistake of removing dried paste too soon once. The result was pale, uneven, and nowhere near as striking as the reference. Give your design time, and you’ll see the final stain settle into something rich, crisp, and expressive.
Why Cool Mehndi Darkens on Day Two
The color changes because the stain continues developing after the paste is removed. At first, the skin may show a bright orange tone. During the next day, the second-day color deepens into a richer reddish brown, which is why judging the result immediately can be misleading.
I prefer to plan mehndi at least a day before an important occasion. That timing gives you space to let the paste dry, remove it gently, and watch the final shade develop. If you’re attending a wedding, sangeet, Eid, or Diwali gathering, this event date choice makes the whole process calmer.
The best designs aren’t always the most crowded ones. A bold flower, a flowing vine, or a meaningful symbol can carry more personality than a full palm of repeated details. You’ll know a pattern is working when the open design still reads clearly from a few steps away.
I’d choose a traditional Arabic motif when I want strong contrast and visible skin. For a more ornate result, I’d choose a mandala with structured borders.
Both can be elegant, but they create very different moods. These simple very simple mehndi designs are a helpful reminder that minimal shapes can still look polished.
The Design Choices I’d Make Again
I’ve tried delicate fingers, large floral palms, ankle vines, and geometric accents, and I’d choose the floral hand design again for most occasions. It gives you enough detail to feel special without requiring every inch of skin to carry the pattern. My honest pick!
The most useful lesson was learning to respect empty space. When I first started collecting cool mehndi designs, I saved the densest patterns because they looked impressive at first glance. In person, the boldest result was often the one with clearer shapes and more visible empty skin.
I’d also plan the drying window before choosing the placement. A wrist design is easier to keep still than a foot design, while fingers need extra care because they bend and touch everything. Your schedule should influence the pattern just as much as your taste.
A meaningful symbol makes the design feel personal, but it doesn’t need to dominate. One peacock feather, one lotus, or one graceful paisley can be enough. You’ll get a more timeless result when the meaningful symbol supports the composition instead of turning it into a crowded message board.
The color matters, too. The best reddish-brown stain looks richer when the paste is fresh, the skin is clean, and the dried pattern is protected.
Small choices, repeated carefully, create the polished finish people notice first. Fresh mehndi paste is usually worth prioritizing over extra detail. These simple peacock mehndi designs show how one symbolic shape can carry an entire pattern.
What Changes the Price?
The artist’s current quote usually reflects time, experience, location, and the complexity of the design. Ask whether the rate is hourly, per hand, per motif, or based on total coverage before you commit.
A simple wrist pattern may cost less than a full palm, but the lowest price isn’t always the best value. Look for clean lines, fresh paste, and a portfolio that matches the coverage level you want. Simple modern mehndi designs can help you compare how smaller patterns use detail efficiently.
If you’re working with a limited budget, choose one meaningful focal point and reduce repeated details. That can give you better value than paying for a crowded pattern you’ll struggle to protect.
My Day-Two Timing Checklist
Plan the drying time first. Keep your hand, foot, or ankle still for 1 to 2 hours, and avoid scheduling the application immediately before travel, cooking, sports, or anything involving frequent washing.
Remember that the first orange tone isn’t the final result. The color shift usually becomes richer during the second day, then gradually softens over 1 to 3 weeks.
My preferred routine is simple: let the paste dry fully, remove the flakes gently, avoid soaking the area, and use a little oil if the skin feels dry. That care gives the care routine a realistic chance to preserve the stain. These simple trendy mehndi designs are worth saving before you choose your placement.
The Questions I Get Asked Most
How much does a cool mehndi design usually cost?
There isn’t one fixed price for a cool mehndi design. The quote varies by artist, region, occasion, coverage, and detail level. Ask for the artist’s current rate before booking, especially for bridal mehndi, full hands, feet, or event work.
Are cool mehndi designs a good choice for a first design?
Yes, because mehndi sits on the skin’s surface and fades naturally within 1 to 3 weeks. A small wrist, palm, or ankle design lets you test a placement and style before choosing something larger. Start with a simple floral motif if you’re unsure.
How do I choose a mehndi artist?
Look for clear examples of finished work, consistent paste lines, clean tools, and a portfolio that includes the style you want. Ask how long the paste should dry and what aftercare they recommend. A skilled mehndi artist should explain the process without rushing you.
How should cool mehndi feel while it dries?
The cone applies paste to the skin’s surface, so the main challenge is staying still while the raised pattern dries. You may notice mild tightness as the paste firms. Keep your hands relaxed, and speak up if the paste feels irritating.
How long does a cool mehndi design take to fade?
Most mehndi stains fade over 1 to 3 weeks, depending on placement, washing, friction, and your skin. The color usually darkens on the second day, then softens gradually. A reddish-brown stain often lasts longer on the palms and feet than on frequently washed areas.
What’s the best placement for cool mehndi designs?
The best placement depends on how visible and detailed you want the design to be. Wrists and forearms suit flowing vines, while palms and feet support ornate patterns. An ankle is a playful option if you can keep the ankle placement still while the paste dries.
Can I create cool mehndi designs at home?
Yes, if you use fresh paste, a clean cone, and a simple pattern with clear shapes. Start with a practice sheet, then choose a small wrist, finger, or ankle design. Keep the paste on long enough to dry, and don’t expect the final color immediately.
Where I’d Start First
If I had to pick one step, I’d start with the floral hand design. The Petal-Gap Rule keeps intricate petals readable, and the open skin helps the reddish-brown stain look crisp on day two. Save that reference, plan your drying time, and let the pattern become personal.
If you want a more traditional direction, revisit these traditional Arabic mehndi designs before choosing your final motif.