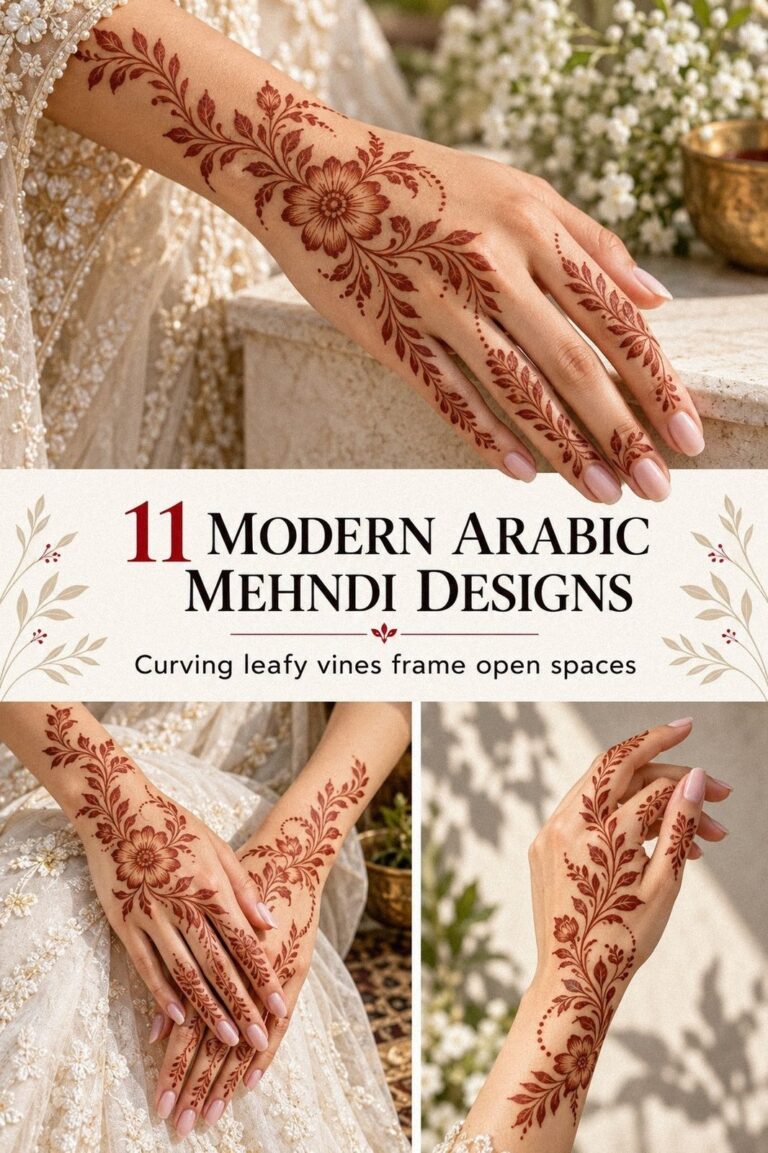
Fresh mehndi paste leaves the cone in raised, delicate trails, then dries into a crisp pattern across the hands. I learned that the design feels most striking when the natural henna paste has room to breathe. Filling every gap isn’t what makes bridal mehndi feel complete.
By the second day, the stain had deepened into a warm brown-red. That change made the pattern feel personal and expressive rather than printed. My strongest choice was keeping the shapes clear enough to recognize while the color developed.
My Editorial Starting Point
I think easy bridal mehndi should look intentional, not merely reduced. A minimal design can still feel elegant, symbolic, and powerful when one motif leads and every other mark supports it.
My opinion is firm: choose one meaningful direction before the cone touches your skin. A delicate paisley with open fingers will usually feel more polished than five unrelated motifs competing for attention!
Three Decisions Before the Cone
– Pick one main motif: paisley, flower, mandala, peacock, or crescent. – Choose one direction of movement: palm to wrist, thumb across the hand, or fingers toward the center. – Reserve one area of open skin so the finished design stays graceful.
The paste should dry for about 1 to 2 hours before you remove it gently. Expect the stain to deepen on the second day and fade naturally over one to three weeks.
- Choose One Clear Bridal Mehndi Idea
- Sketch Both Hands as a Pair
- Match the Design to Your Hands
- Build from the Center of the Palm
- Give the Fingers Their Own Rhythm
- Let a Vine Travel from Wrist to Palm
- Place One Symbol Near the Thumb
- Decide Between Bold and Minimal
- Protect Fresh Bridal Mehndi
- Understand the Brown-Red Stain Timeline
- Connect Hand and Foot Mehndi Carefully
- Budget for the Actual Application
1Choose One Clear Bridal Mehndi Idea
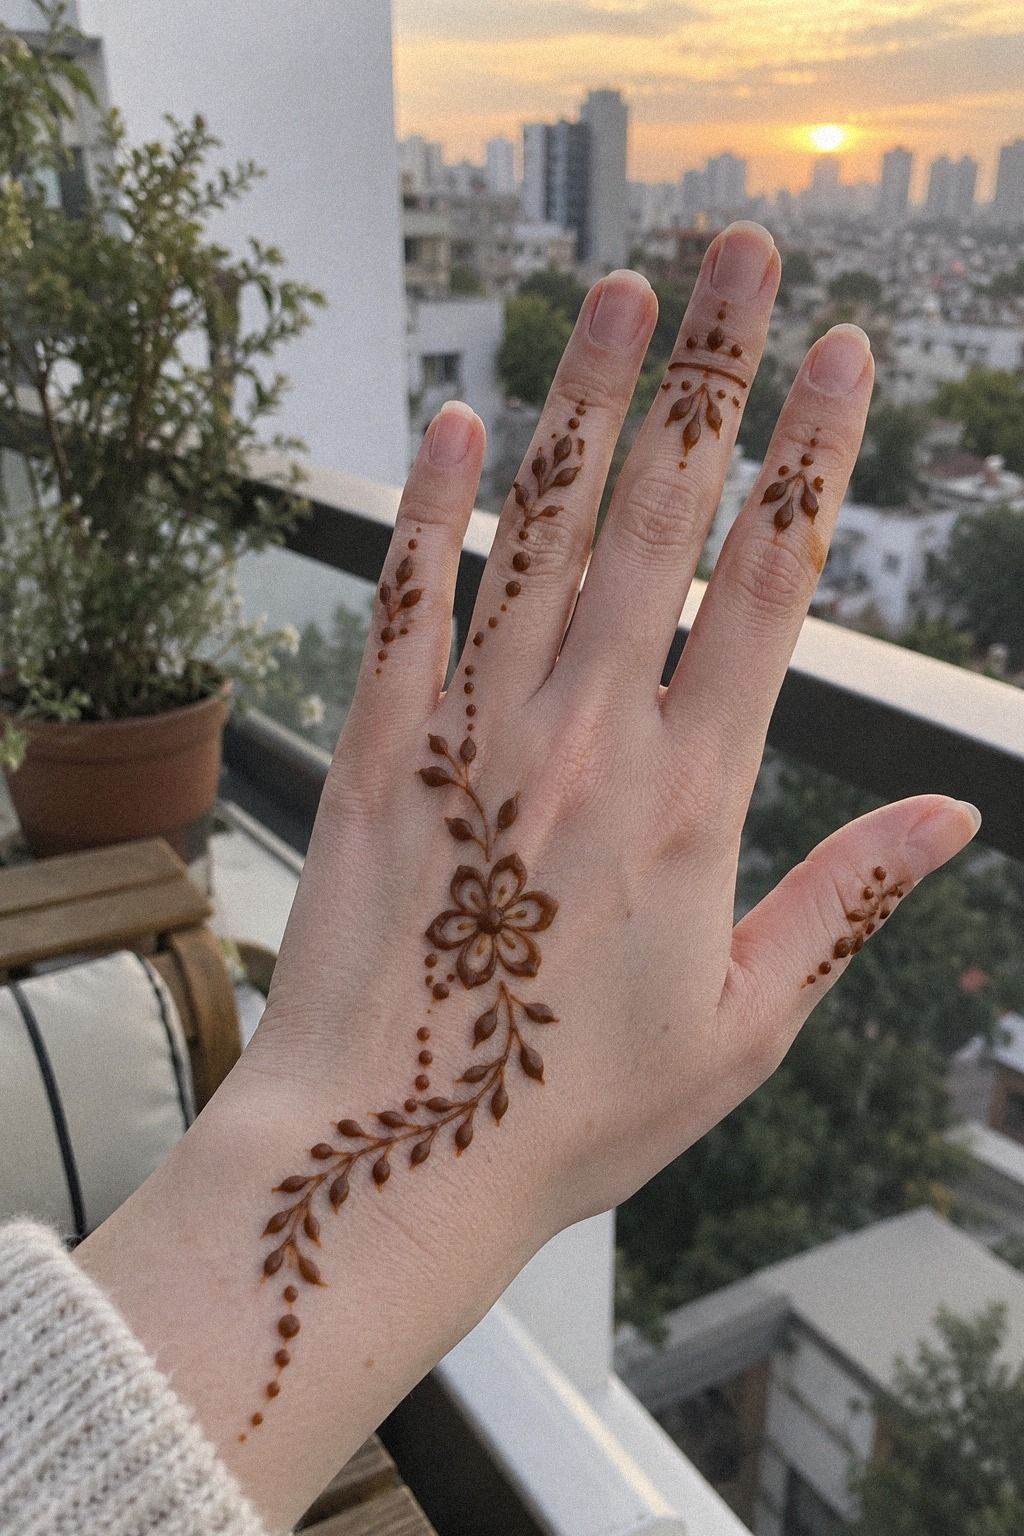
Before I chose my design, the back of my hand was completely bare. I wanted something meaningful and elegant, but I didn’t want dense coverage hiding every trace of skin.
I began with one paisley, two leaves, and a few open curls toward the fingers. That was enough. The result felt minimal without looking unfinished.
When I compared references, these simple bridal mehndi designs helped me judge how much breathing room I preferred. I borrowed the rhythm, not every individual mark.
The best test is distance. Hold your hand naturally and ask whether the main shape still reads. If the answer is no, remove a detail before adding another.
I kept the fingers lighter than the palm. That gave the design a graceful taper and made the central shape feel more important.
The Open-Palm Rule
My rule is to leave one section visibly open. The open palm becomes a pause, and the surrounding paste looks more deliberate because it isn’t spread evenly everywhere.
I used the heel of the palm as that pause. A symbolic center, a broken border, and a few curved leaves gave the hand a polished rhythm.
The empty skin became part of the design. It made the pattern feel understated while keeping the bridal character intact.
2Sketch Both Hands as a Pair
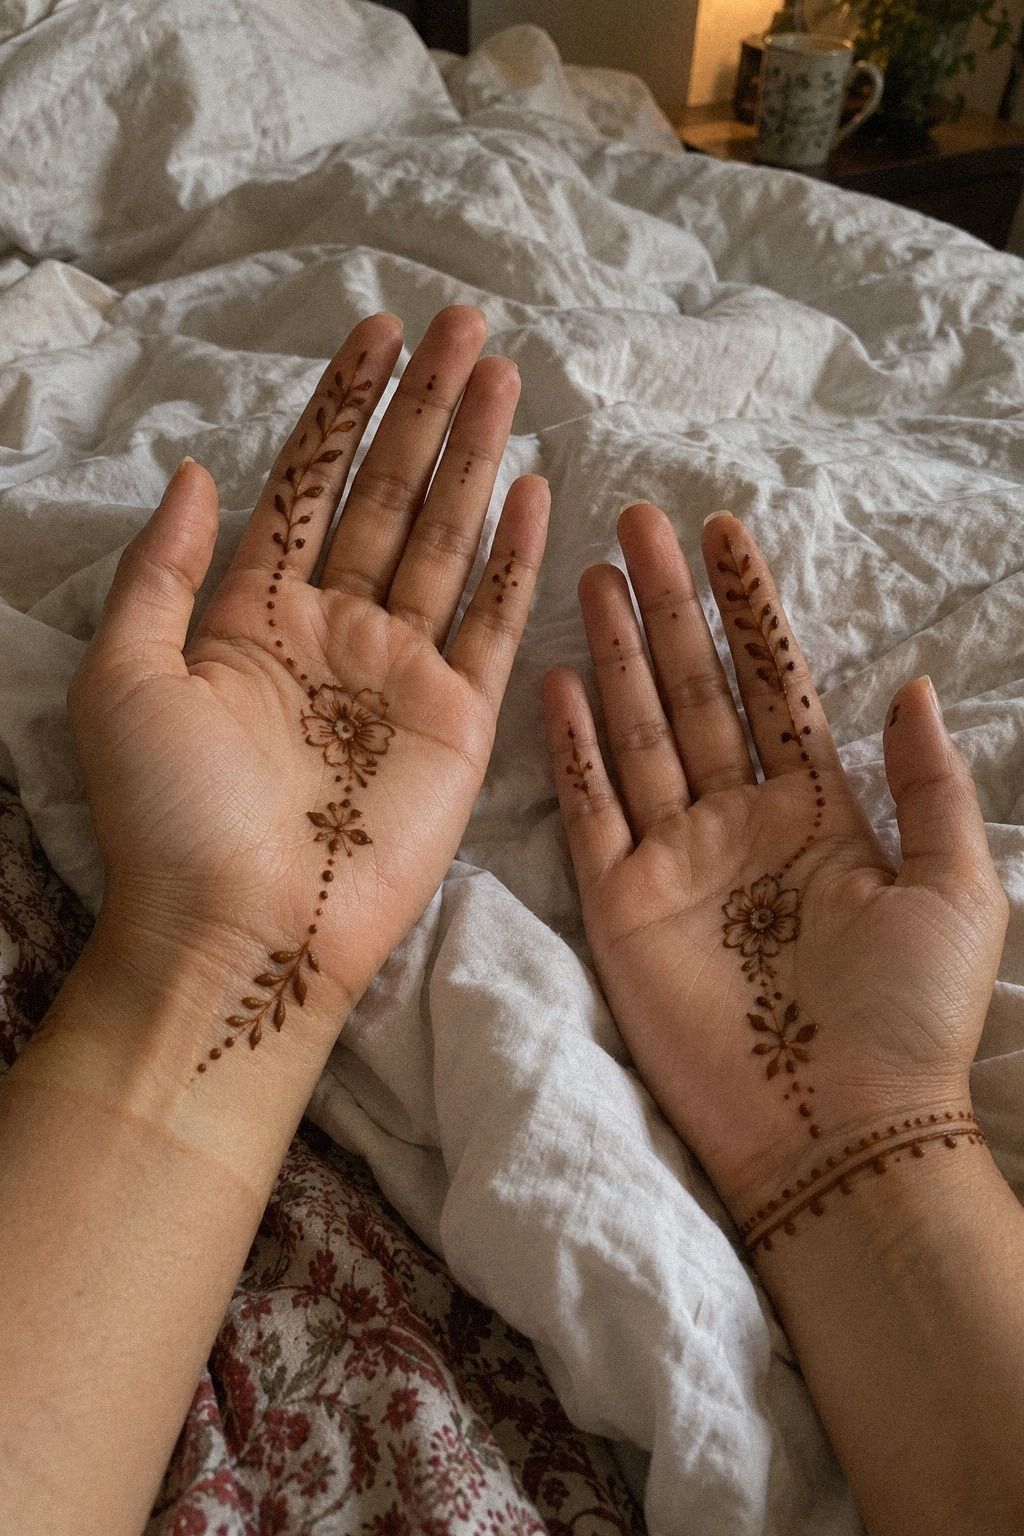
For my latest easy bridal mehndi designs, I studied both hands together instead of treating them as separate drawings. One hand carried a larger mandala, while the other repeated its outer rhythm with a smaller center.
That gave the pair a balanced feeling without making the designs identical. I wanted them related, not copied.
I sketched the plan on paper first, then tested the spacing with a washable pencil on a hand outline. This showed me where the wrist curve would begin and whether the fingers felt overloaded.
I didn’t mirror every detail. A slight difference in scale made the result feel more personal and handmade.
These easy new bridal mehndi designs helped me compare related motifs before I settled on one direction. I chose a shared paisley shape, then changed the surrounding leaves.
The most useful step was drawing the wrist connection before the palm details. Once I knew where the pattern would travel, the hands felt flowing rather than disconnected.
3Match the Design to Your Hands
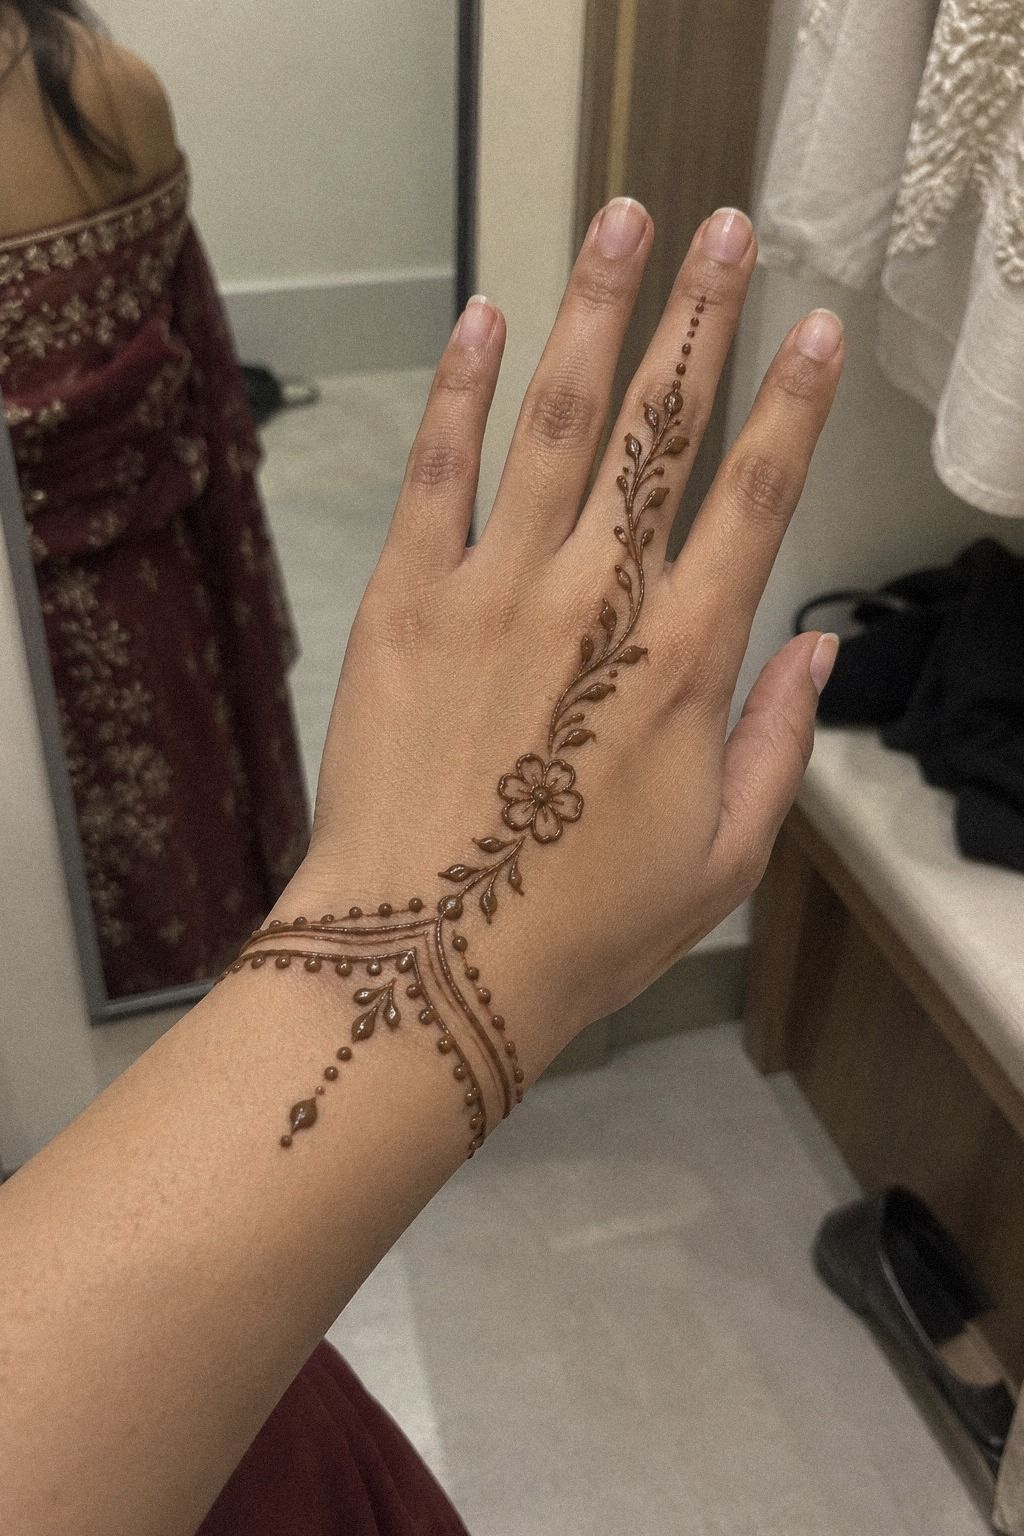
Matching easy bridal mehndi designs to your hands starts with proportion. I didn’t choose a motif because it looked good on someone else’s hand; I checked how its width would sit across my own palm.
Long fingers can carry a narrow vine or repeated petals. Shorter fingers often look better with fewer, larger marks. A dainty pattern isn’t automatically more flattering if every detail becomes too small to read.
I also considered how my fingers bend. A symbol placed across a crease can lose its shape, while one shifted slightly toward the thumb may remain clear.
These simple Pakistani mehndi designs gave me useful structural references. I reduced the density and kept the strongest traditional rhythm.
Don’t copy a design’s scale blindly. Measure the width of your palm with your fingers relaxed, then adjust the motif before the cone is opened.
4Build from the Center of the Palm
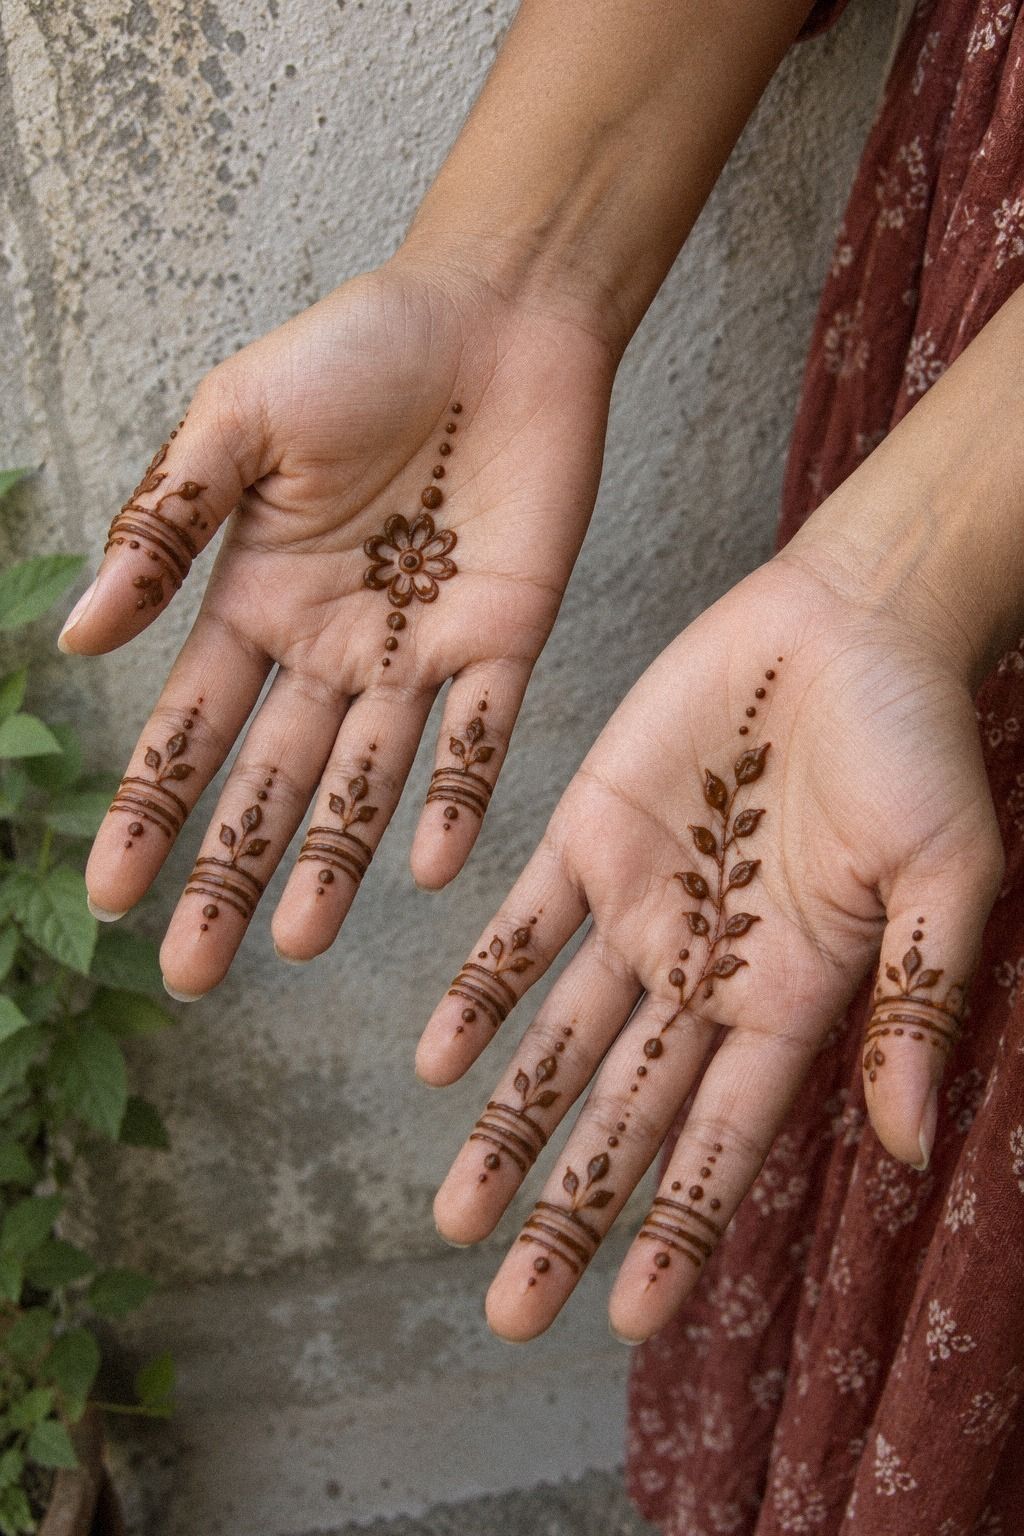
The center of my palm became the anchor. I used a round floral mandala, then built outward with short petals and curved leaves.
You can begin with a dot, flower, crescent, or paisley. The important thing is that the center feels intentional rather than dropped into the middle by habit.
I didn’t start with the fingers because the design began drifting. Once the palm center was marked, I could judge the space for the heel, thumb, and wrist.
A bridal pattern feels calmer when every section grows from one decision. That gave mine a crisp direction without requiring dense coverage.
The mandala was graceful, but it wasn’t the only choice. A peacock eye or pair of leaves can feel just as expressive when the surrounding marks stay light.
The Three-Ring Method
I used three loose rings: a filled center, an open petal ring, and a broken outer ring. The lemon-sugar sealant went on only after the paste had set, so the edges stayed clear.
Use a light hand with the sealant. Too much liquid can make a fine curve run, especially around the center where several lines meet.
The first ring gave the palm a bold point. The second added softness, and the broken outer ring connected the shape to the rest of the hand.
I left the heel mostly clear. That made the center appear larger and kept the design comfortable when I moved my fingers.

5Give the Fingers Their Own Rhythm
The fingers needed a different pace from the palm. I used tiny leaves on two fingers, an open chain on another, and left one fingertip almost clear.
That variation kept the result intricate without making it crowded. Every finger didn’t need the same treatment.
I prefer one stronger finger detail over five identical bands. A small paisley near the index finger can feel more iconic than repeated marks running across every joint.
These simple trendy mehndi designs showed me several modern directions, but I removed the heaviest fingertip coverage.
Before applying paste, bend and relax your fingers. Mark the places where creases appear, then keep the most delicate details away from those folds.
A finger pattern should still look connected when your hand is open and when it is relaxed. That small movement test saved me from adding lines that would have disappeared.
6Let a Vine Travel from Wrist to Palm
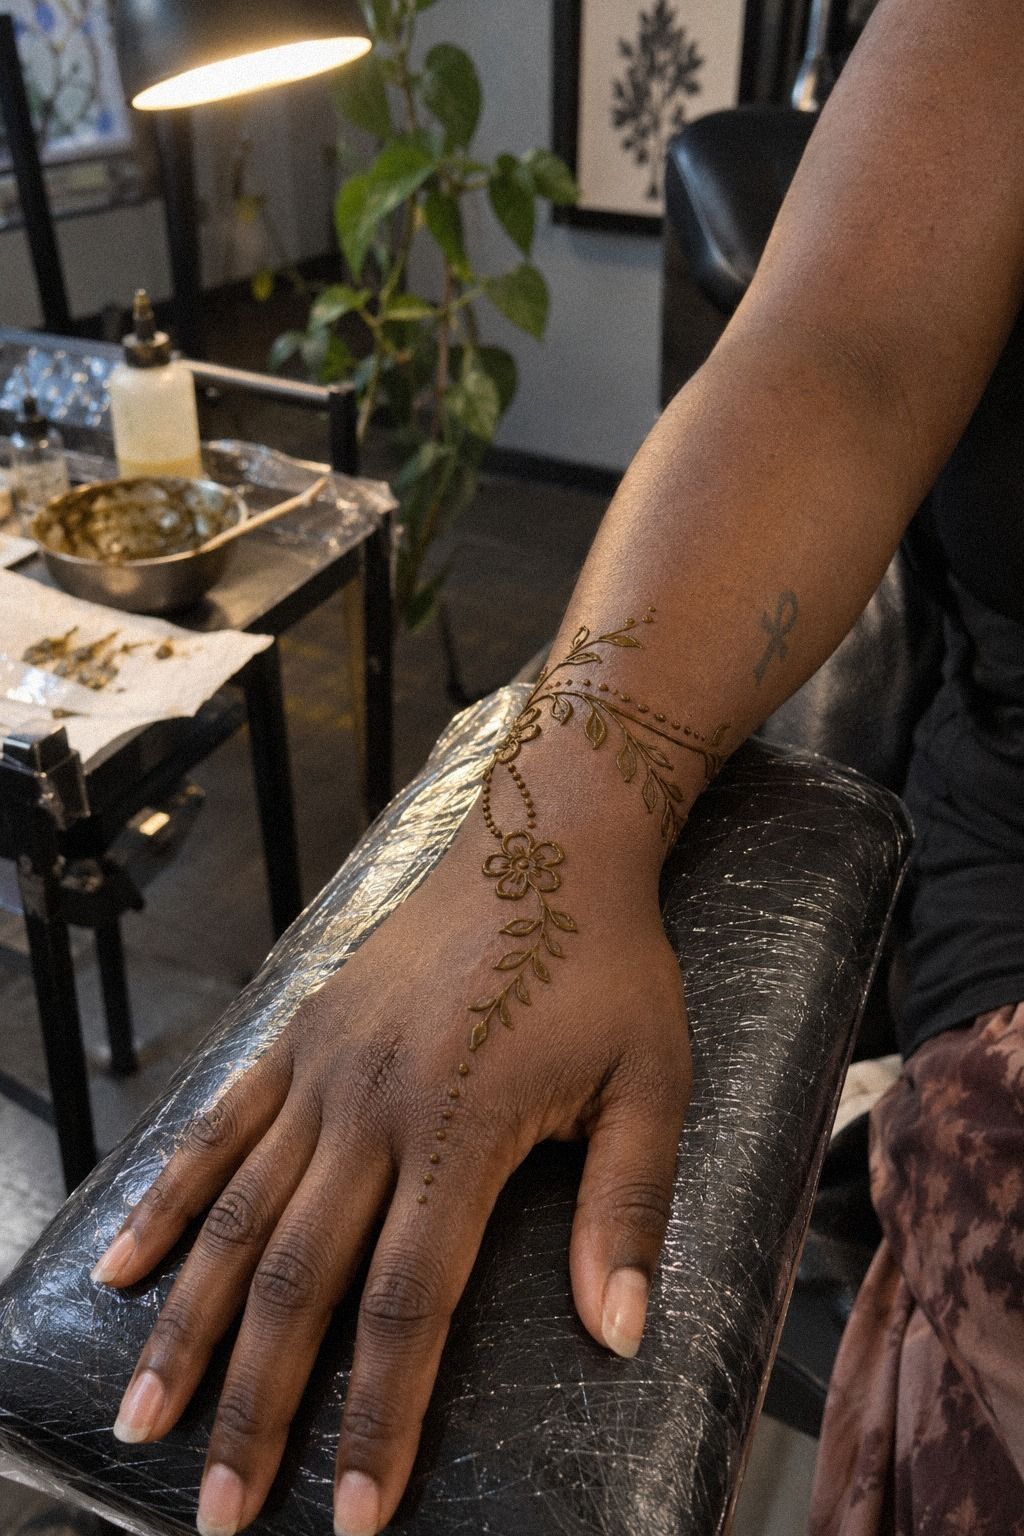
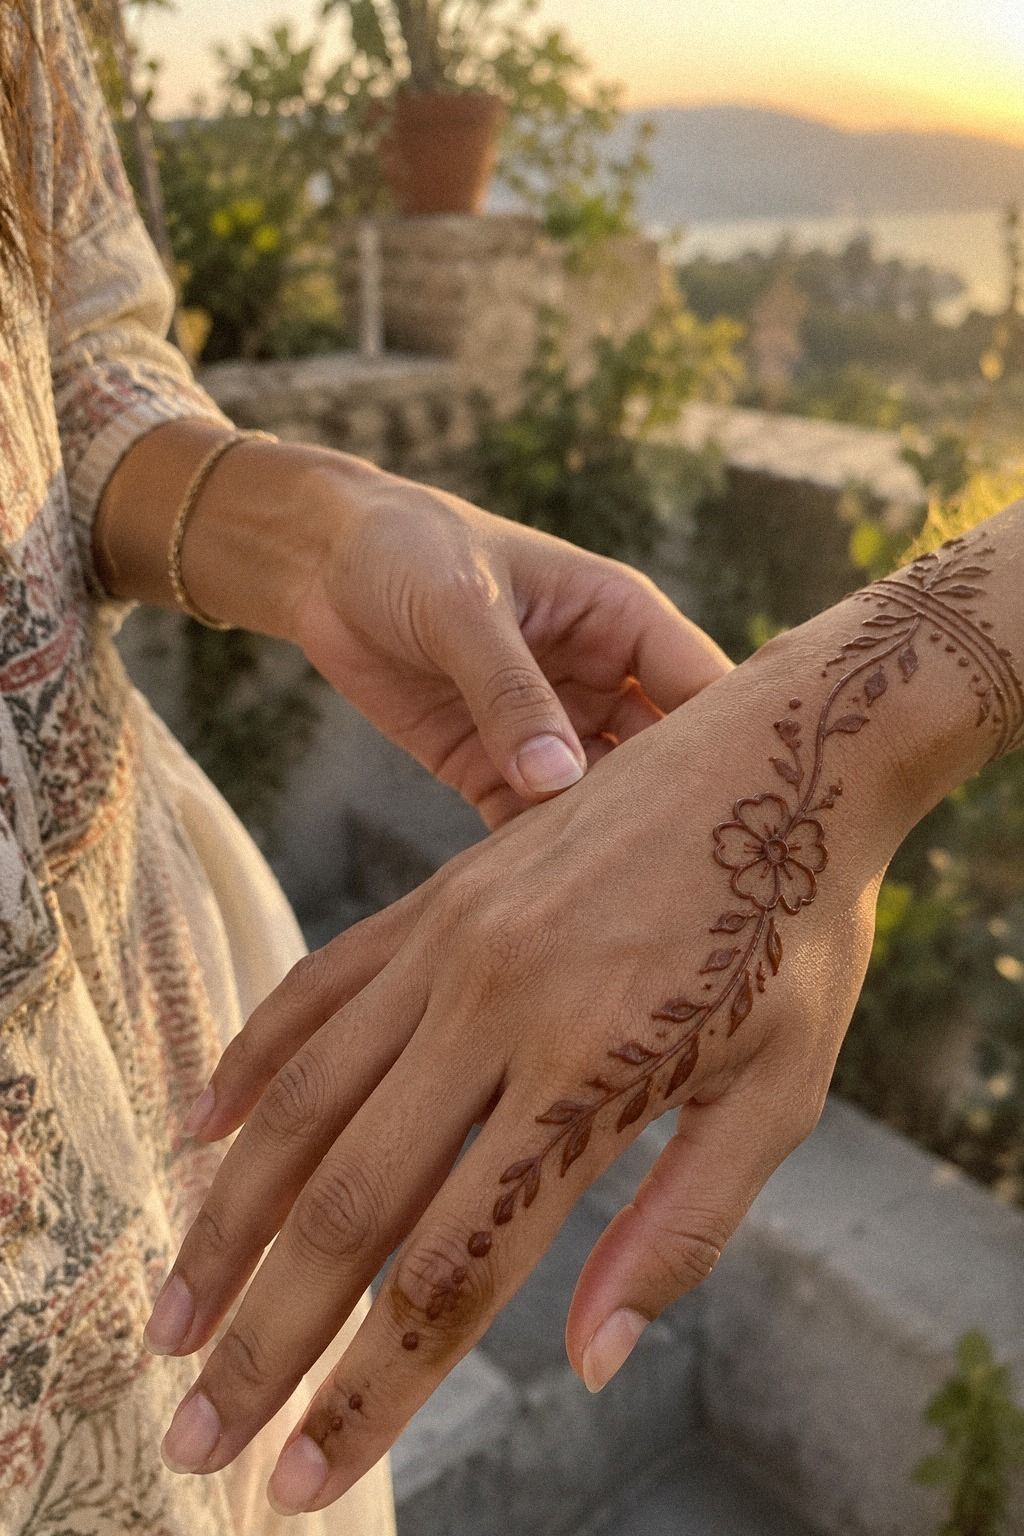
I wanted the wrist to feel lengthened, so I used one curved stem instead of a solid band. The mehndi cone made it easy to change the line width as the pattern moved.
I began at the wrist, divided the stem into three branches, and added leaves only where the curve needed support. The result felt daring without becoming heavy.
The main vine was flowing, but the leaves stayed controlled. One paisley near the wrist gave it a stronger identity while the remaining branches stayed open.
A wrist vine should make sense when the hand turns. I rotated my palm, relaxed my fingers, and checked whether the curve still looked intentional.
If the outer branch feels forced, shorten it. A sleek curve usually looks more polished than an ambitious one that ends abruptly.
The simple peacock mehndi designs collection also gave me ideas for carrying a curved neck or feather shape into the wrist without copying a full peacock.
The Wrist-Flow Test
Follow the main curve from the palm to the forearm without lifting your eyes. If the path stops suddenly, add one small leaf or soften the final bend.
If it feels too busy, remove the smallest curl. Editing made my design more understated, and that tiny edit matters!
7Place One Symbol Near the Thumb

I wanted the thumb area to carry one meaningful detail, so I chose a small peacock shape near its base. The motif felt vibrant when the paste was fresh and remained recognizable after the stain developed.
A thumb symbol can be a paisley, flower, moon, initial, or leaf. Keep it large enough to read, but don’t let it become a second center.
I tested the shape while bending my thumb toward my palm. That showed me where the paste would crease and where the curve needed more room.
The final symbol was feminine without being overly ornate. Three feather dots and one curved body gave it enough character.
Ask your mehndi artist to draw the symbol first. If the surrounding border changes, the most important mark will still remain clear.
8Decide Between Bold and Minimal

Both hands carried one stronger center with mostly minimal surrounding strokes. That contrast gave the design a powerful focal point without turning the whole hand dark.
I used thicker paste for the central paisley and thinner lines for the leaves. The difference in weight created interest without adding extra motifs.
A bold center doesn’t require heavy coverage. One filled petal or darkened curl can be enough if the nearby marks remain open.
For a more fierce direction, use a sharper paisley and angular leaves. For a softer result, round the petals and break the border.
I rejected the urge to make both hands equally dense. The slight variation made the pair feel alive and stylish.
9Protect Fresh Bridal Mehndi
After the application, I let the paste dry for about 1 to 2 hours. It needs time to set before you cover or move your hands too much.
Once the paste hardened, I brushed it away gently instead of scraping. The dried paste is only one stage of the result, so I didn’t judge the color immediately.
A light lemon-sugar mixture can help the paste stay attached, but the skin shouldn’t be dripping. Too much moisture may blur a delicate curve.
I avoided washing my hands immediately after removing the flakes. The stain deepened on the second day, then gradually faded over one to three weeks.
Don’t use unlabeled black paste. I’d choose fresh, clearly sourced henna paste and ask what ingredients are included before the cone touches skin.
The easy henna designs collection helped me see which shapes remained readable after the paste had been removed.
Aftercare Timing
These are practical ranges, not guarantees. Placement, paste quality, body temperature, washing, and daily activity can all affect the result.
10Understand the Brown-Red Stain Timeline

The stain looked lighter immediately after the paste came off. I knew that was normal, so I resisted changing my opinion too quickly.
By the second day, the color had deepened and the fine shapes looked more connected. The warm brown-red stain gave the design a richer character.
After that, the color softened gradually. It usually remained visible for one to three weeks, depending on placement and how often the hands were washed.
I liked that changing color. It made the design feel ethereal for a short time, then more muted as it faded.
Don’t compare the fresh paste directly with the final stain. They are different stages of the same process.
11Connect Hand and Foot Mehndi Carefully
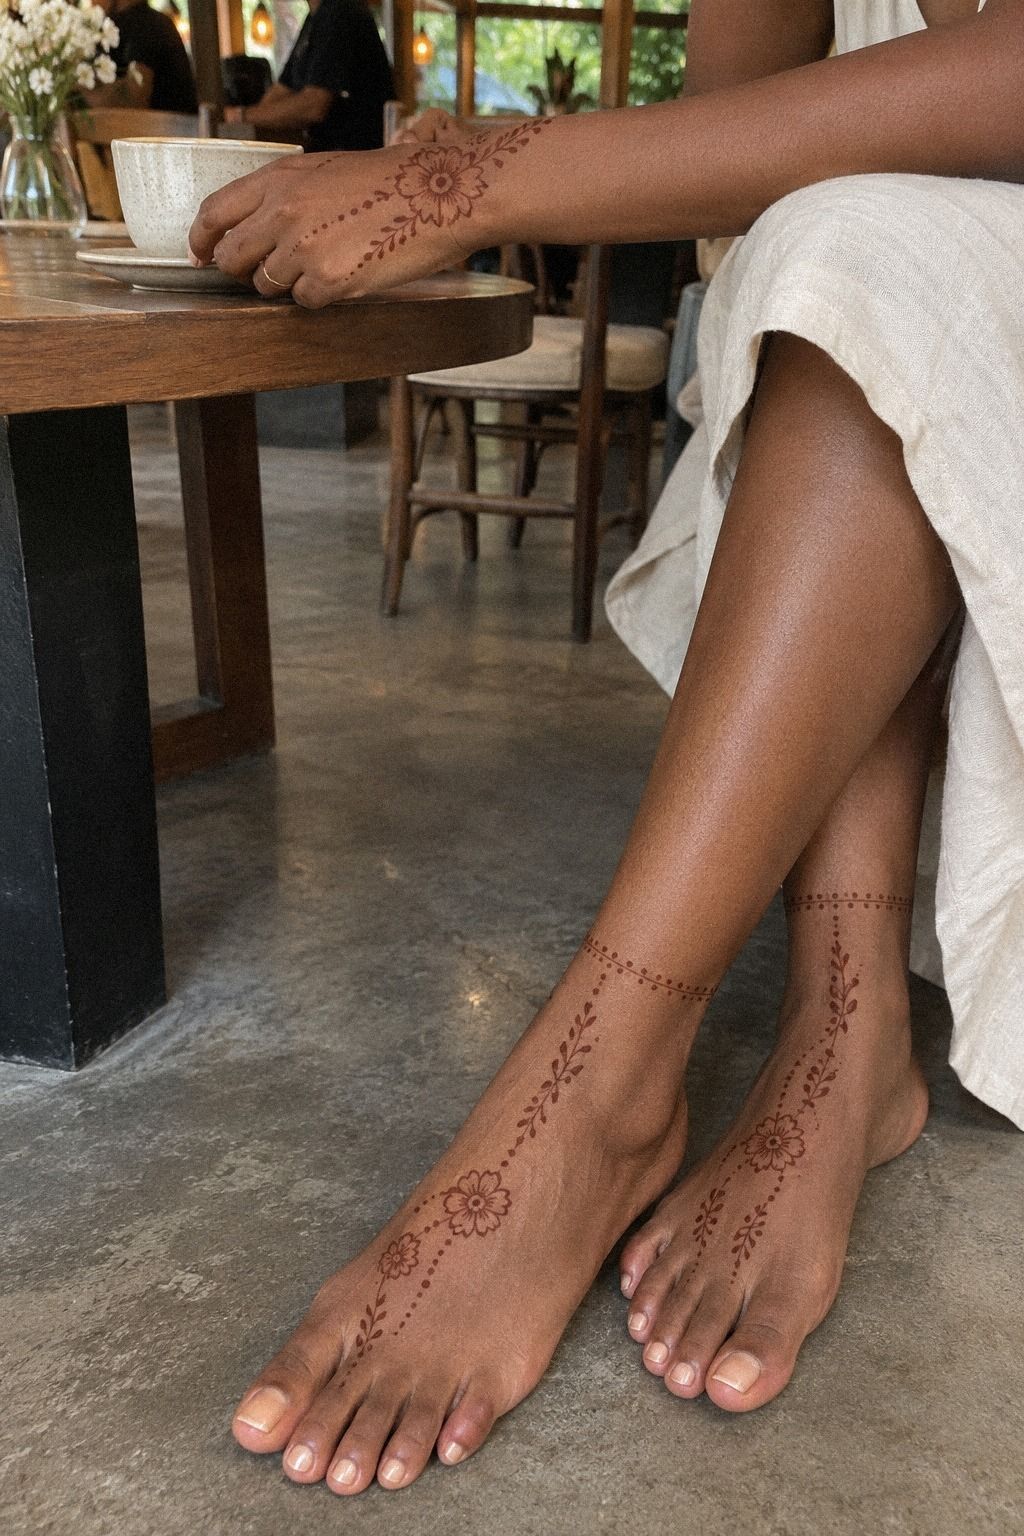
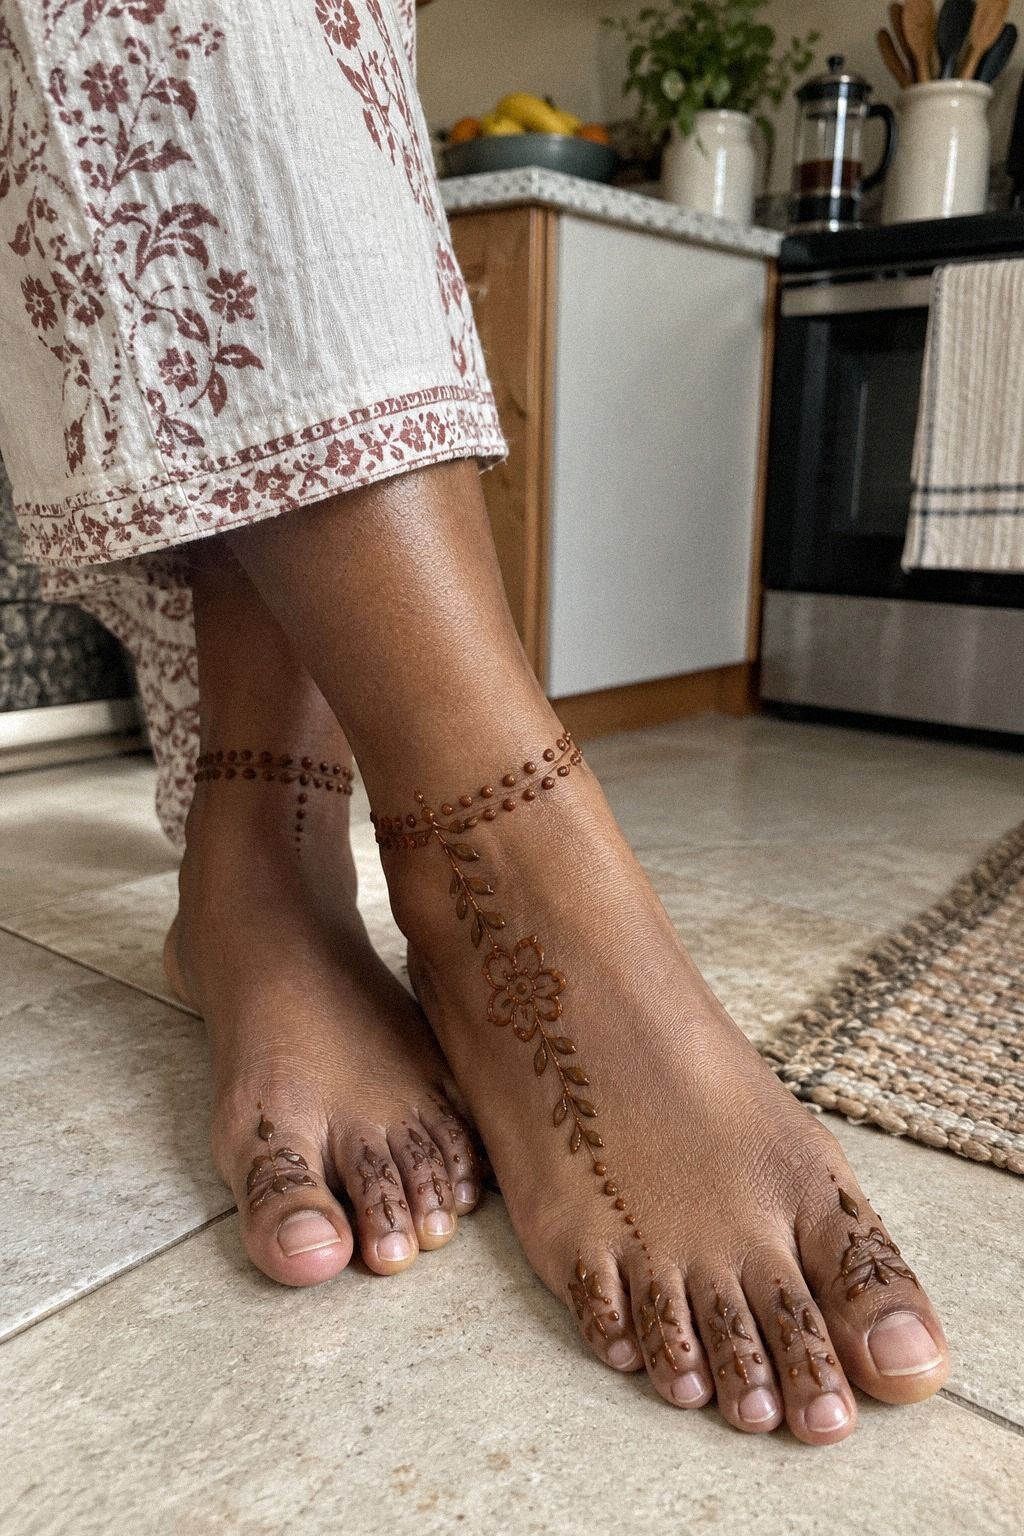
I treated the feet as a supporting part of the bridal set rather than repeating the entire hand design. One ankle curve and a few matching leaves were enough.
The shared detail made the set feel classic without forcing the hands and feet to look identical. I repeated the paisley shape, not the complete arrangement.
These simple mehndi designs for front hand easy references helped me compare lighter arrangements before deciding how much detail to carry elsewhere.
Keep the foot pattern practical. A delicate border can be beautiful, but too many tiny marks may lose clarity as the stain develops and the area moves.
The result felt romantic because the same visual language appeared in both places, but each area still had its own proportion.
12Budget for the Actual Application
For my home practice version, my extra spend was $0 because I already had a cone, cotton swabs, and basic supplies. That isn’t a universal professional price.
A mehndi artist’s fee can change with region, travel, guest count, coverage, timing, and whether the application includes hands, feet, or both.
These figures are planning examples, not fixed quotes. Ask for the total before the occasion and explain whether you want simple or fuller coverage.
My budget went further because I chose one focal motif and kept the fingers light. The simple bridal mehndi designs references helped me see where a lighter pattern could replace a much denser one.
I wouldn’t choose an artist on price alone. Fresh ingredients, clean tools, a clear portfolio, and reliable timing matter more than a bargain quote.
A written quote also prevents confusion about travel, additional guests, and the amount of paste work included.
The Editorial Choice I’d Make
If I were planning this again, I’d reject the idea that bridal mehndi must cover every available inch. That expectation often produces a busy result before the design has found its rhythm. I’d rather see one memorable paisley and a confident stretch of open skin.
My favorite combination is a rounded mandala, a single wrist vine, and one symbolic thumb detail. It feels timeless because the shapes are recognizable without depending on a passing trend. The hand still looks like a hand.
I’m also careful about collecting references. Too many examples create a muddled plan: one dense jaal, one dramatic peacock, one fingertip-heavy pattern, and suddenly the cone has no clear instruction. I’d choose one reference for structure and another for a single motif only.
The paste deserves patience. Fresh lines look raised and darker, while the brown-red stain needs time to develop. I’d never make a final judgment in the first hour, especially when the second-day color can change the entire mood.
For a bridal application, I’d choose ethereal curves over rigid symmetry. Perfectly mirrored hands can look controlled, but a slight difference in scale often feels more human and personal. Handmade variation is part of the charm.
I’d keep the feet connected through one repeated shape rather than copying the hands. A paisley on the ankle or a small leaf chain is enough. The most empowering choice is knowing when the design has reached its limit.
In the end, easy bridal mehndi works when every mark has a reason. Make the center clear, let the cone create movement, protect the drying paste, and allow the stain to become what it will become. That restraint is what made my final design feel polished!
The Questions Worth Answering First
How much do easy bridal mehndi designs usually cost?
I wouldn’t rely on one standard price because the quote changes with region, travel, guest count, coverage, and timing. I’d send references and ask for a written quote that explains exactly what the mehndi artist will apply.
Are simple bridal mehndi designs good for a first application?
Yes. I find them easier to plan, faster to apply, and less likely to feel crowded. Open spacing also keeps the brown-red stain readable after the paste dries and develops.
How do I choose a mehndi artist?
I’d look for clean cone control, varied examples, clear ingredient information, and designs shown after the stain has developed. I’d also ask about drying time and aftercare. Consistent work matters more to me than one unusually elaborate reference.
How long should fresh bridal mehndi stay on?
I let the paste dry for about 1 to 2 hours, then remove it gently once it has set. The color usually deepens on the second day and remains visible for about one to three weeks. Gentle washing helps it fade evenly.
Where should I place the main design?
I’d choose the center of the palm, back of the hand, wrist, thumb, or ankle according to movement and proportion. The main motif should sit where it can remain recognizable when the hand bends.
Can I combine palm and foot patterns?
Yes. I’d repeat one leaf, paisley, or border rhythm so the areas feel related without looking copied. A shared motif creates harmony while allowing each hand or foot to keep its own scale.
Where I’d Start First
If I had to pick one direction, I’d start with an open-palm mandala, a light finger rhythm, and one vine traveling toward the wrist. The structure is elegant, readable, and easy to adjust to different hands.
I’d borrow one symbolic detail from these simple peacock mehndi designs, then keep the surrounding paste restrained. The goal isn’t maximum coverage; it’s a design that still feels complete after the color changes.
Show your mehndi artist the palm reference before the occasion, then adjust the scale to your own hand. One center, one flowing connection, and one area of open skin are enough.
That combination feels vintage and fresh at the same time. It gave my bridal mehndi a clear identity without asking the cone to do too much.