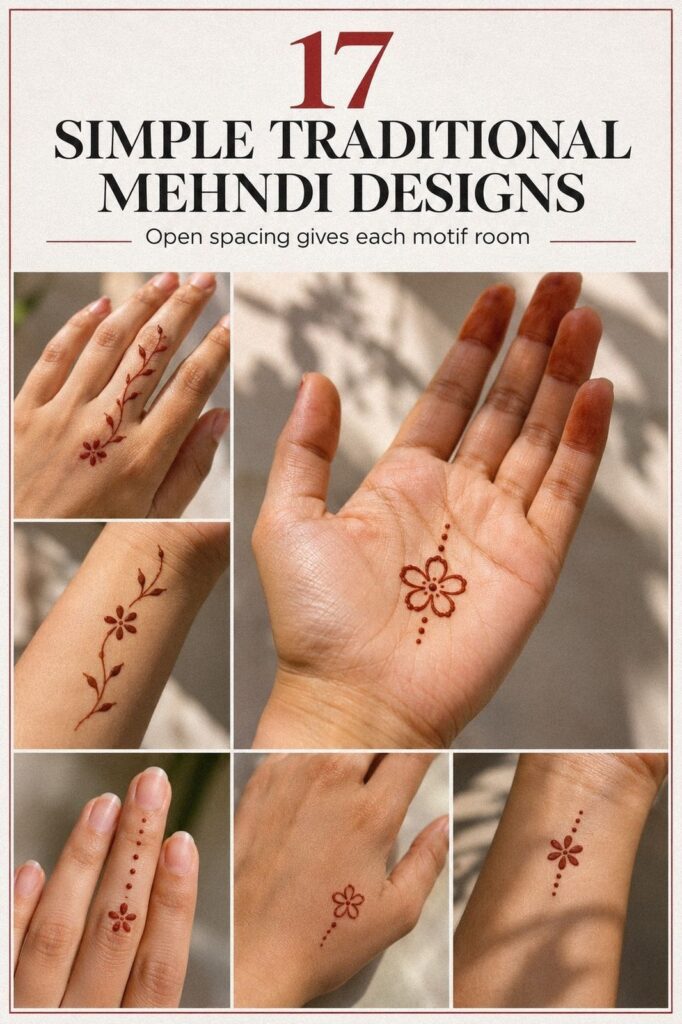
Traditional simple mehndi designs can be planned in minutes and still look striking when the cone work is clean, the spacing is deliberate, and the paste is natural. I once chose a pattern that was too dense for the time I had, and the result looked rushed. Now I choose one focal shape, two supporting details, and enough open skin to keep the design delicate. That’s the whole method!
Traditional Simple Mehndi Designs for Palm Centers
A palm-center design gives you one clear focal point without covering every inch of skin. Choose a small floral wheel, a compact mandala, or a rounded paisley placed directly in the middle of the palm. You’ll want the outer lines to stay crisp, because the palm naturally creates friction when you wash, carry bags, or handle food.
For a traditional result, use fresh henna paste with a narrow cone opening and keep the pressure steady. I’d skip filling the entire palm with solid color.
It’s more dramatic, but it loses the timeless quality that makes simple mehndi feel personal. A few petals, dots, and curved leaves can look far more polished.
– One centered mandala. – Four curved petals. – A small ring of dots. – Bare fingertips for contrast.
If you’re short on time, let the center dry for 1 to 2 hours before gently flaking it away. A lemon-sugar sealant can help the paste stay in place while it dries, but you shouldn’t soak the design afterward. The color often looks orange at first and deepens by the second day.
That change is part of the charm!
For more references, compare your idea with these simple very simple mehndi designs. You’ll notice that the strongest examples don’t chase complexity. They give your eye one meaningful shape and let the surrounding skin do some of the work.
Start With a Five-Minute Mehndi Plan
Before you open the cone, decide where the design will begin and end. Mark the palm center, wrist, or first finger joint in your mind, then choose one motif that can carry the pattern.
I’ve found that a short plan saves more time than rushing. You don’t need to copy every detail from a reference. Choose one focal shape, one connecting line, and one finishing detail.
If you’ve got only five minutes, use dots, a small leaf, and a single curved stem. The result can still feel expressive when the marks have enough space around them. Start there!
Latest Traditional Simple Mehndi Designs with Fine Linework
The latest traditional simple mehndi designs often use fine, controlled lines instead of heavy blocks of paste. Think small scallops, narrow vines, open petals, and paisley shapes that sit lightly across both palms. You can make the design feel intricate without making it difficult to draw.
Start with one hand and repeat only the strongest detail on the other. Matching every curve sounds neat, but it can make your design look stiff.
I’ve found that a slightly different leaf or dot cluster feels more handmade. That small variation keeps the result expressive rather than copied from a stencil.
– Fine curved stems. – Open paisley interiors. – Three-dot clusters. – Narrow finger bands.
If you’re working with a fresh cone, test the flow on paper first. The paste should come out smoothly, without watery separation or hard lumps.
Your hand doesn’t need to move quickly. You’ll get cleaner marks if you pause at each curve and lift the cone before the line becomes too thick.
Browse these simple trendy mehndi designs when you want a current reference without losing traditional structure. The best choice for you isn’t the busiest image. It’s the one you can finish calmly and still recognize as your own.
Traditional Simple Mehndi Designs for Hands and Fingers
Hand and finger designs work well when you want the back of the hand to feel decorated but not overloaded. Anchor the pattern near the wrist, guide one flowing vine toward the knuckles, and leave a clean strip between the main design and the fingertips. You’ll get a graceful line that photographs well from several angles.
I’d choose a simple jaal over a solid glove effect here. A jaal gives you structure, but the open gaps keep the pattern minimal and crisp. If you’re attending a family gathering, this placement also lets your bangles or bracelets remain visible without competing with the paste.
– One curved wrist stem. – Small leaf pairs. – Open diamond gaps. – Three decorated fingers.
Your fingers need a lighter touch because the skin folds and moves often. Keep the fingertip dots small, and don’t drag a long line across a crease. That detail may look insignificant while you’re drawing, but it’s what keeps the design neat after the paste dries.
For more placement ideas, save these simple stylish mehndi designs for front hand. You can borrow the spacing, then make the motifs softer, bolder, or more personal depending on your occasion. A design doesn’t have to match perfectly to feel intentional.
What Changes on the Back of the Hand?
The back of the hand gives you more visible length than the palm, so a diagonal trail can work beautifully. Begin near the wrist line, then move toward one knuckle instead of spreading the design evenly across the whole hand.
I’d leave one side mostly bare. That contrast makes the central motif easier to read and keeps the result sleek rather than crowded.
If you’re wearing rings or bangles, check their position before applying paste. You’ll want the main vine to remain visible once your jewelry is in place.
Minimal Mandala Mehndi Designs with Classic Motifs
A minimal mandala works beautifully when you want a classic centerpiece with a little ceremony around it. Begin with a small circle, add eight simple petals, and finish with dots or short scallops. You don’t need a dozen rings.
Too many layers can blur once the paste dries.
For a more traditional look, place the mandala near the palm center and extend only one narrow vine toward the wrist. I’d avoid placing a large design on every finger.
It’s tempting, but the extra detail can make your hand look crowded in photographs. One decorated finger and two tiny dot trails are usually enough.
– Small circular center. – Eight open petals. – Short scalloped border. – One peacock feather accent.
If you’re using eucalyptus oil, use only what your mehndi artist or natural paste supplier recommends. More isn’t automatically better, and sensitive skin deserves a cautious approach. You should also test unfamiliar ingredients before an important celebration, especially if your skin reacts easily.
A mandala can feel sacred and meaningful without carrying a complicated story. If you want a wider range of traditional references, look through these simple Pakistani mehndi designs. Choose the motif that feels right for you, then reduce its size and remove two details.
Delicate Floral Mehndi Designs for Hand Backs
Floral designs on the back of the hand are soft, visible, and easy to adapt. A small flower near the wrist or hand can lead into two leaves, a curved stem, and a few scattered dots. The result feels romantic without becoming overly ornate, which is why this approach works for both celebrations and ordinary weekends.
I’d choose flowers with open centers rather than dense petals. The paste will dry more clearly, and your design won’t look like one dark patch from a distance. You can make the flower feminine, playful, or more vintage by changing the petal shape, but the spacing should stay generous.
– Five rounded petals. – Thin curved stem. – Two pointed leaves. – Tiny dot accents.
If you’re drawing on feet and ankles, keep the pattern away from areas that rub against tight footwear. A delicate ankle vine looks lovely, but it won’t stay neat if it’s pressed against a strap for hours. Your best placement is one that you can protect while the paste is drying.
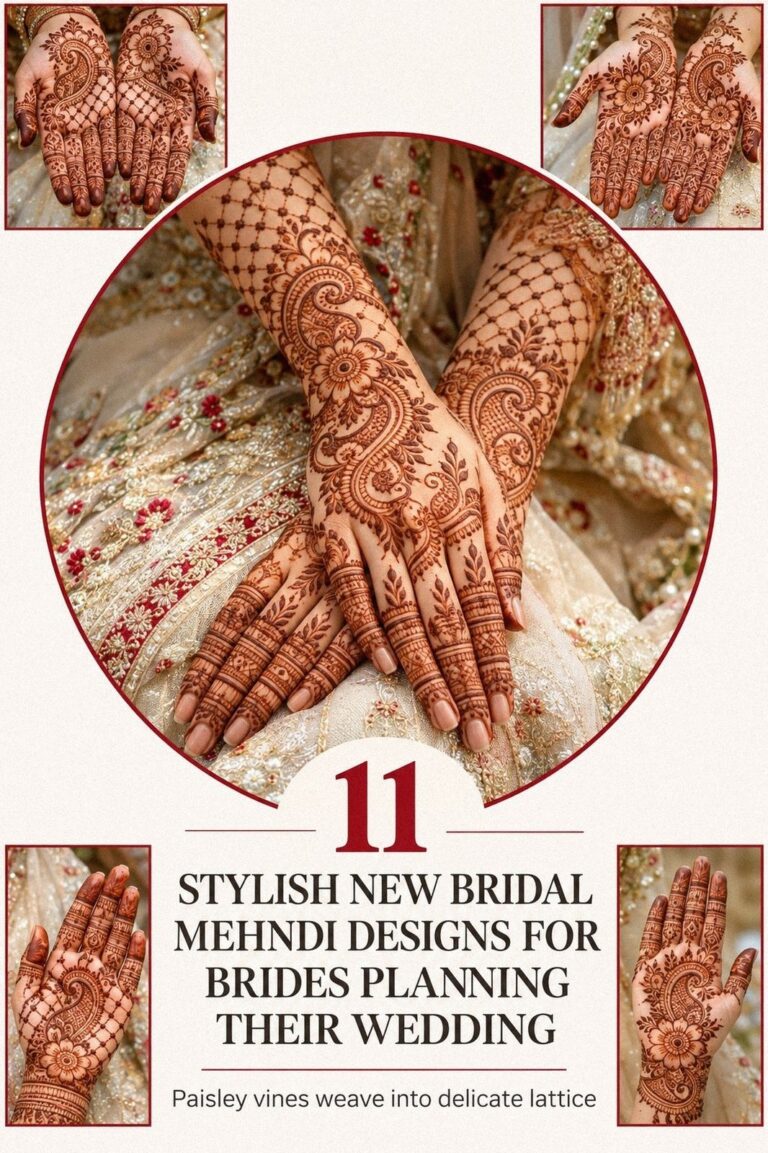
For more floral direction, explore these simple new bridal mehndi designs. You don’t need bridal coverage to borrow the flowers. Take one bloom, remove the heavy fill, and let the reddish-brown color create the detail.
Bold Paisley Mehndi Designs with Open Space
A bold paisley can carry the entire design when you give it enough room. Place one large paisley along the forearm and let the narrow end point toward the fingers.
Add a few leaves outside the shape, but don’t surround it with a wall of dots. The open skin makes the central motif look powerful.
I prefer one strong paisley over several small ones that compete for attention. If you’re working on deep ebony skin, a clear outline with confident interior curves can create an elegant contrast as the paste stains. The design should be readable from a short distance, not only when someone leans in to inspect every mark.
– One curved paisley body. – Three interior leaf shapes. – A short vine at the wrist. – Open space around the edge.
Your cone pressure matters here. Start with the outline, let it dry slightly, then add the interior details. You’ll get a cleaner shape if you don’t keep touching the same line.
I made that mistake once, and the paisley became heavy before I noticed.
Save these simple peacock mehndi designs if you want to add a bird-inspired detail. A tiny feather curve inside the paisley is enough. You don’t need a full peacock to make the reference feel symbolic, bold, and distinctly traditional.
Traditional Arabic Mehndi Designs for Wrist Placement
Arabic-inspired wrist placement is ideal when you want the design to travel instead of sit in one block. Start with a curved floral trail at the wrist, then guide it diagonally toward the hand. That direction gives your pattern a graceful movement and keeps the center of the palm mostly clear.
The strongest Arabic designs use confident shapes with less filling. I’d choose three large leaves and one open flower over ten tiny details. The pattern will look vibrant while the paste is wet, and it’ll still read clearly after the color settles.
That’s especially useful when your time is limited.
– Angled wrist vine. – Three broad leaves. – One open flower. – Small dot finish.
If you’re preparing for Eid, Diwali, a sangeet, or a wedding, ask your mehndi artist to show you the placement before the cone touches your skin. You can decide whether the trail should point toward the thumb, little finger, or forearm. A quick conversation can prevent a design that feels awkward later.
These traditional Arabic mehndi designs offer useful ideas for spacing and direction. You’ll see why open areas matter. They keep the pattern readable, even when the drawing itself is fairly simple.
Intricate Bracelet Mehndi Designs Around the Wrist
A bracelet design gives you a neat band without requiring full hand coverage. Draw two narrow borders around the wrist, then connect them with small loops, dots, or jaal openings. You can keep the center lighter so the pattern feels understated rather than heavy.
I’d avoid making the bracelet too wide if you’re working quickly. A narrow band is easier to keep even, and it won’t overwhelm a floral trail above it. If you’re wearing bangles, leave a little bare space so both the jewelry and the mehndi can be seen.
– Two curved borders. – Small looped connections. – Open diamond gaps. – One central dot row.
Your paste needs time to dry before you move your wrist freely. Keep the arm supported, and don’t bend the design sharply while it’s still wet. The first hour matters most, but the full drying period can take 1 to 2 hours depending on the paste and the amount applied.
For a more decorative starting point, look at these simple modern mehndi designs. Then simplify them again. Your best bracelet may be the one with fewer loops, stronger spacing, and one crisp central detail instead of several competing borders.
Symbolic Traditional Mehndi Designs with Sacred Elements
Symbolic designs feel most personal when you choose one element that means something to you. A lotus, moon, peacock, sun, or small mandala can become the center, with dots and vines supporting it.
You don’t need to explain every mark. The meaning can stay private and still make the design meaningful.
For a sacred-inspired pattern, I’d keep the outline open and avoid piling symbols together. One lotus with a thin halo will look more intentional than a crowded collection of icons. If you’re choosing a motif for a wedding or family event, ask whether the shape connects to a tradition you already value.
– One lotus or peacock. – A narrow halo of dots. – Two curved leaves. – A small wrist trail.
Your mehndi should come from natural henna paste that’s prepared for safe skin use. Avoid suspiciously dark instant paste, especially if the ingredients aren’t clearly listed. A reddish-brown stain that deepens on the second day is the familiar result you’re looking for.
You can compare symbolism with these simple traditional mehndi designs and then choose one detail that feels personal, timeless, and empowering. The design doesn’t need to announce its meaning. It only needs to feel right when you look down at your hand.
Simple Mehndi Designs Using Dots and Vines
Dots and vines are the fastest way to create rhythm without filling large areas. Start with a curved vine from the palm or wrist, then place dots along one side rather than both. That uneven balance looks whimsical and handmade, while the repeated marks keep everything connected.
I’d use different dot sizes instead of identical beads. A large dot near the vine, followed by two smaller dots, gives your design a softer taper. You can make the pattern edgy with sharp leaves or more graceful with rounded petals, but the basic structure stays easy to repeat.
– One curved vine. – Large and small dot pairs. – Three pointed leaves. – Bare skin between clusters.
If you’re drawing on both hands, repeat the movement, not every single mark. Your left and right sides may never match perfectly, and they don’t need to. The slight difference makes the design feel handmade rather than printed.
For another quick reference, save these simple trendy mehndi designs. You’ll find plenty of ways to alter the dots, shorten the vine, or add one sharp paisley. A small design can still look stylish when your spacing is intentional.
Graceful Traditional Mehndi Designs for Fingertips
Fingertip designs are useful when you want a noticeable finish but have very little time. Cover the tips with small scallops, checks, or fine petals, then leave the rest of the fingers mostly open. This creates a dainty look that still feels traditional, especially when the palm carries one larger motif.
I’d keep the fingertip work consistent in scale. Mixing one huge tip pattern with several tiny ones can make the hand look unbalanced. You can choose a polished row of dots, a fierce solid edge, or a more ethereal petal pattern depending on the occasion.
– Small scalloped edge. – One dot row. – Open finger length. – Matching palm accent.
Your fingertips may fade sooner because they’re washed and used constantly. That doesn’t mean the idea failed.
It simply means you should keep the design simple enough to refresh for another occasion. Let the paste dry completely before touching fabric or handling food.
If you like finger-focused references, revisit these simple stylish mehndi designs for front hand. You’ll see that a few strong marks can look iconic without becoming ornate. Choose the detail you’ll enjoy seeing every time you move your hands.
Feet and Ankles: Keep the Motif Readable
Feet and ankles need a slightly different approach because footwear can rub against the stain. A small ankle vine or one centered motif usually gives you better value than a dense pattern that gets hidden inside a shoe.
I’d avoid placing fresh paste beneath a tight strap. If you’ve got an event soon, apply the design early enough to allow 1 to 2 hours of drying time before dressing.
For a traditional result, use one paisley, two leaves, and a few dots. The design can look refined without covering the entire foot.
Classic Motifs for Quick Mehndi
A lotus, peacock feather, open flower, or small sun motif can give a short application a clear identity. Pick one symbol and let the surrounding lines support it. That keeps the result ornate enough to feel finished without making the cone work slow.
If you prefer a less floral direction, use a crisp paisley with two leaves or a narrow jaal border. You can make the pattern more playful with uneven dots, or more vintage with rounded petals and a restrained trail.
The strongest quick motifs are easy to recognize from a short distance. They’re personal, timeless, and simple enough to repeat when you’re working on both hands.
Choosing a Mehndi Artist
A good mehndi artist should be able to explain the paste, drying time, placement, and expected stain color. Ask whether the cone contains natural henna and whether the ingredients are clearly labeled.
The lowest price isn’t always the best value if the artist rushes the application or uses a suspicious mixture. Look for steady lines, clean spacing, and examples of fully developed stains rather than only wet paste.
If you’re booking for a wedding, Eid, Diwali, or sangeet, ask for a quote before the appointment. You’ll avoid surprises, and you can decide whether the coverage is worth it for your budget.
DIY or Artist: Which Option Is Worth It?
Doing a small design yourself can be affordable when you have time to practice. One cone, a paper exercise, and a simple motif may be enough for a palm pattern or finger design.
An artist may be worth it when you need both hands finished quickly or want a more intricate placement. You’re paying for speed, control, and the ability to keep the design balanced.
Your choice depends on the occasion, the coverage, and how much you’re comfortable spending. There’s no reason to pay for full-hand work if a meaningful wrist trail is all you want.
What Do Simple Mehndi Designs Cost?
These are planning ranges rather than fixed prices. The final cost depends on your location, the artist’s experience, the event, and how much skin you want covered.
A design is often worth it when the placement matches your schedule. Paying more for coverage you won’t protect while it dries may not offer much value.
For a home application, check the natural henna cone, storage date, and ingredient list. A cheaper cone isn’t a bargain if the paste is old or unclear.
The Open-Space Rule: Why Less Mehndi Reads More Clearly
I used to think a traditional design needed more detail to look finished. Then I spent an afternoon drawing a dense pattern for a family celebration, and the details blurred into one dark patch before the paste had even dried.
Since then, I’ve trusted open space. It gives each motif a place to breathe, and it lets the reddish-brown stain show its shape clearly.
The best simple mehndi designs aren’t empty. They’re edited.
I’d rather see one confident paisley, a clean vine, and a few dots than a palm packed with every flower and border available. That choice feels striking, easier for you to repeat, and more memorable when time is tight.
You’ll also find that open space makes your hands look graceful in photographs.
The drying stage deserves patience. Keep the paste on for about 1 to 2 hours, then remove it gently without soaking. The color can deepen on the second day, so don’t judge the final result immediately.
A natural stain usually lasts around 1 to 3 weeks, depending on washing, friction, and placement.
The practical details matter, too. Keep the area away from strong sun and swimming while you want the stain to last, and use a mild moisturizer once the paste has flaked away.
This isn’t about chasing a perfect result. It’s about choosing a pattern you can wear comfortably and remember fondly.
Keeping the Stain Darker for Longer
The stain may look orange immediately after the paste comes off. It usually deepens during the second day, so patience matters more than adding extra product.
Keep the reddish-brown stain away from unnecessary soaking, harsh scrubbing, and swimming soon after application. Palms and fingertips often fade faster because they’re used and washed more frequently.
If you’re planning for an event, apply the paste at least one day ahead when possible. That gives the color time to develop and lets you see whether the design feels right.
A Few Things Worth Answering
Where can I find inspiration for traditional simple mehndi designs?
Start with a mehndi artist’s portfolio, Pinterest references, or a trusted natural henna supplier’s examples. Look for clean motifs and clear photos of dried stains, not only wet paste.
There are no sponsored product links in this guide. You can save the designs you like, show them to your artist, and ask which version suits your hand, palm, fingers, or feet.
How much do traditional simple mehndi designs usually cost?
The cost varies by artist, occasion, coverage, and region. A small design usually takes less time than a bridal pattern, but you should ask for the price before booking.
For a home design, check the ingredient list and storage date of the natural henna cone. Exact prices change, so a local quote is more useful than a fixed number copied from another country.
What color will traditional simple mehndi designs be in 2026?
Natural henna still gives the familiar reddish-brown stain, with the color often becoming deeper on the second day. The design itself can look modern through spacing, not artificial dye.
I’d choose a reddish-brown stain over suspicious instant-black paste. The classic color works with floral, paisley, mandala, Arabic, and jaal motifs, and it keeps the result connected to traditional mehndi.
Can I do simple mehndi designs on a small budget?
Yes. Choose one palm center, a finger pattern, or a short wrist vine instead of full coverage. A single cone and a simple reference can be enough for a personal design.
You can also practice on paper before applying paste. The most budget-friendly approach is an open pattern with fewer lines, because you’ll spend less time drawing and waste less paste.
How long should I leave the henna paste on?
Leave the paste to dry for about 1 to 2 hours, depending on the amount used and the advice from your mehndi artist. Keep your hands still while the raised paste is setting.
After it dries, gently flake it away rather than washing immediately. The color may look light at first, then deepen by the second day as the henna stain settles.
How long do traditional simple mehndi designs last?
A natural henna stain usually lasts around 1 to 3 weeks. Palms and fingertips can fade sooner because they’re washed and used more often than protected areas.
You’ll help the color last by avoiding unnecessary soaking, harsh scrubbing, strong sun, and swimming soon after application. A simple palm design may change gradually, but its outline should remain readable for several days.
Where I’d Start First
If I had to pick one, I’d start with the palm-center mandala. It’s quick, meaningful, and open enough to stay readable as the color deepens. Save the simple modern mehndi designs for variations, then choose one cone, one focal shape, and a little patience.
The final choice should feel personal, practical, and worth the time you have. A few deliberate marks can create a daring, memorable result without turning the application into a long project.