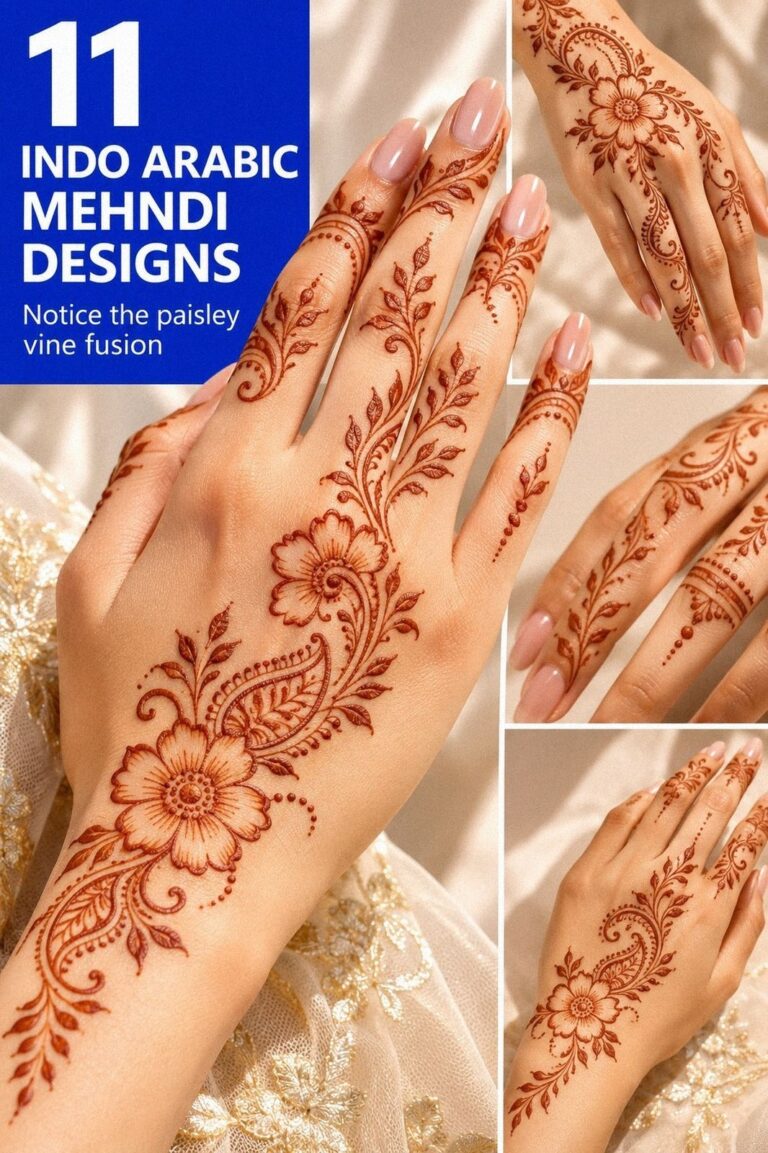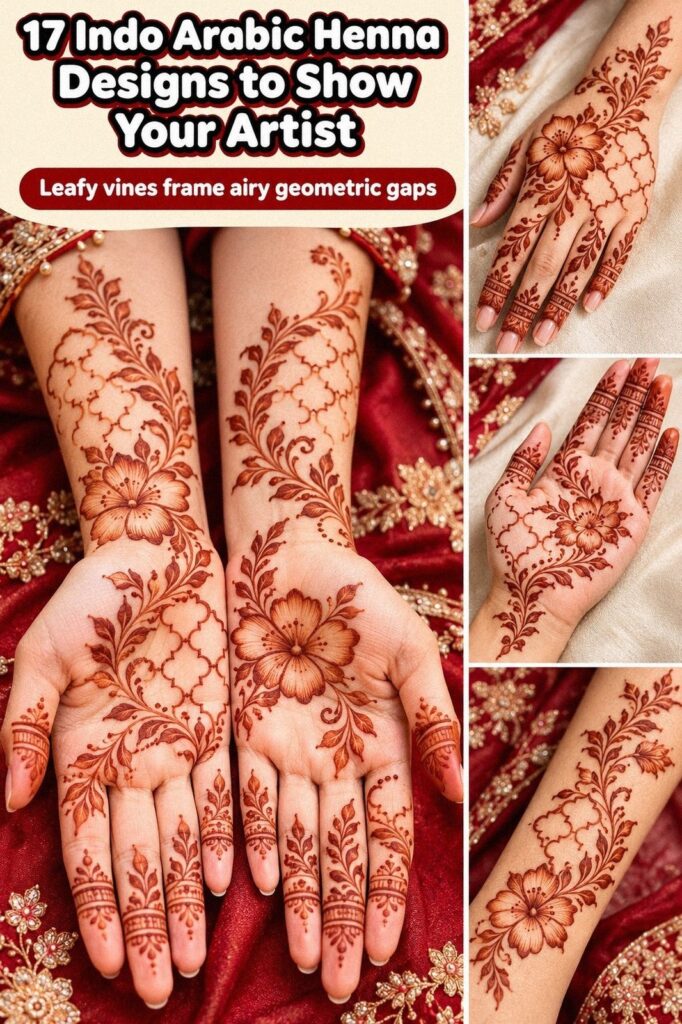
Indo Arabic henna designs can give you a striking hand pattern with one cone, a steady wrist, and about 1 to 2 hours of drying time. I’d leave skin visible, keep the trail flowing, and let the stain deepen on day two. Simple wins!
Simple Indo Arabic Henna Designs for Palms
Start with a graceful palm trail that begins near the wrist and opens toward the fingers. Keep the center open, with one flower slightly off-center instead of planted directly in the middle. That small shift makes the pattern feel expressive and personal.
I’d use a natural henna cone with a fine opening for this design. Your line should be crisp but not painfully thin, since delicate paste lines can disappear as the stain fades.
A 3 to 4 inch flower gives your palm enough character without covering the whole hand. If you’re still choosing a direction, compare it with these indo arabic very simple mehndi designs.
– Open palm center, a clear patch of skin around the flower. – Reddish-brown paste, left to dry for 1 to 2 hours. – Curved leaf trail, with three leaves spaced along one vine.
Keep your fingers lighter than the palm so your hand doesn’t look crowded. You can repeat one small teardrop on each finger, but don’t mirror every mark perfectly. A little imbalance feels raw and handmade.
Your stain should deepen on the second day, so judge the finished color later, not while the paste is fresh.
Build a Single Vine Before Adding Details
A single vine can make a one-cone design look intricate without demanding a large amount of paste. Draw the route first. Then add leaves, dots, and small petals only where the line needs rhythm.
Start near the wrist and let the vine travel toward the index or middle finger. A one-cone route gives you a clear structure, which is especially useful when your budget is tight or you’re practicing alone. Leave a turning point near the thumb so the design feels flowing rather than stiff.
– Main vine, sweeping diagonally across the hand. – Open skin breaks, separating each floral cluster. – Alternating leaf shapes, placed along the stem.
This approach is worth it when you want a meaningful pattern that dries quickly. It also gives you room to stop before the design becomes muddy.
For another route with lighter details, compare these indo arabic modern mehndi designs. Your best detail may be the one you decide not to add!
Latest Indo Arabic Henna Designs with Bold Blooms
This latest Indo Arabic henna design uses bold bloom shapes on both palms, with the flowers carrying most of the attention. Large petals, narrow vines, and a few clean dots create a polished contrast that’s easy to follow.
For your version, let one bloom face toward the thumb and angle the second toward the little finger. I’d skip identical mirrored flowers because they can look stiff, especially when your hands move separately.
A fresh henna paste cone gives you raised texture while it dries, while an older cone may drag across the outer petal edges. These indo arabic stylish mehndi designs for front hand can help you compare fuller compositions.
– Large flower heads, five to seven petals each. – Fine vine trails, crossing the base of each palm. – Tiny dot clusters, framing the thumb side.
Your final pattern should feel vibrant but controlled. If you’re attending a festive evening, keep the wrist section open enough to show a bracelet or sleeve edge.
The color may look orange-brown at first, then turn deeper after the second day. That reveal feels almost magical!
Indo Arabic Henna Designs for Backhands
Backhand designs need a strong central route because the hand is long and exposed. Use one central flower, a diagonal vine toward the wrist, and small finger details that keep the design sleek. Let the main trail follow the hand’s natural direction instead of forcing it straight down.
I prefer this placement when you want a stylish design with a clear focal point. Your wrist can carry two or three leaves, while the back of your hand holds the heavier floral work.
Use fine-tip henna paste for finger lines and a slightly wider opening for the flower outline. One cone opening rarely works equally well for every detail.
– Diagonal floral trail, from wrist toward index finger. – Medium bloom, with rounded open petals. – Narrow finger marks, never filled from knuckle to fingertip.
You can keep the design minimal or connect it to a second hand later. Don’t rush the wrist curve, since that’s where lines can wobble most.
For additional references, browse these indo arabic simple mehndi designs and these indo arabic simple mehndi designs. Your finished stain should look intentional, even where the paste lines aren’t identical.
Minimal Indo Arabic Henna Designs Along Fingers
Finger-focused henna is delicate, understated, and surprisingly powerful when the spacing is right. Resist filling every gap. Negative skin around the lines is what keeps the design crisp.
Start with your ring finger or middle finger, then build outward. I’d draw one narrow vine on two fingers and use small bands on the others, rather than repeating the same motif five times.
A fine henna cone tip helps you make tiny petals, but the paste still needs to flow smoothly. If it skips, warm the cone between your palms for a minute before continuing.
– Slim finger vines, one continuous curve each. – Small diamond marks, placed near the joints. – Bare skin breaks, especially between motifs.
This is a good choice if you want a minimal design for a short evening occasion. It uses less paste and takes less time. Your fingers will touch clothing, cups, and other surfaces, so let the paste dry completely.
The result should feel dainty, not unfinished. These indo arabic very simple mehndi designs show how much impact a few lines can have.
Intricate Indo Arabic Henna Designs with Mandala Centers
Mandala-centered henna looks intricate because the eye has a clear point to follow. Begin with a circular mandala center, then continue toward the foot with leaves, petals, and fine arches. Foot skin can make a cone drag if your posture is awkward, so work slowly.
I’d begin with the mandala outline, then add the surrounding petals once the center feels balanced. A smooth henna paste cone is important for small rings and scalloped borders.
Keep the ankle trail more open than the center so the design remains graceful as it moves upward. Your pattern should feel ornate without turning into one solid block of paste.
– Fine ankle vines, curling toward the outer foot. – Small shaded petals, with clear gaps between rows. – Pointed leaf details, linking the center to the ankle.
You can use this approach for a festive foot design, especially with an anklet nearby. I’d avoid covering the entire foot in dense paste because the central mandala will lose its authority.
For more peacock and circular references, look through indo arabic peacock mehndi designs. If you’re working alone, draw the simplest outer border first and add detail only where your hand stays steady.
Indo Arabic Henna Designs for Bridal Wrists
Bridal wrist designs can be ornate without becoming heavy. Let the wrist trail feel like an extension of the hand, not a separate bracelet placed underneath it.
For your design, choose one primary wrist band and let the vines travel above and below it. A natural reddish-brown henna cone creates raised lines while the paste is fresh.
I’d skip overly dense checkerboard filling unless you’re working with an experienced mehndi artist. It takes longer to dry and can blur when your arm bends.
– Layered wrist band, with one clear outer edge. – Floral forearm trail, angled toward the elbow. – Open skin windows, separating repeated motifs.
Your occasion may be a wedding, sangeet, Eid, or another celebration, so let the pattern match the energy of the event. If you’re choosing between a full forearm and a shorter wrist design, I’d pick the shorter version when you want easier movement.
These indo arabic new bridal mehndi designs show how a heavier design can still keep a graceful route. And yes, bridal henna can be bold without covering every inch!
Sangeet, Eid, and Diwali: Choose the Mood
Sangeet, Eid, and Diwali each invite a slightly different direction. A wedding celebration can handle ornate petals and longer wrist trails, while a family gathering may suit a lighter palm or finger pattern.
Choose one celebration plan before you open the cone. For Sangeet, try mirrored wrist movement without copying every mark.
For Eid, a symbolic paisley or floral trail can feel elegant. For Diwali, small blooms, dots, and vibrant reddish-brown contrast keep the design playful.
– Festive motif, such as paisley, mandala, or peacock. – Matching wrist detail, repeated loosely on both hands. – One open section, so the pattern remains crisp.
Consider the cost of your occasion, your drying time, and how much movement you’ll need. A smaller design may offer better value when you’re greeting guests, carrying a phone, or changing clothes.
For more front-hand ideas, compare these indo arabic stylish mehndi designs for front hand. The most stylish choice is the one you can actually wear comfortably.
Flowing Indo Arabic Henna Designs with Arabic Vines
Flowing Arabic vines are the easiest way to make one cone look more elaborate than it is. Every curve should feel connected, even if the flowers change size along the route.
I’d draw the main Arabic vine first, then attach leaves at uneven intervals. Perfect spacing can make a pattern look mechanical, while varied spacing gives it a playful, handmade rhythm. Use smooth-flowing henna paste for long curves, and pause before each leaf so you don’t drag the line.
Your wrist should have one clear destination, such as a large flower or a pointed leaf.
– Pointed leaf pairs, alternating sides of the stem. – Small floral pause, near the thumb base. – Open wrist curve, ending beside the forearm.
This pattern is expressive enough for a festive evening but simple enough to practice on paper first. I’d test your cone on a scrap sheet before touching your skin because a broken line can change the whole rhythm.
If you want a modern comparison, see these indo arabic modern mehndi designs. Your best line won’t always be the longest one. It’ll be the one that leads the eye cleanly.
Indo Arabic Henna Designs Featuring Peacock Motifs
Peacock motifs bring a symbolic, iconic focal point to both hands. Keep the bird shape recognizable by giving the neck, feather fan, and body enough open skin around them.
I’d place the peacock motif slightly toward the outer palm instead of dead center. That lets your fingers carry smaller blossoms without competing with the main figure. A medium-flow henna cone works well for the body outline, while a finer tip gives you the feather marks.
Don’t overfill every feather. A few crisp scallops often look more elegant than a solid fan.
– Peacock body, curved toward the thumb. – Open feather fan, with repeated scalloped edges. – Floral border, linking one palm to the other.
Your design can be meaningful without becoming overly literal. If you’re not sure about a full peacock, use only the curved neck and feather suggestion near the wrist. I’d choose that simplified version over a cramped bird every time.
For another peacock-focused direction, save these indo arabic peacock mehndi designs. The strongest focal point should still be visible when your fingers are relaxed.
Geometric Indo Arabic Henna Designs for Ankles
Geometric ankle henna gives flowing floral work a sharper, more daring edge. Use a clear band, one directional trail, and enough open skin to keep the shapes readable.
Start with a narrow geometric henna border instead of a wide filled band. Add small diamonds, arches, and leaf points on one side, then leave the other side lighter. I’d avoid making every shape identical because perfect repetition can flatten the expressive character of Indo Arabic work.
Your ankle design should move when you walk, not look rigid.
– Slim ankle band, with open diamond shapes. – Angular leaf points, turning toward the foot. – Light floral trail, rising toward the ankle bone.
Ankles can be more sensitive than the forearm because the skin is closer to bone, so choose a smaller pattern if you’re new to mehndi. The stain will still look bold after the paste darkens on day two. For a related hand-and-wrist reference, explore indo arabic pakistani mehndi designs.
Your goal is contrast: crisp geometry beside soft petals.
Delicate Indo Arabic Henna Designs with Negative Space
Negative space makes delicate henna look polished and intentional. Choose one repeated detail and use it consistently so the design feels light rather than incomplete.
Try a delicate henna cone line for the fingers, then place one small floral cluster in the palm. I’d keep the lines slightly wider around the flower and thinner near the fingertips.
That gives your design a clear center without losing its graceful feeling. If your cone produces a thick line, simplify the pattern instead of forcing in smaller details.
– Clean finger arcs, with generous skin between them. – Tiny floral cluster, just below the fingers. – One open wrist curve, ending in a pointed leaf.
This is one of the most forgiving ideas for a first cone because small imperfections disappear into the overall rhythm. Your design will also dry faster than a dense bridal pattern. I’d choose this when you want something refined for dinner, a family event, or a short celebration.
See these indo arabic very simple mehndi designs for more restrained spacing. Less paste gives your hands more movement.
Indo Arabic Henna Designs for Festive Hand Details
Festive hand details can combine flowers, leaves, dots, and short bands without becoming too elaborate. Keep one visual idea on each hand so the result feels expressive rather than random.
I’d choose one playful motif for each hand, such as a flower on one palm and a leaf trail on the other. A fine natural henna paste keeps the details expressive and clean.
Your design doesn’t need to match perfectly, especially for a casual Diwali, Eid, or sangeet evening. I’d rather see two related patterns than one cramped attempt at symmetry.
– Festive flower marks, placed near the palm heel. – Short finger bands, with one open joint. – Curved wrist leaves, pointing toward the forearm.
The paste should stay on your skin for about 1 to 2 hours before you gently remove it. Don’t wash the area immediately if you want a deeper stain.
Your color may continue darkening through the next day, then gradually fade over 1 to 3 weeks. These indo arabic stylish mehndi designs for front hand offer more festive placement ideas.
Save the design you can actually wear comfortably!
Why Does One Cone Still Work for Me? The One-Cone Rule
I keep returning to one-cone henna because it forces better decisions. You can’t hide a weak composition under layers of extra detail, and you can’t rescue a shaky line with a crowded palm.
When I’m choosing a design, I look first at the route, then the focal point, then the empty skin. That order keeps the result striking and wearable.
The biggest mistake is treating every open patch as a problem. It isn’t. Clear skin gives your flowers room to look elegant, and it helps the pattern remain readable after the stain softens.
If you’re working with an artist, show them the placement you want and ask how the design will move when your hand bends. A good mehndi pattern should work in motion.
I also prefer natural henna paste over suspiciously dark products. Pure henna paste usually dries greenish-brown, stains orange first, and deepens on the second day.
Your finished color can vary with skin, warmth, paste quality, and aftercare. I’d skip any cone that promises an instant black stain, especially if the ingredients aren’t clearly listed.
One cone, one strong route, and a little patience can take you further than a crowded reference. Your best design may be the one that leaves enough skin visible to make the flowers feel intentional.
One Cone or Two? Compare the Value
One cone is usually enough for a small palm, finger design, or flowing backhand trail. A second cone may be useful when you want a wider opening for large petals and a fine opening for tiny marks, but it isn’t automatically better.
The real second cone value comes from control, not quantity. If your first cone flows smoothly and the tip is clean, spending more may not change the final result. If the opening keeps clogging or the paste feels dry, a fresh cone can be worth it before a major event.
– One cone, for a simple palm, fingers, or one backhand. – Two cones, for mixed line weights or both hands. – Several cones, for longer bridal coverage or group applications.
For most no-fuss evenings, I’d start with one reliable cone and reserve the extra cost for better paste quality. That keeps the design focused and makes your budget easier to manage.
Natural Henna Costs by Coverage
Prices vary by artist, city, event, design density, and whether you apply the paste yourself. The figures below are planning ranges, not a quote. Ask for the total before booking, especially if travel or an event minimum applies.
A planning range helps you decide whether a design is worth it before you commit. If you’re doing the work yourself, your main costs are the cone, practice paper, and time. If an artist is involved, ask whether the quoted cost covers both hands, touch-ups, and travel.
A small palm design can deliver excellent value for a short celebration. Bridal coverage costs more because it requires patience, repeated motifs, and longer drying time. For a fuller comparison, browse these indo arabic new bridal mehndi designs.
Aftercare That Protects the Stain
Let the paste dry undisturbed for about 1 to 2 hours, or longer if you can keep the area comfortable. Once it flakes away, avoid rushing straight to soap and water. A post-paste care routine gives the stain more time to develop.
The color often looks orange at first, deepens on the second day, and then gradually softens. Keep the area away from unnecessary scrubbing and friction during the first several hours. Lemon-sugar can help some traditional applications stay in place, but use only a small amount so the paste doesn’t become wet and smeared.
Natural henna generally fades over 1 to 3 weeks. The exact duration depends on washing, skin, friction, and placement.
Palms may develop a deeper stain, while fingers and feet can fade at different speeds. These indo arabic simple mehndi designs show how lighter patterns can still look complete as the color softens.
Small Palm or Bridal Forearm? Choose the Coverage
A small palm pattern is graceful, quick, and easier to keep clean while the paste dries. A bridal forearm design is more ornate, more time-consuming, and better suited to a long celebration or formal ceremony.
Choose the small palm design if you want a crisp result with less commitment. Pick the bridal forearm pattern if you love layered vines, dense floral details, and a longer route toward the elbow. Neither choice is more meaningful by default.
A shorter design can be worth it when you’re applying the paste yourself. You’ll spend less time holding your arm still, use less product, and have more control over the final color. A larger pattern makes sense when the event, outfit, and available time support it.
The Questions Worth Answering First
How much do Indo Arabic henna designs usually cost?
I’d expect the design cost to depend on coverage, detail, artist experience, and travel. A small palm usually takes less time than a bridal forearm. I’d ask for the complete total before booking, including both hands, event minimums, and travel if the artist comes to you.
Where can I buy a safe henna cone?
I’d buy a natural henna cone from a reputable mehndi supplier or make paste from clearly listed ingredients. I’d avoid vague labels and instant-black promises. Natural paste dries gradually and usually leaves an orange-to-brown stain that deepens after application.
How long do Indo Arabic henna designs last?
I’d expect a natural henna stain to remain visible for about 1 to 3 weeks. It usually looks strongest around the second day, then fades from the edges inward. Washing, friction, skin type, placement, and aftercare can all change the timing.
What color is popular for henna in 2026?
I’d choose rich reddish-brown henna because it shows the organic character of natural paste. Warm orange-brown, deep brown, and layered floral contrast can all look elegant. I’d still favor a natural stain over an artificial black result with unclear ingredients.
Can I do Indo Arabic henna designs on a budget?
I’d start with one simple pattern, a practice sheet, and one cone. A small palm or finger design uses less paste and takes less time than full bridal coverage. Practicing lines on paper first also helps you avoid wasting product while you learn the flow.
How long should I leave henna paste on?
I’d leave the paste application undisturbed for about 1 to 2 hours, or longer if your artist recommends it. After removing the dry paste, I’d avoid immediate soap and water. The stain needs time to deepen, especially during the first day.
Where I’d Start First
If I had to pick one, I’d start with the simple palm trail. It has enough floral detail to feel meaningful, while the open skin keeps it crisp as the stain fades. Pin that design for later, then compare it with these indo arabic simple mehndi designs before choosing your cone.