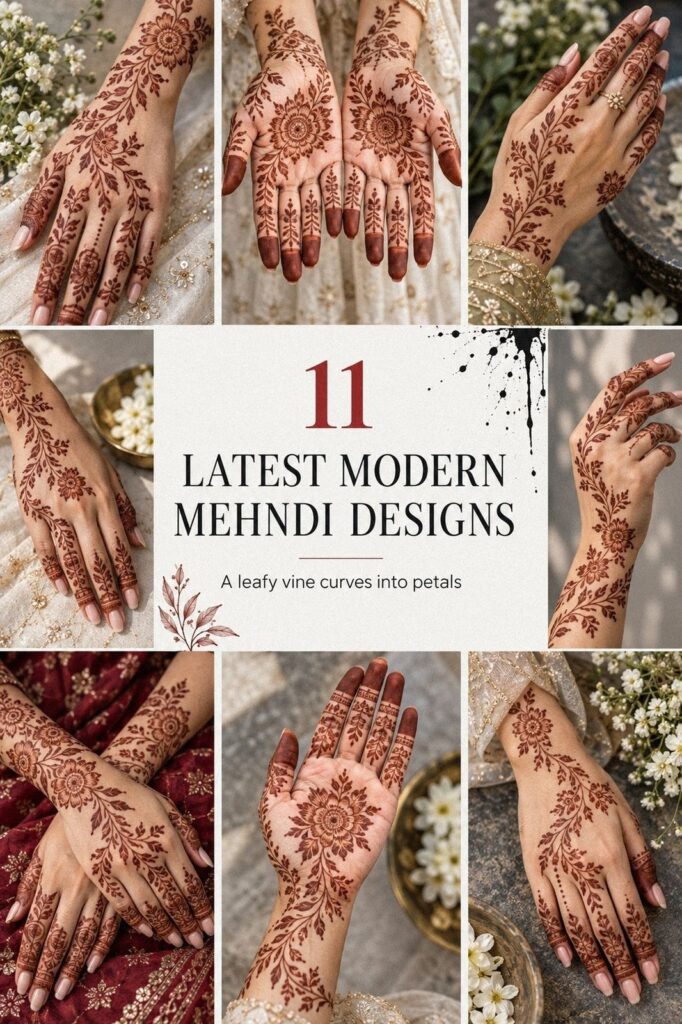
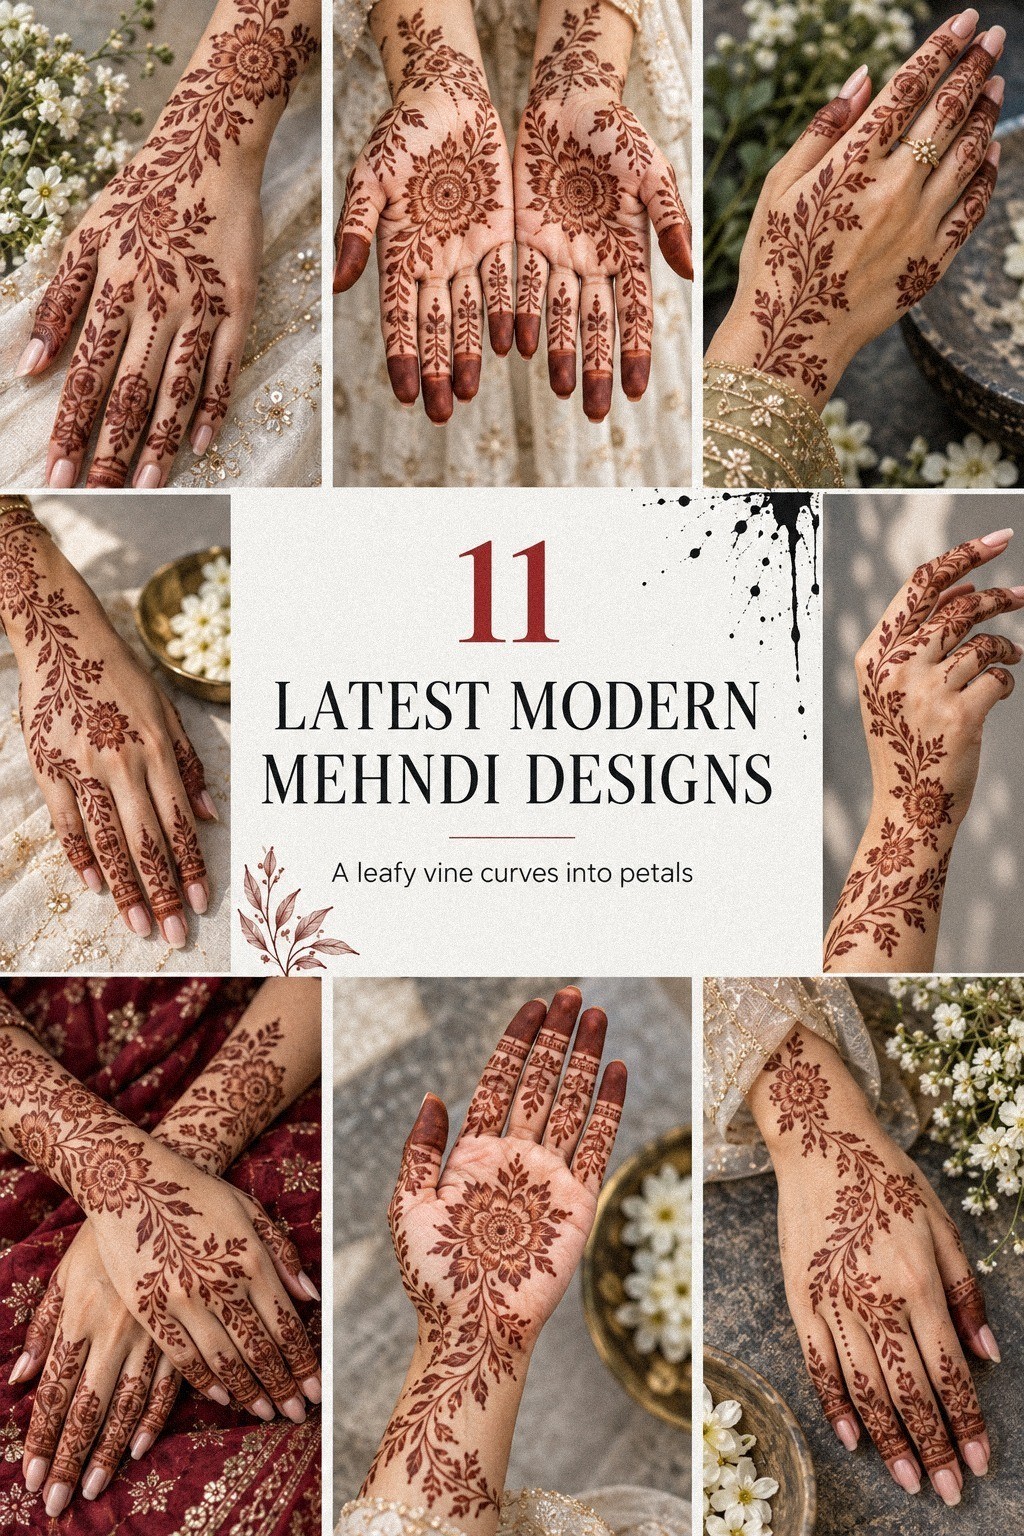
Latest modern mehndi designs need more timing than a quick drawing. Plan 1 to 2 hours for the paste to dry, then expect the stain to deepen on day two. Start with placement, choose your pattern, and keep your hands still while the design sets. That simple pause matters!
Editor’s note: the best result comes from a fresh cone, clean skin, deliberate spacing, and enough time to let the paste dry naturally. Mehndi is temporary, so your choices can be personal, playful, and bold without feeling permanent.
- Start With Latest Modern Mehndi Designs
- Pick Minimal Linework For Hands
- Place Bold Motifs Across Fingers
- Choose Intricate Botanical Patterns
- Keep Negative Space Looking Crisp
- Plan Symmetry Around Your Palm
- Add Symbolic Details With Meaning
- Blend Delicate Curves Into Cuffs
- Match Latest Designs To Your Style
- Test Placement Before Applying Mehndi
- Finish With A Striking Hand Composition
1Start With Latest Modern Mehndi Designs
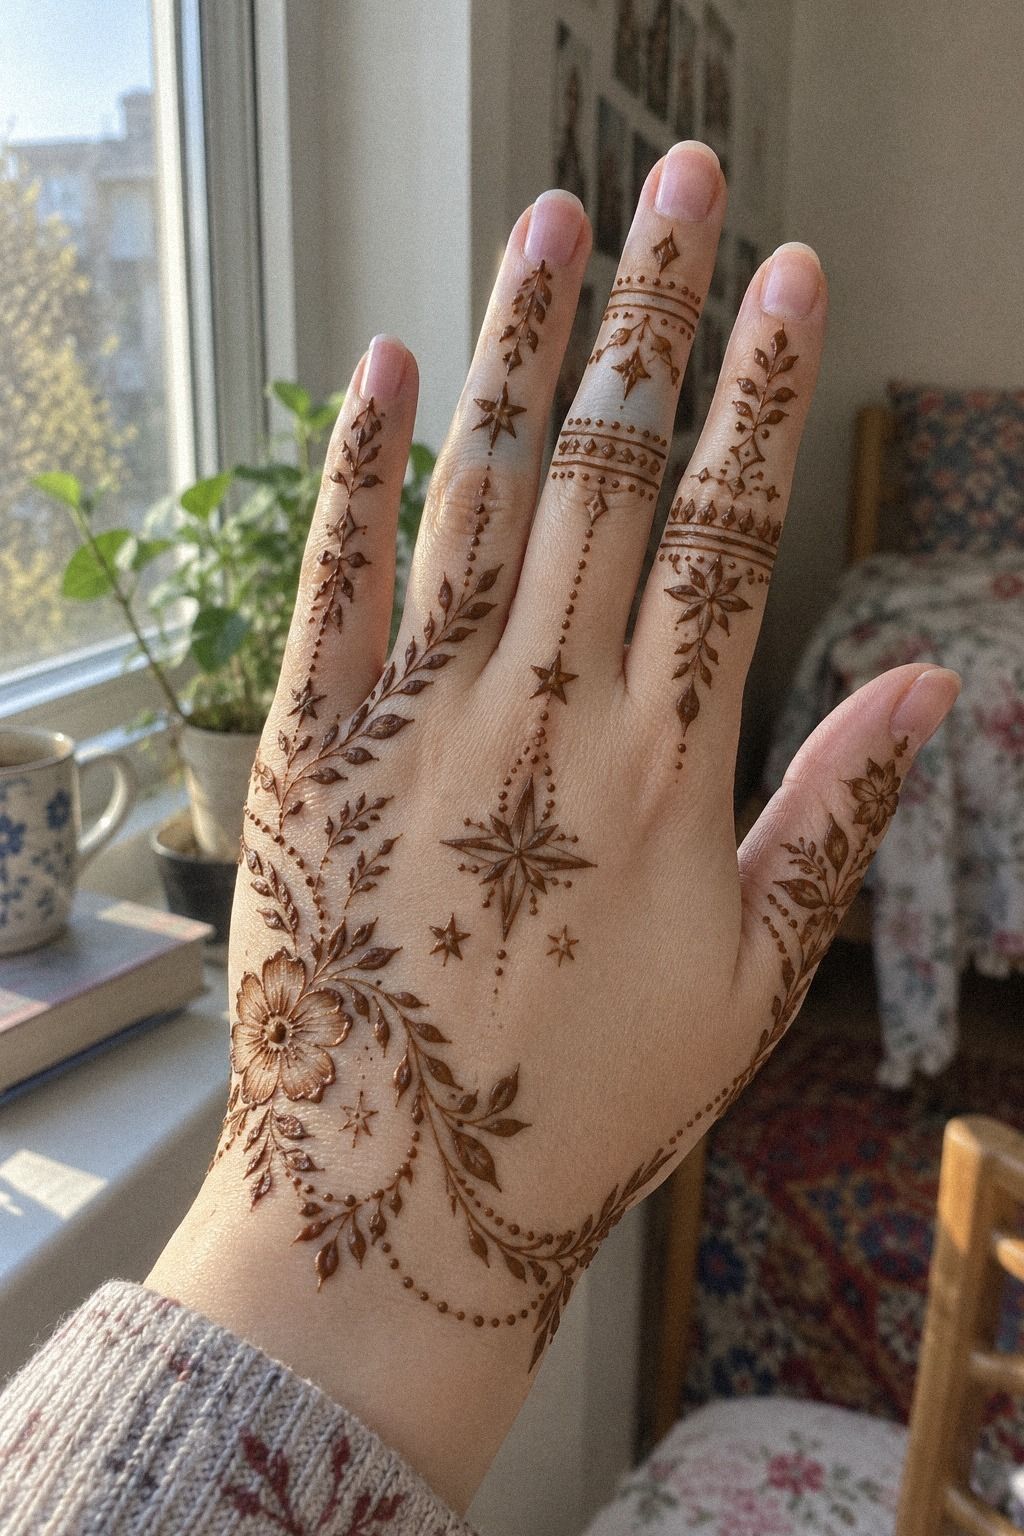
Begin by deciding where your latest modern mehndi designs should sit before the cone touches your skin. The back of the hand and fingers create an elegant reddish-brown pattern that reads clearly in person. If you’re dressing for guests, keep the central shape visible above your sleeve.
The palm, fingers, and wrist each need a different rhythm. I wouldn’t cover every inch first. A little bare skin makes the design feel more intentional and keeps the main motif readable.
For a simple starting point, compare the spacing in these simple modern mehndi designs. The strongest examples use one focal shape, a few connected curves, and enough open skin for the natural henna paste to stand apart.
Don’t begin with the smallest finger just because it’s easy. Start at the back of your hand, where you can judge scale and direction. If guests are arriving soon, sketch the route mentally, then keep your hand flat while the paste dries.
2Pick Minimal Linework For Hands
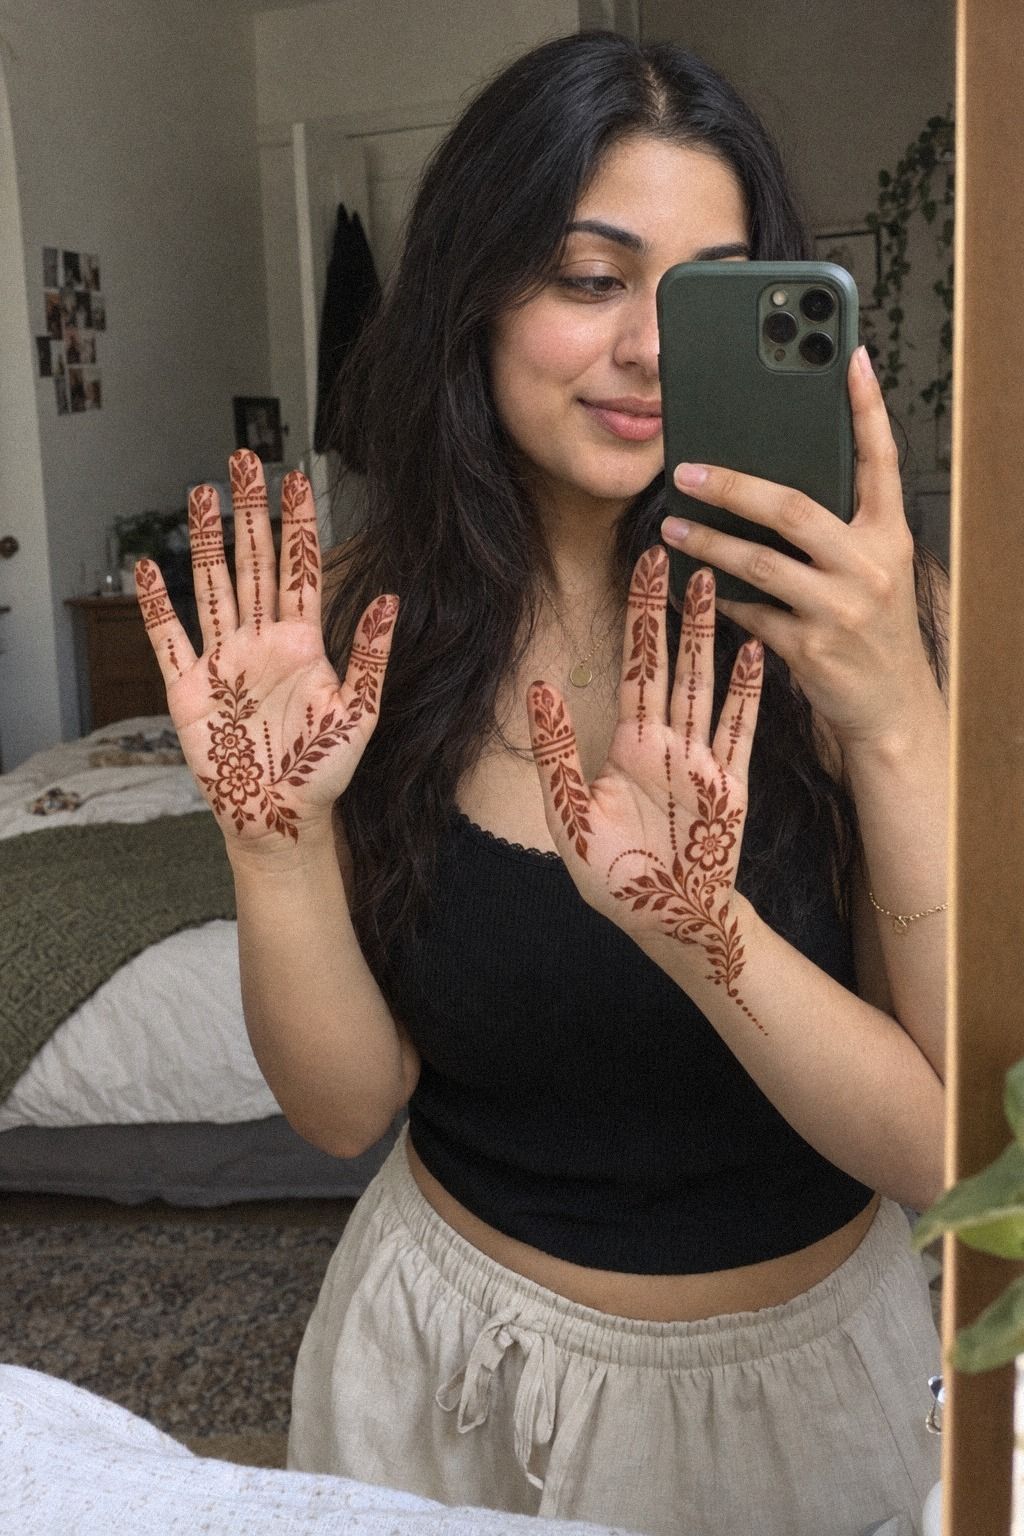
For hands and palms, choose a minimal structure that won’t become muddy when the stain develops. Fine arcs, open centers, and repeated dots create delicate drawn detailing without crowding the palm.
Use the palm crease as a natural guide. You can place a small floral center near the middle, then let narrow curves move toward the fingers. I prefer this understated approach because it stays readable when you turn a cup, greet someone, or lift your hands for a greeting.
Browse simple latest simple mehndi designs if you’re unsure how much detail your hands can carry. Pick one repeated shape, such as a leaf or scallop, and keep its scale consistent. A fine-tip mehndi cone helps you control pressure without forcing the paste out.
If you’re working at home, test one small curve on paper first. Watch whether the paste comes out smoothly or breaks into beads. You won’t get a polished result from a blocked cone, and this two-minute check can save your entire palm.
3Place Bold Motifs Across Fingers

Your fingers need a different rhythm from the back of your hand. Place bold motifs in a staggered pattern so each digit has movement without looking identical. A bold paisley center on one finger can balance smaller bands on the next.
Keep the fingertips stronger if you want the design to read from a distance. Leave a narrow strip of skin between the finger sections, especially if your hands will be held close together. That contrast makes the stain look striking rather than heavy.
The latest very simple mehndi designs show how repeated marks can feel current without becoming ornate. Choose two motifs at most, perhaps a filled teardrop and a small flower. If you use five unrelated shapes, your hand loses its visual language.
Don’t pull the design too far around the sides of your fingers if you’ll need to move soon. Wet paste can smear against another finger.
Rest your hand on a clean cotton cloth, keep each finger separated, and let the pattern set. It works!
4Choose Intricate Botanical Patterns

Intricate botanical patterns can look graceful when the stems follow the natural direction of the fingers. Use one central flower, a few curling leaves, and open gaps around the wrist. The pattern feels more flowing when it grows outward instead of stopping abruptly.
Choose a flowing stem before adding smaller details. Your eye should travel from the palm toward the index finger without getting trapped in a dark patch. I made this mistake once with a dense floral cluster, and the center looked flat after the stain deepened.
A latest stylish mehndi design for front hand can help you compare botanical scale. Look for a paisley leaf cluster with one large shape and several smaller companions. Keep the flower centers open and use dots to soften the transition into the fingers.
You can make the pattern personal with a tiny leaf from a meaningful plant, but don’t force symbolism into every mark. An intricate design still needs a clear silhouette. Let the paste dry for 1 to 2 hours so your graceful curves won’t transfer onto fabric.
5Keep Negative Space Looking Crisp

On feet and ankles, negative space becomes the main design tool. Keep the central motif open, use a few crisp curves, and avoid filling every gap.
A little breathing room helps the pattern stay readable as the stain deepens. Keep it clean!
6Plan Symmetry Around Your Palm
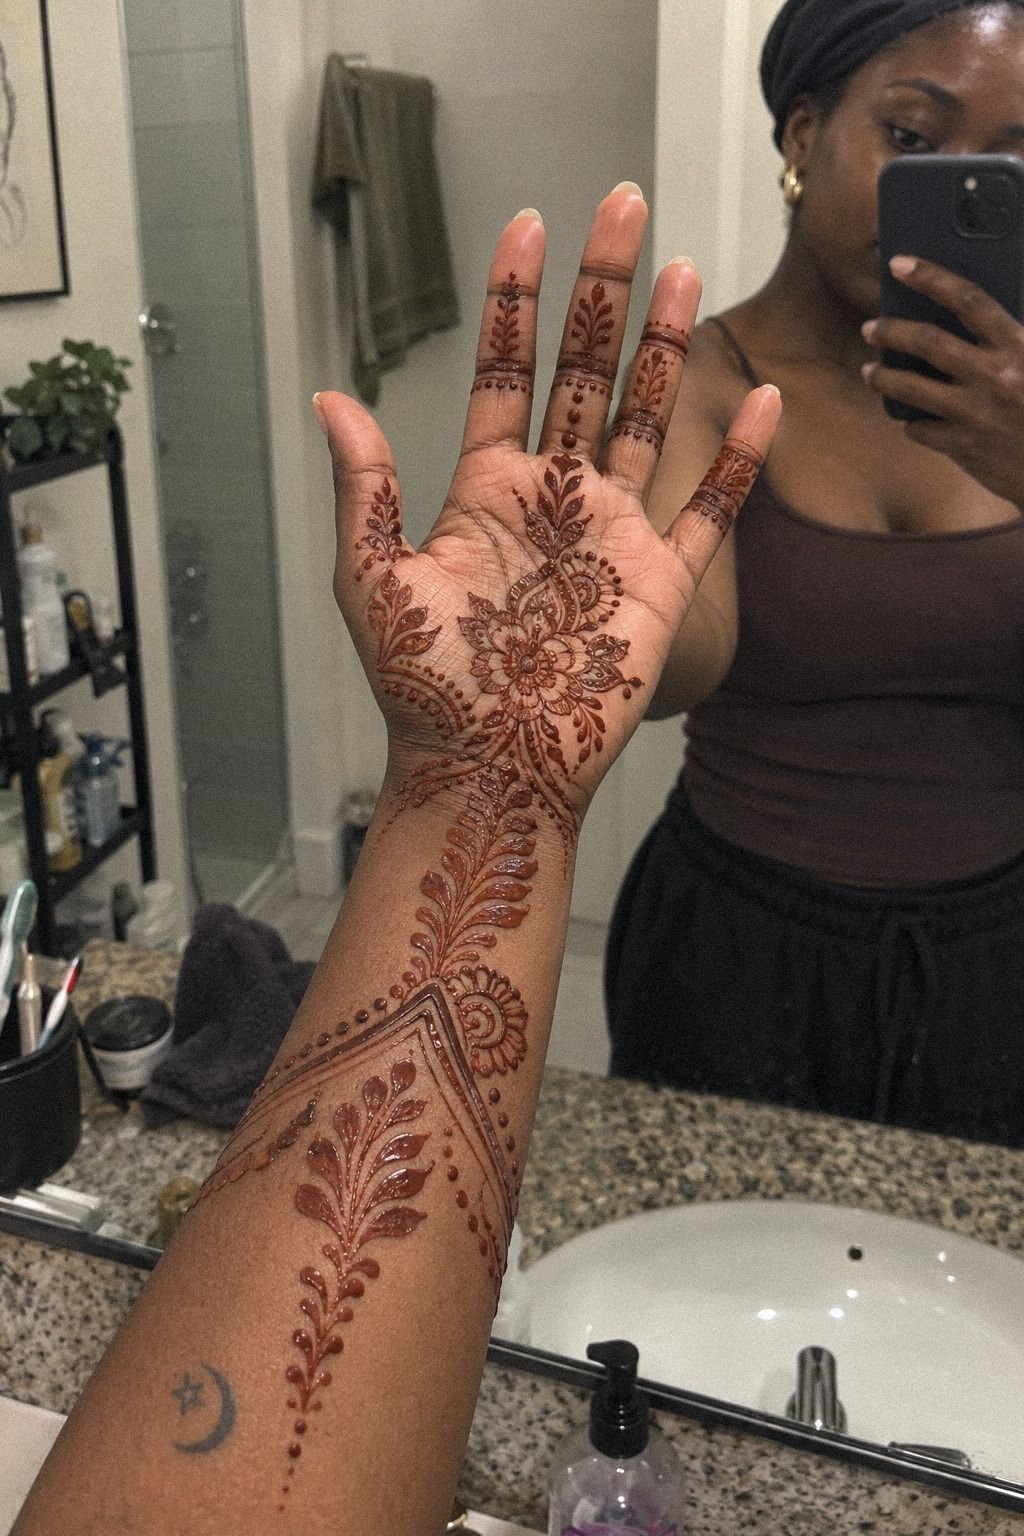
Your palm anchor should guide both hands. Begin with one central shape, then repeat its direction on the second hand. The designs don’t need to be identical, but they should feel related.
I call this the Palm Anchor Rule: one central shape controls the rest of the composition. It might be a round mandala, a small flower, or a connected black-brown paisley medallion. Once you’ve placed it, mirror the scale before adding bands or fingertip details.
For a traditional variation, compare the spacing in these latest peacock mehndi designs. You can borrow the sweeping neck of a peacock or its feather rhythm without copying the whole motif. That keeps your result symbolic and personal.
If you’re doing both palms, finish the first hand before beginning the second. You won’t be able to judge symmetry while both are wet. Let the first design dry, compare the shapes side by side, and adjust the second with a lighter touch.
7Add Symbolic Details With Meaning
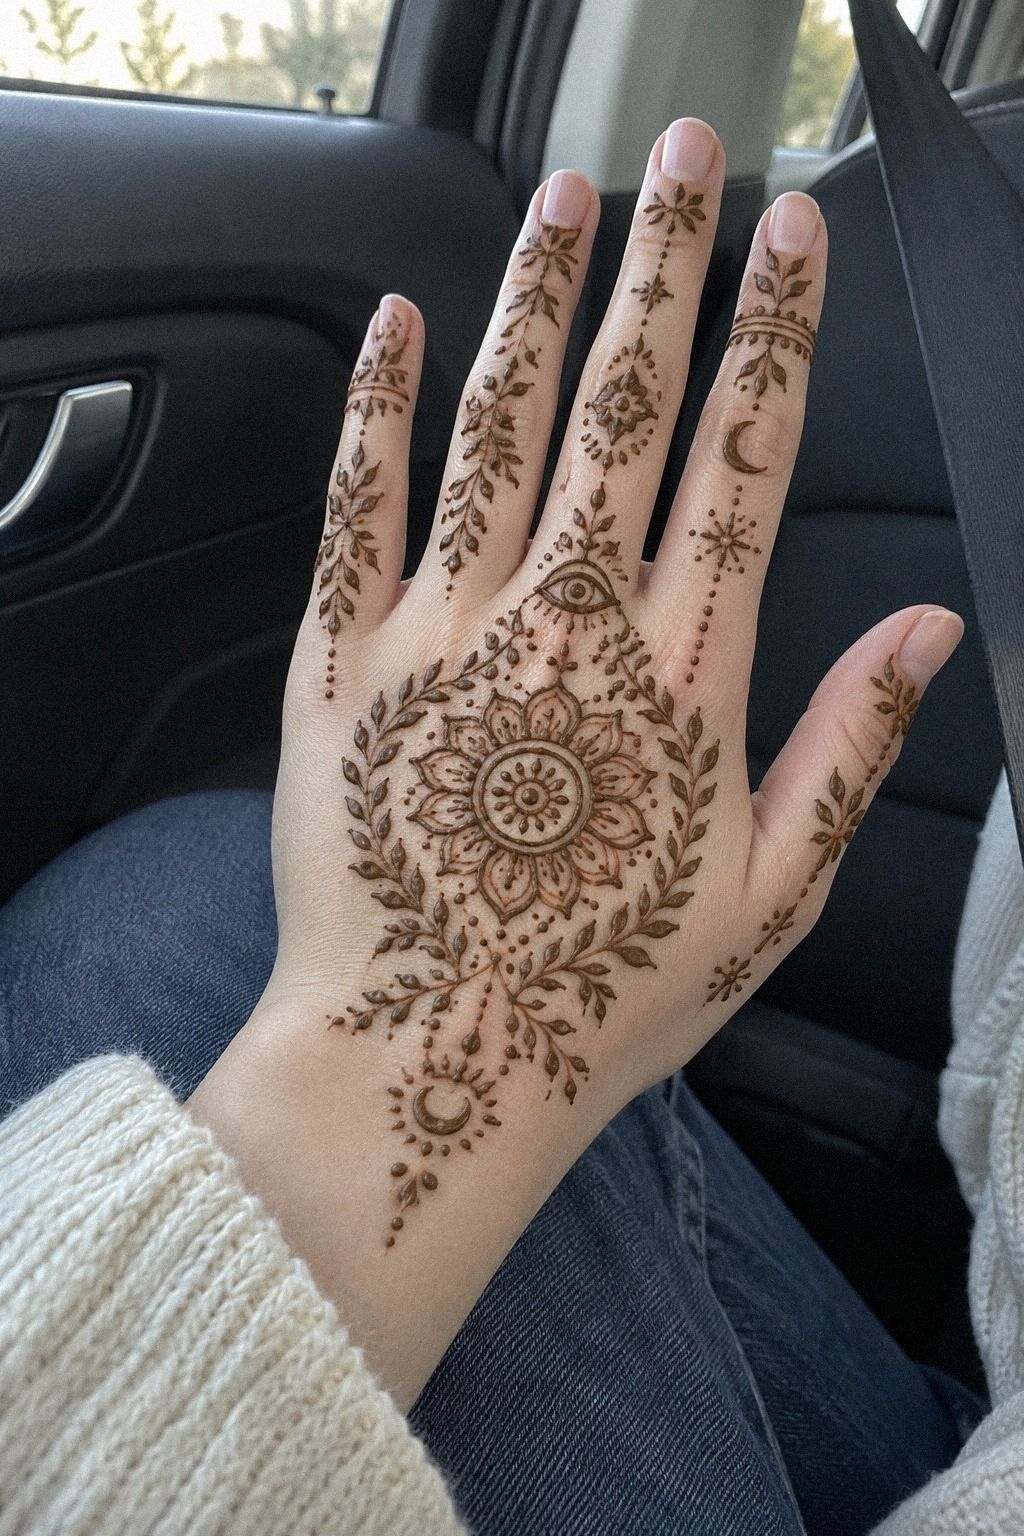
Symbolic details work best when you choose one meaningful idea that matters to you. A moon, leaf, initial, or petal can carry more feeling than a crowded collection of unrelated marks. Keep the detail small enough to support the main pattern.
8Blend Delicate Curves Into Cuffs
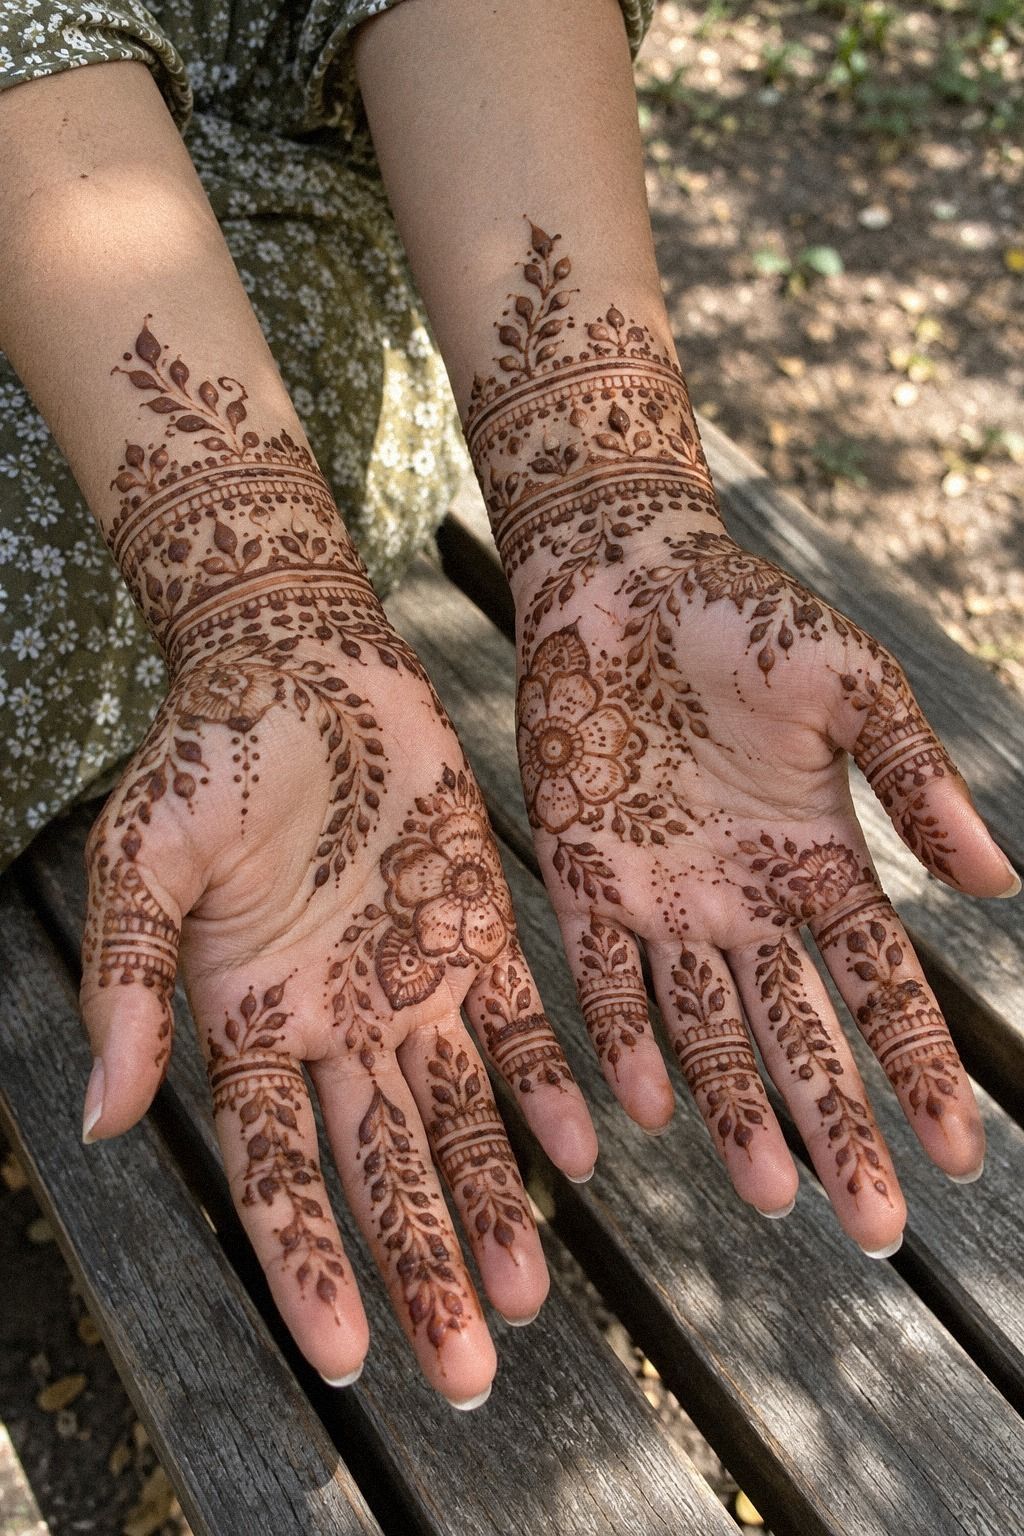
Both hands can feel connected when the wrist area works like a cuff. A narrow band, a curved vine, or a sequence of dots can finish the composition without swallowing the palm.
Try a delicate wrist vine that follows the natural bend of your wrist. Keep its center open if the palm already carries a dense motif. That contrast makes the whole arrangement feel sleek and balanced.
A cuff is also a smart choice when budget or time is tight. It uses less paste, takes less time, and still gives the hand a polished finishing mark. You can always add more detail later if the color develops cleanly.
9Match Latest Designs To Your Style
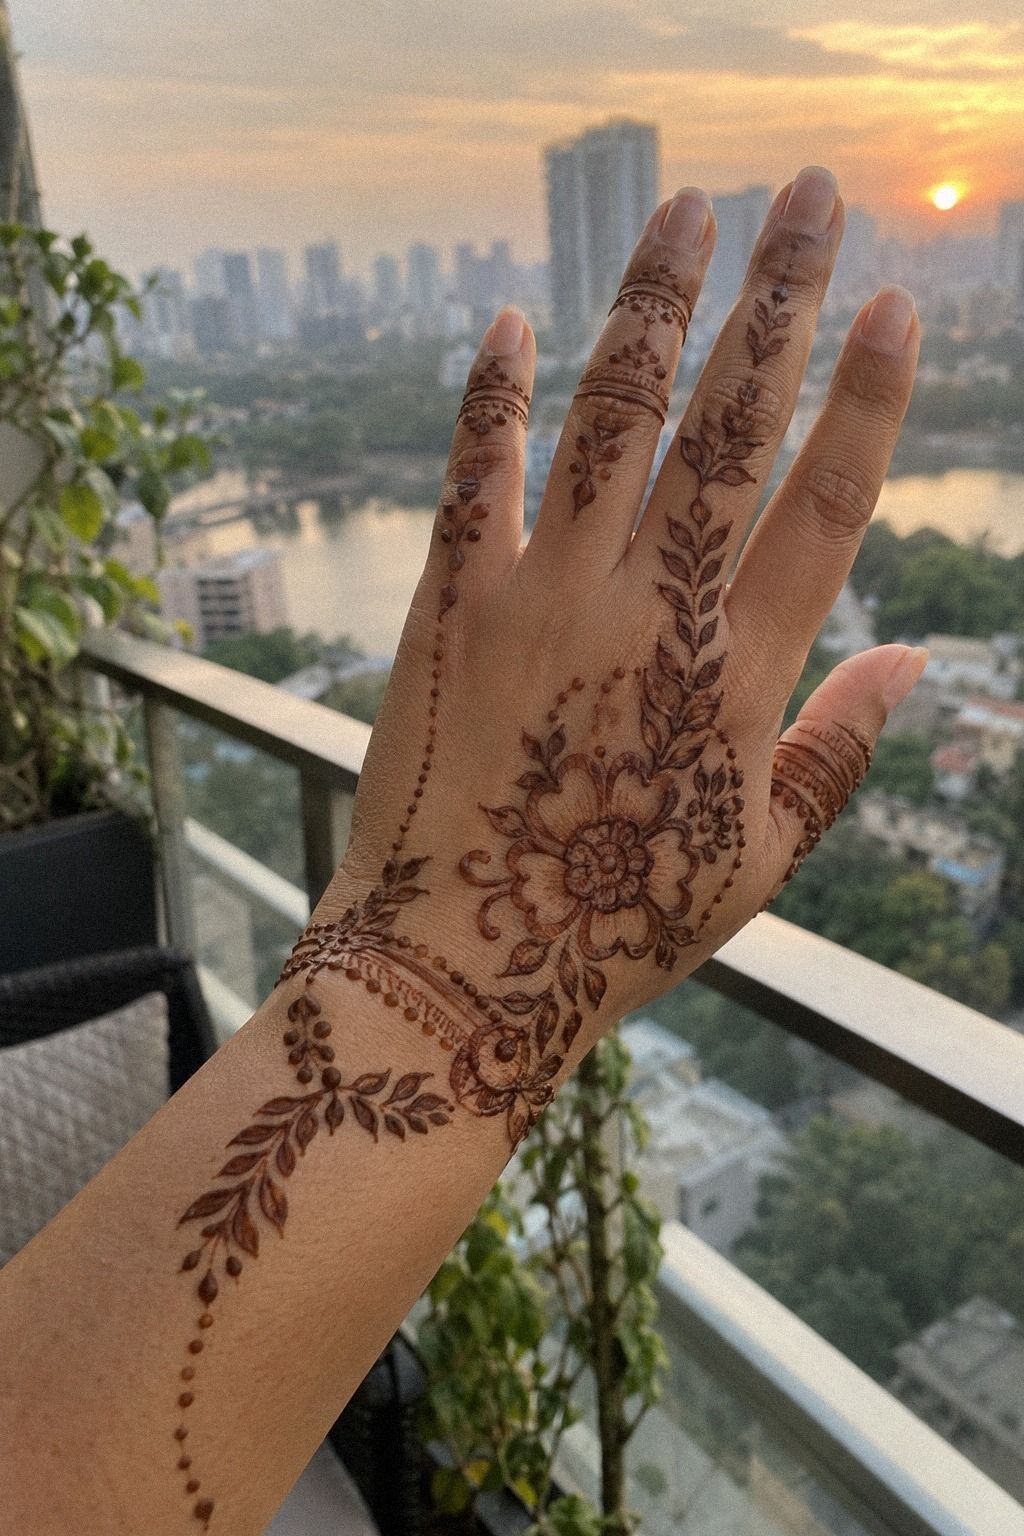
Your style should decide the pattern’s mood before the occasion does. You can make it edgy with sharper angles, classic with repeated paisleys, or romantic with soft floral curves. Choose one direction so your hand doesn’t look undecided.
Ask yourself what you usually wear on your hands. If your jewelry is simple, an ornate center can carry the visual interest.
If you wear stacked rings, choose an understated design with open fingers. You’ll enjoy the result more when the motif fits your habits.
Use simple modern mehndi designs to compare lighter compositions, then look at latest new bridal mehndi designs for fuller coverage. The key difference is density, not quality. A natural brown henna stain can look vibrant either way.
Think about value, too. A pattern you’ll still enjoy on day two is usually worth the price of a more elaborate design you chose only because it was fashionable. Your taste can be feminine, masculine, playful, or somewhere between.
10Test Placement Before Applying Mehndi

Before applying mehndi, test the placement with a washable pencil or a dry cone. Mark the palm center, fingertip direction, and wrist ending before using paste. This quick rehearsal can prevent a crooked starting point.
11Finish With A Striking Hand Composition

Finish by checking the entire hand as one striking composition. Use one focal area, supporting details, and a clean edge. Don’t judge each flower separately, because the pattern needs to work as a complete gesture.
Take a quick look before the paste dries. Your eye may miss a spacing problem while you’re looking down, so hold your hand naturally and check whether the pattern still feels balanced. I like to turn the hand palm-up and palm-down before adding anything else.
A vibrant reddish-brown stain will make the final arrangement clearer after the second day, so keep your last additions restrained. Use a tiny dot row, a short curve, or one final leaf to close an open path.
Give yourself enough time to sit still. Keep lemon-sugar sealant nearby, avoid touching fabric, and let the dried paste flake away without scraping. The result can be ornate, meaningful, and wonderfully personal when you stop treating the last five minutes as a race.
The Two-Day Color Rule I Trust
I used to judge mehndi while the paste was still wet. That was my first mistake. The lines looked pale, the spaces seemed too wide, and I kept adding marks that weren’t needed.
By the next day, the stain had deepened and the composition looked heavier than I intended.
Now I check the design before it dries and wait before deciding whether anything is missing. The deepening second-day color can change your opinion completely, so don’t spend more money or add more paste too early.
The best timing choice is simple: apply the paste 1 to 2 hours before you need to move around, then protect the design while it sets. If you can leave it undisturbed longer, your patience usually pays off.
Modern mehndi works because it leaves room for the hand itself. The most captivating patterns aren’t always the densest ones. They let a crisp palm center, a delicate finger rhythm, and a graceful wrist curve appear together.
A Timing Plan That Holds Up
If guests arrive at 7 p.m., apply the paste around 4:30 or 5 p.m. That gives you time for placement, drying, gentle flaking, and a little margin if one section needs correction. A simple arrival-time plan is more useful than trying to finish everything at the last second.
For a smaller design, one cone may be enough. For both hands, feet, or a fuller occasion pattern, buy a spare cone so a blocked tip doesn’t ruin your schedule. It can be a small cost with a big practical value.
Keep your phone, water, and clothing within reach before you begin. Once the paste is on, you won’t want to search for anything.
I’d rather prepare for ten minutes than smudge a striking motif in ten seconds. Give yourself room!
A Small Budget Check
The cost of mehndi depends on coverage, detail, location, and whether you’re working with an artist. A simple home design can stay affordable, while a detailed event pattern may justify a larger spend if the timing and finish matter to you.
When comparing quotes, ask what the price includes: the cone, both hands, additional feet or forearms, travel, and the expected drying guidance. Transparent artist pricing makes it easier to compare value instead of guessing from a single number.
If your budget is limited, keep the palm focal point and simplify the fingers. That gives you a memorable result without paying for every inch of coverage. In my view, that is often the best value.
When a Fuller Pattern Is Worth It
A fuller pattern can be worth it for a wedding, sangeet, Eid, or Diwali celebration when the design is part of the occasion itself. It usually needs more preparation, more paste, and more drying time, so schedule it before the event day if possible.
For a meaningful bridal-style arrangement, choose one visual language before the appointment. Paisleys, florals, peacocks, and jaal can work beautifully together when the scale is controlled. Too many unrelated references make the result feel noisy.
Don’t assume more coverage automatically means more impact. A bold central motif with sharp negative space can feel more iconic than a completely filled palm. Spend on detail that supports your idea, not on detail for its own sake.
The Details I’d Protect First
Protect the palm center, the fingertips, and the final wrist curve. Those areas carry the identity of the design, while smaller dots and filler marks can be simplified if time becomes tight.
Keep lemon-sugar sealant ready once the paste has dried enough to hold. Use a light touch, because too much moisture can soften the lines. Gentle post-application care helps preserve the crispest details while the stain develops.
Avoid soaking, swimming, harsh soap, and heavy friction during the first day. Let the dried paste flake away naturally, and don’t scrape it off. Your stain needs patience more than constant attention.
A Few Things Worth Answering
How long does a latest modern mehndi design last?
A latest modern mehndi design usually lasts one to three weeks, depending on washing, friction, skin, and placement. Palms and fingers often fade sooner because they work harder. Your stain may look brightest on day two, then soften gradually.
How long should mehndi paste stay on the skin?
Let the henna paste dry for about 1 to 2 hours before moving around. Rubbing it against fabric can remove detail. Once it has dried and begun flaking, let it release naturally instead of scrubbing.
Can I create modern mehndi at home?
Yes, you can create home mehndi designs with a fresh cone, clean skin, and a simple reference. Start with one palm motif and test your pressure on paper. If you’re new to cones, choose open patterns from latest very simple mehndi designs.
What is the most common mehndi mistake?
The most common mistake is adding too much paste before the color develops. Keep your open negative space visible, because wet brown lines deepen later. Your design may look modest at first, but the second-day stain can be much richer.
How should I care for fresh mehndi?
Keep fresh mehndi paste dry while it sets, then avoid swimming, long soaking, harsh soap, and direct sun during the first day. Your stain will develop more evenly when you handle it gently. For placement ideas, compare latest stylish mehndi designs for front hand.
Start With the Palm Anchor
If I had to pick one step, I’d start with the palm anchor. It keeps every finger and cuff detail from wandering, and it still reads clearly after the color deepens.
Choose one personal paisley or flower, let it dry, and build outward from there. Save this guide for your next occasion, then stop collecting references. Your hand needs a decision, not another folder.