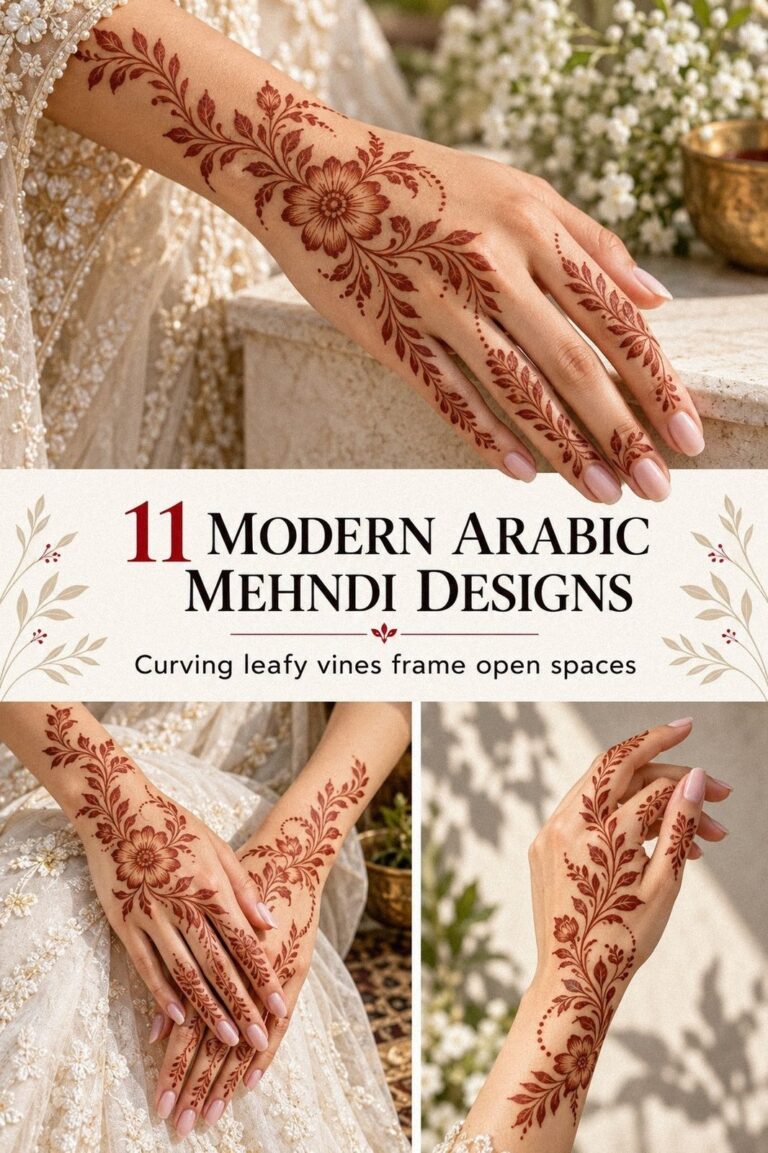
Latest trendy mehndi designs can look intricate without becoming overwhelming. I’ve found that one well-filled henna cone, a clean plan, and 1 to 2 hours of patient drying matter more than a crowded pattern. The stain usually deepens on the second day and fades within 1 to 3 weeks. A thoughtful design can be worth the cost of the cone. Start small. Build boldly!
- Start With Intricate Finger Mehndi Patterns: The Finger Ladder Rule
- Pick Bold Arabic Mehndi For Hands: The Open Trail Method
- Place Delicate Vines Across The Wrist: The Wrist Bridge
- Keep Negative Space Crisp And Striking: The Empty-Palm Rule
- Plan Symmetrical Mandala Designs For Palms: The Four-Point Mandala
- Choose Minimal Mehndi With Sharp Linework: The One-Stroke Pause
- Add Symbolic Elements With Personal Meaning: The Meaning Map
- Match Flowing Patterns To Hand Shape: The Palm Current
- Try Playful Glitter Accents On Fresh Mehndi: The Accent Dot Rule
- Balance Ornate Details With Clean Finishes: The Three-Weight Rule
- Photograph Vibrant Latest Mehndi Designs Clearly: The Warm-Light Frame
1Start With Intricate Finger Mehndi Patterns: The Finger Ladder Rule
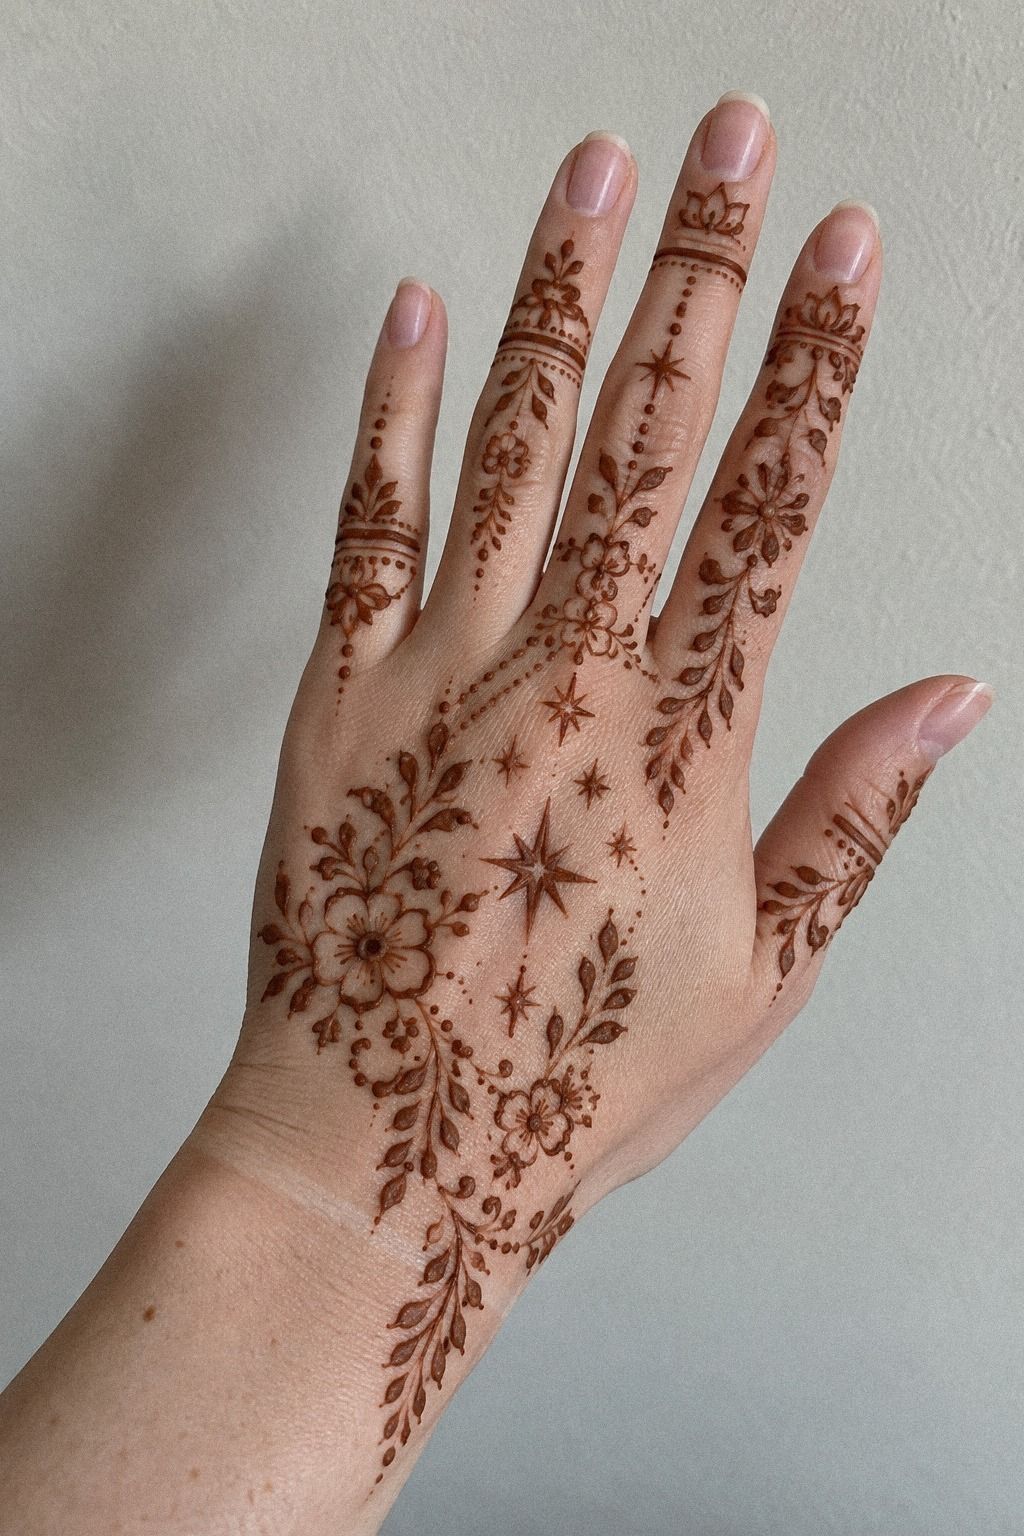
Begin with the fingers because they set the finger rhythm for the whole design. Draw one crisp paisley on the index finger, then repeat a smaller version on the ring finger.
Keep the middle finger quieter so your eye has room to move. This natural henna paste creates a reddish-brown stain that looks expressive against fair skin.
You’ll want the fingers to feel balanced, not identical. I’d choose an intricate pattern on two fingers and a minimal trail on the others.
That contrast feels stylish and personal. If you’re studying simple latest simple mehndi designs, notice how open gaps keep the pattern readable.
Use the narrow cone opening with a light hand. A tiny opening gives you delicate dots and sharp curves, while a wider opening makes a fierce, dramatic shape.
Don’t press hard, or your paste will puddle at the turn. A small cotton swab nearby lets you clean an accidental mark before it dries.
The Finger Ladder Rule is simple: largest motif, medium motif, tiny detail. Your design will look more polished when each finger has a different visual weight.
And if one curve wanders, don’t panic. Mehndi is hand-drawn, so a little raw movement gives it character.
2Pick Bold Arabic Mehndi For Hands: The Open Trail Method
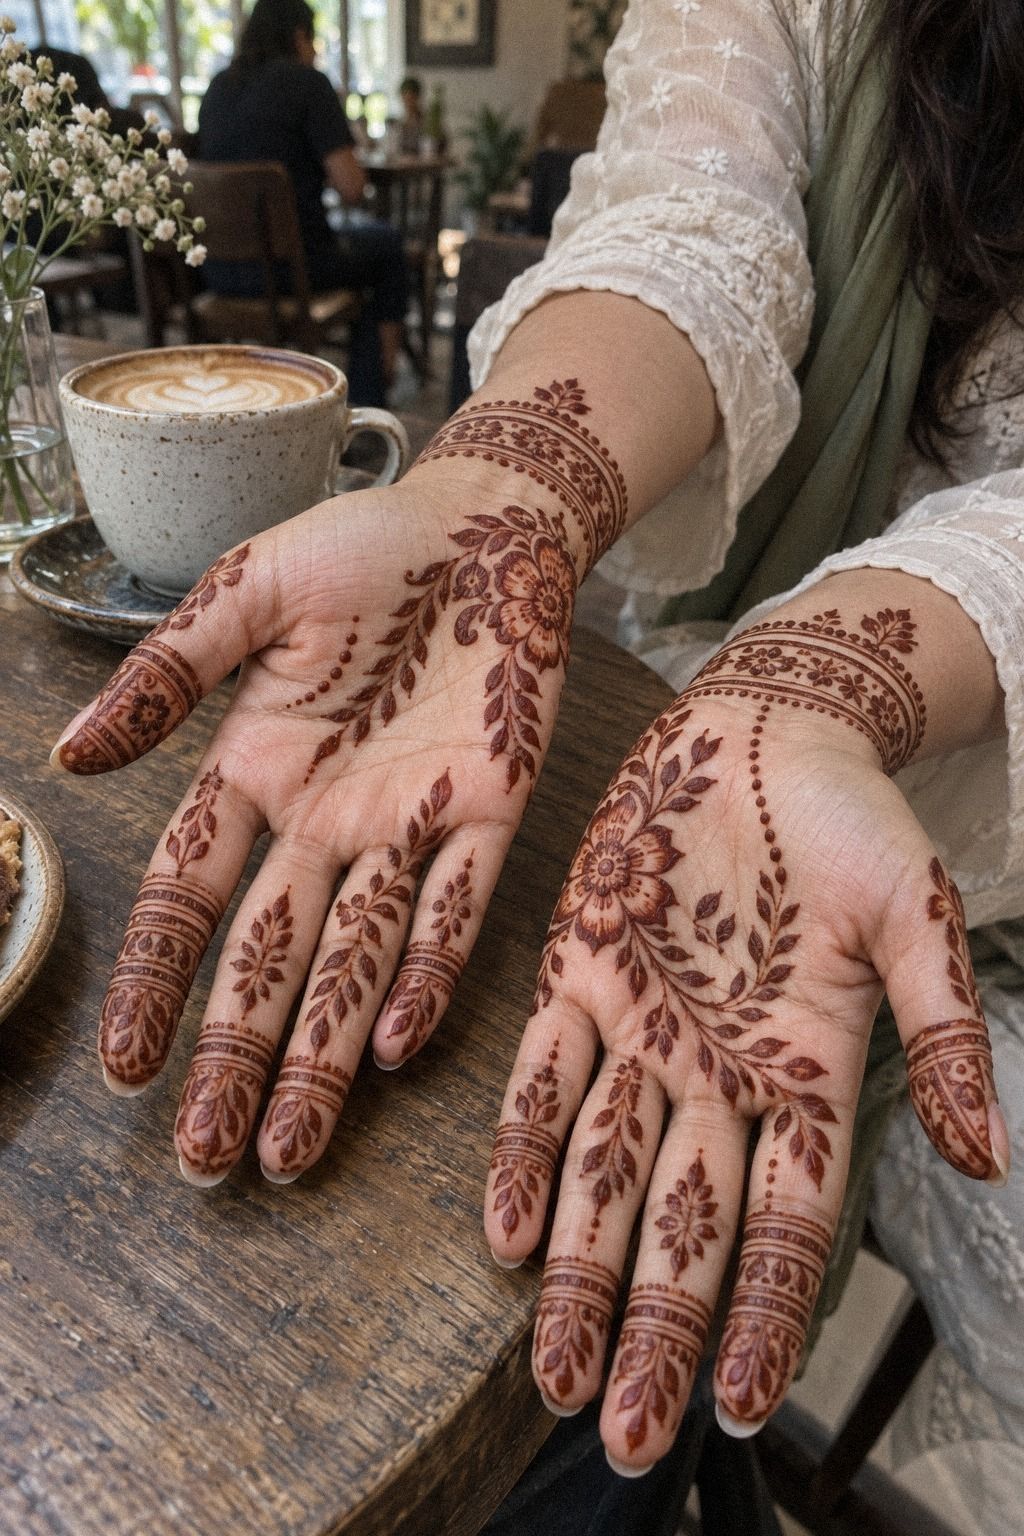
Arabic mehndi works beautifully when you want a bold design with breathing room. Start near the side of the palm, then guide a flowing vine toward the wrist.
Add leaves on one side instead of filling every gap. The result feels elegant, modern, and powerful without looking heavy.
For warm ivory skin, reddish-brown henna paste creates a striking contrast on both hands. You can echo one large paisley across each palm, then let the smaller leaves change direction. I prefer this over copying both hands perfectly because slight variation makes the pair feel more personal.
If you’re working from latest stylish mehndi designs for front hand, study the empty areas around the motifs. Those spaces are part of the composition. Your palm doesn’t need to be completely covered to look ornate, and that open approach often gives better value than adding detail everywhere.
Keep the cone tip close to the skin, but don’t drag it through wet paste. Make one long curve, lift, and restart.
That creates a crisp edge. And if you want a more daring finish, add three tiny dots between the leaves, not a second full border!
3Place Delicate Vines Across The Wrist: The Wrist Bridge
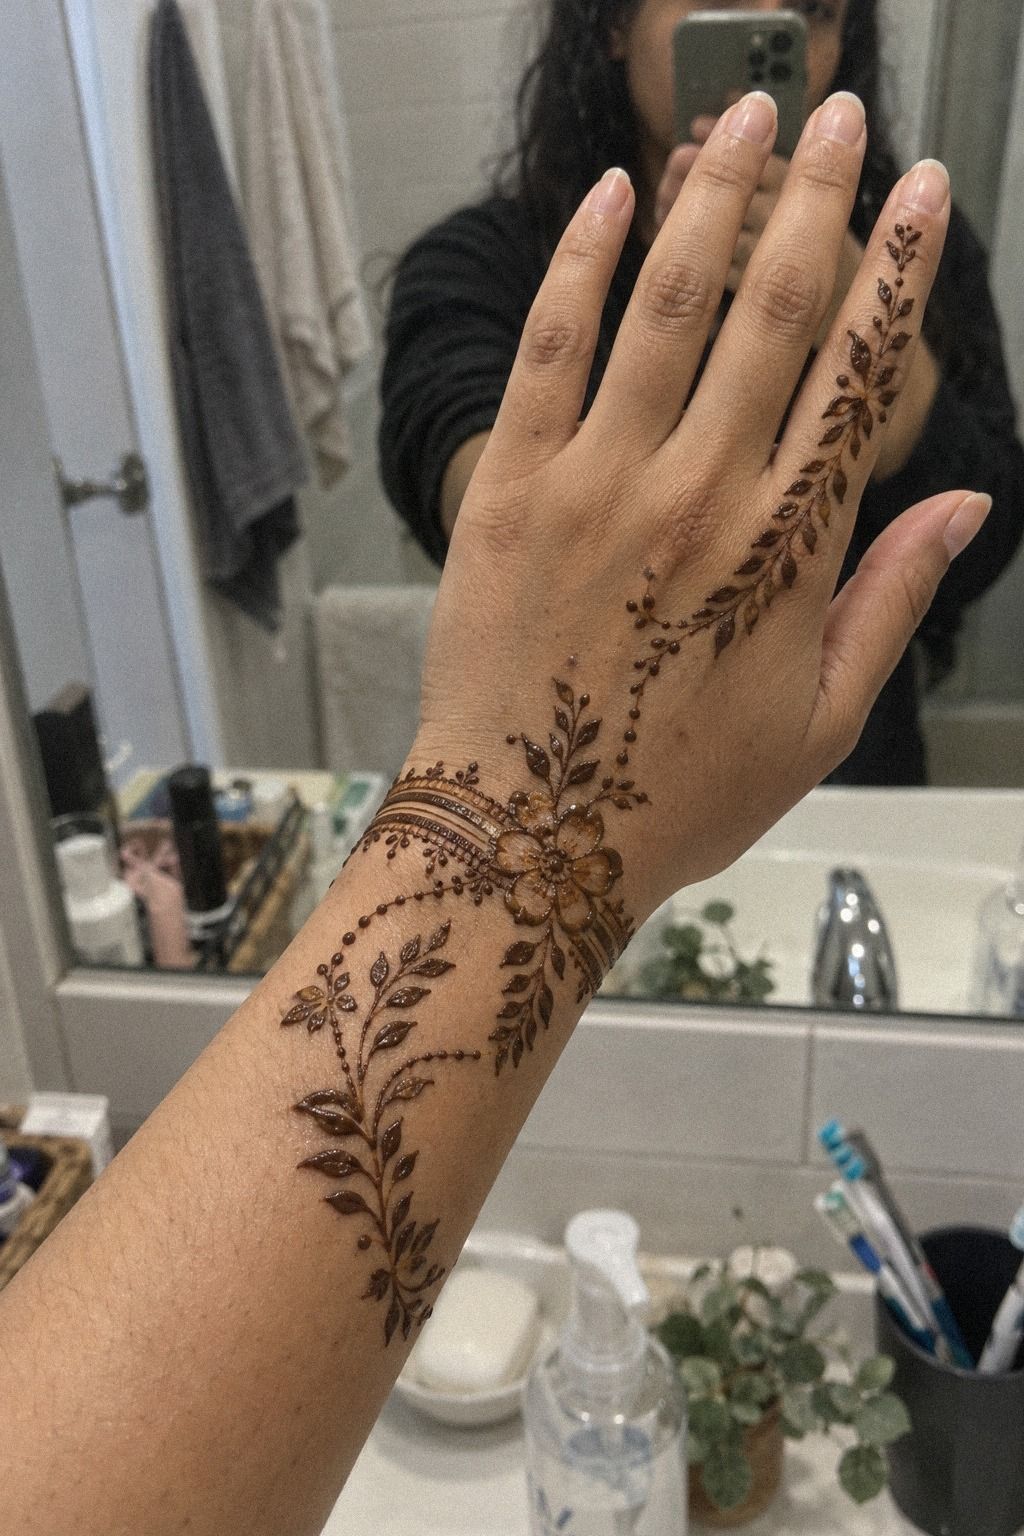
A wrist vine should connect the hand to the forearm without looking like a bracelet copied from a template. Begin with a narrow stem near the thumb side, then let it bend gently across the wrist.
Add graceful leaves that point toward the fingers. The pattern should feel as though it’s moving.
Use a fine-tip mehndi cone for the smallest leaves. Your wrist has a curved surface, so shorter strokes are easier to control than one long sweep.
I made the mistake of drawing the entire vine before checking my hand position. The paste smudged when I turned my wrist, and the cleanest fix was starting again.
A delicate vine is a good choice when you want something understated but still expressive. Pair a larger paisley near the hand with two tiny buds near the forearm.
That scale change gives your design a polished rhythm. Would a thick band have the same graceful movement?
Not quite.
For more inspiration, compare latest very simple mehndi designs with fuller wrist patterns. You’ll notice that the best simple examples use fewer marks but stronger placement. Let your wrist remain visible around the vine.
4Keep Negative Space Crisp And Striking: The Empty-Palm Rule
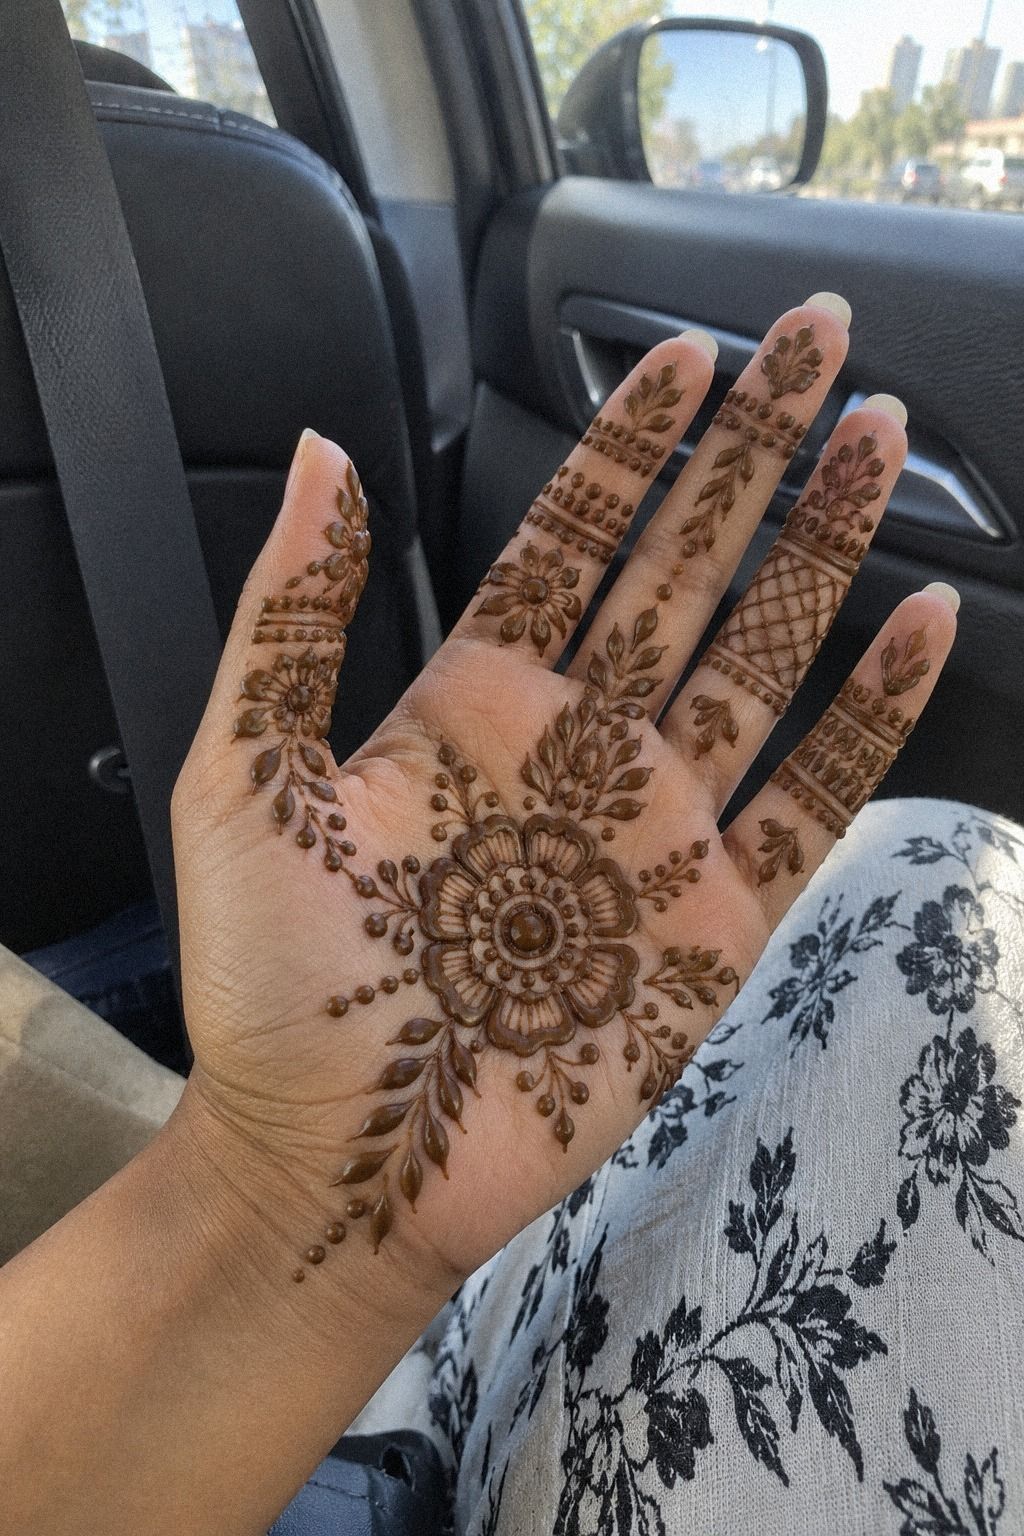
Negative space is not unfinished space. It’s the clean skin around your motifs that makes each paisley, dot, and leaf look crisp.
Start by placing one bold shape in the center of the palm, then leave a clear border around it. This approach feels sleek, modern, and confident.
On warm brown skin, reddish-brown sifted henna powder paste can look vibrant when the gaps stay sharp. If your lines spread, the open areas disappear quickly. You’ll get a stronger result by using fewer details and allowing each curve to remain visible.
I’d skip filling every fingertip just because the palm feels empty. A crowded hand can hide the most expressive part of your design. Instead, add three dots near the base of one finger and repeat them beside the wrist.
That small echo ties the composition together.
If you’re comparing simple trendy mehndi designs, look for the pattern’s quiet zones. Your eye needs somewhere to rest. Keep a clean tissue close, and if a dot lands too thickly, lift it gently before the paste sets.
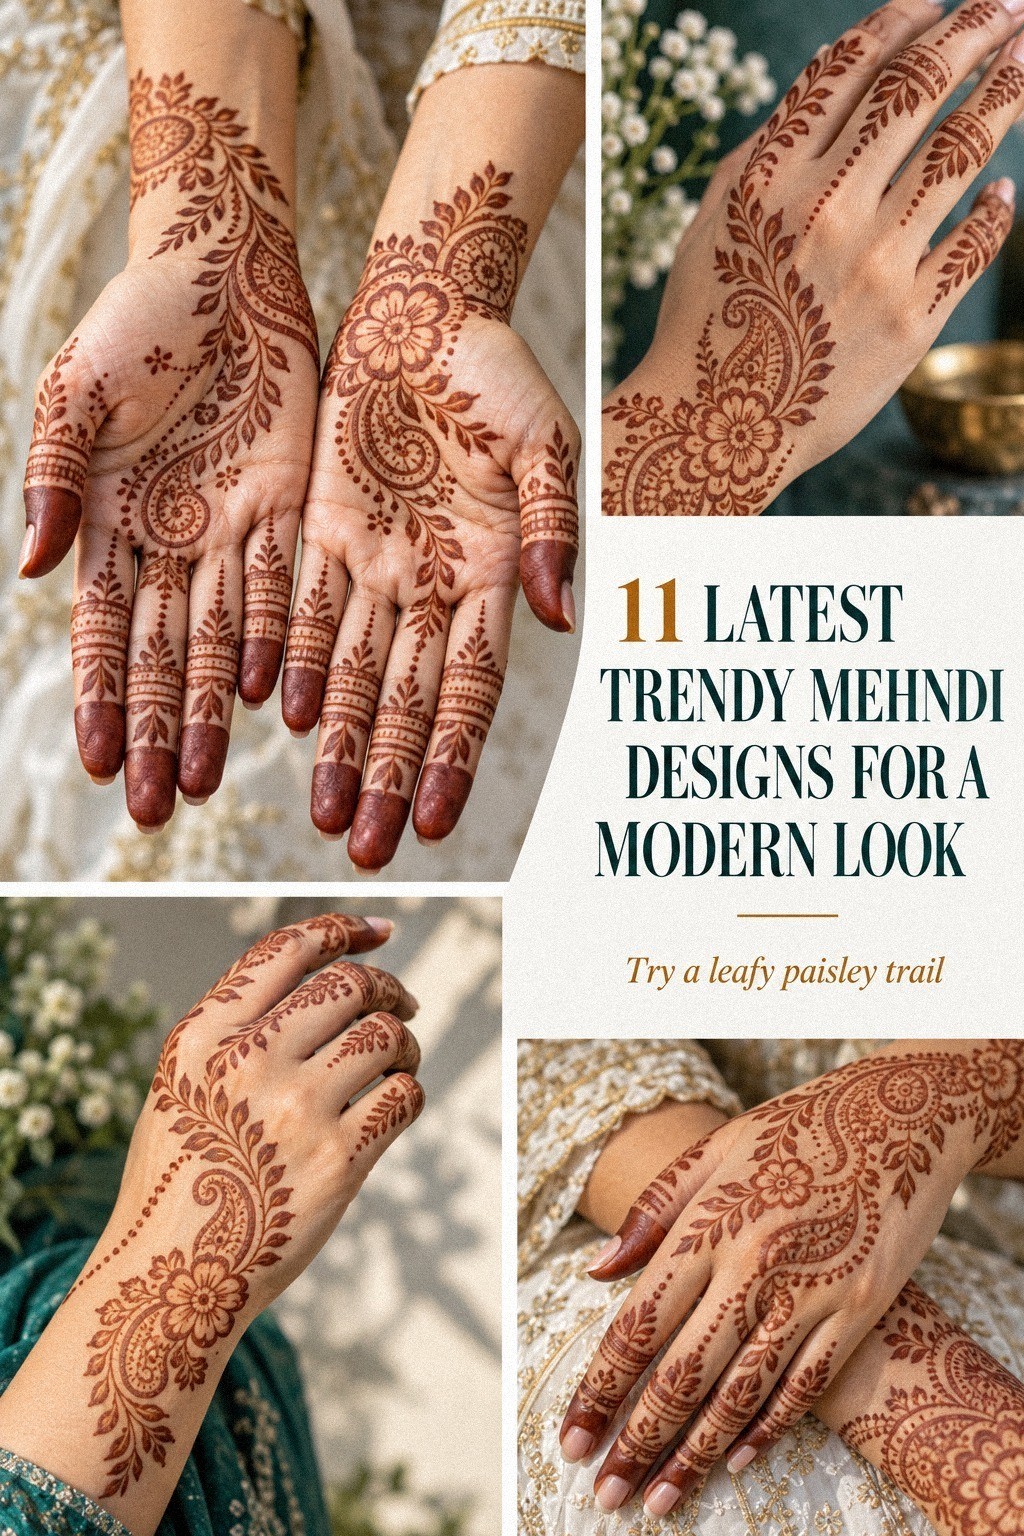
5Plan Symmetrical Mandala Designs For Palms: The Four-Point Mandala
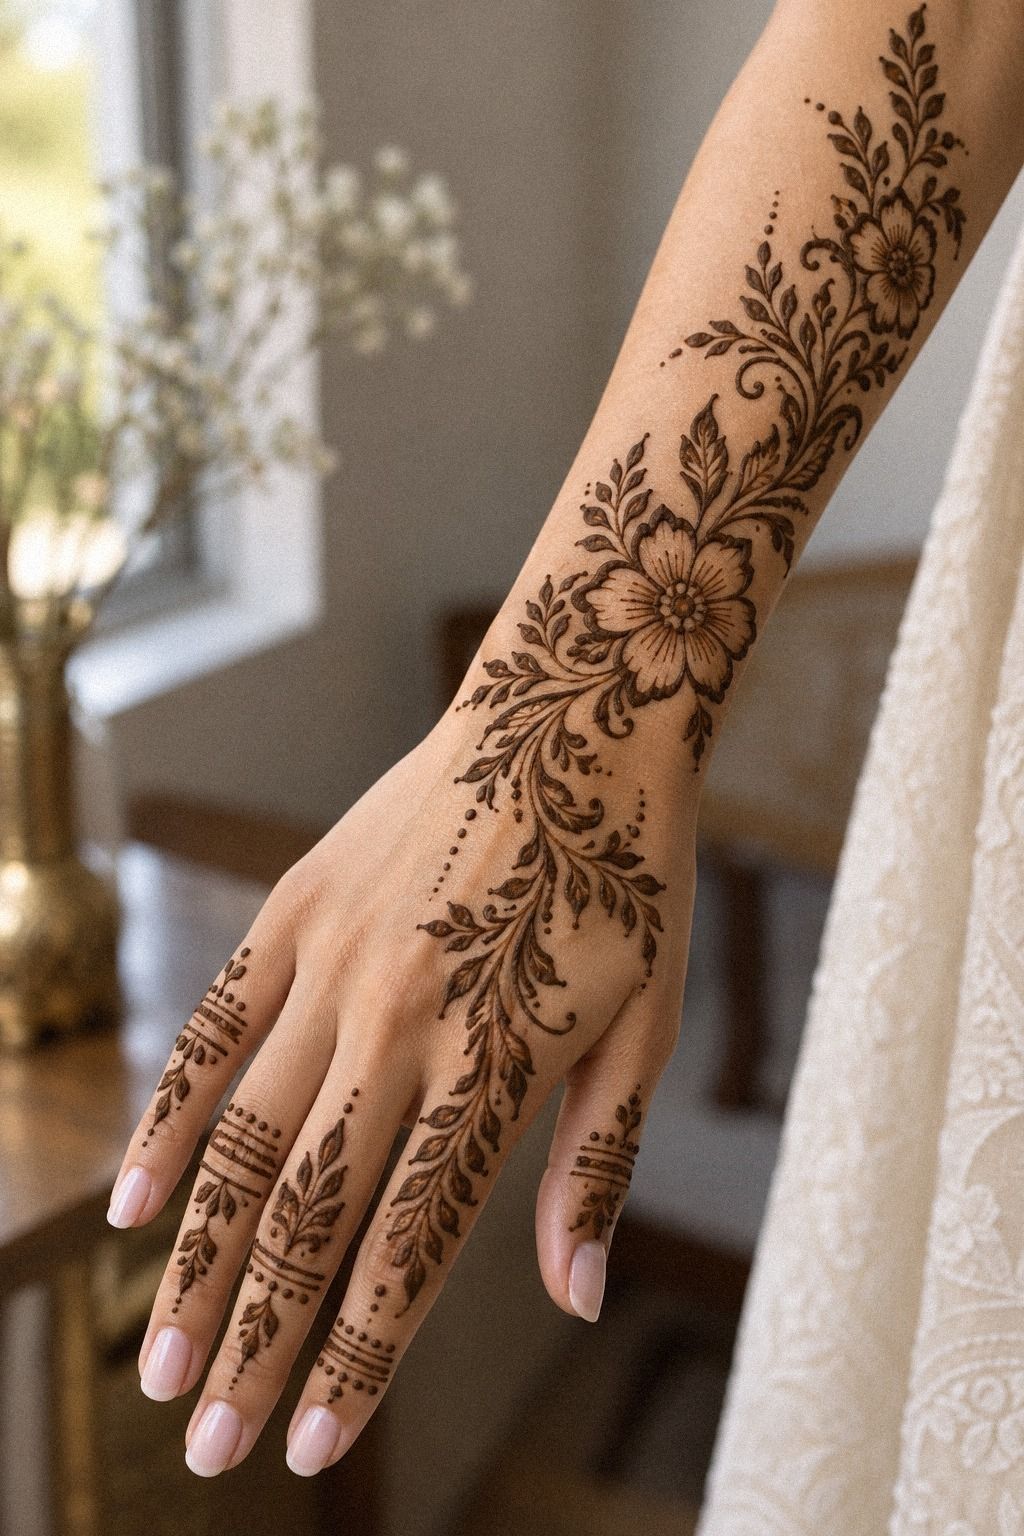
A palm mandala needs a plan before the cone touches skin. Mark the center with a tiny dot, then imagine four points around it: top, bottom, left, and right.
Build the design outward in rings. This keeps the structure harmonious, ornate, and easier to correct.
For feet and ankles, the skin curves more than the palm, so your rings should stay compact. Use natural henna powder mixed into a smooth paste, then draw a small center flower followed by scalloped petals.
Don’t begin with the biggest ring. The center controls everything that follows.
The Four-Point Mandala works because you’re checking direction as you go. After every few petals, pause and turn your foot or palm slightly.
Your design doesn’t need mathematical perfection, but it should feel intentional. I’d choose a clear center over ten extra flourishes every time.
For a more detailed reference, browse latest peacock mehndi designs. Peacock feathers can sit beside the mandala without competing with it. If your palm already has a large center, keep the ankles quieter with small leaves and a narrow trail.
6Choose Minimal Mehndi With Sharp Linework: The One-Stroke Pause
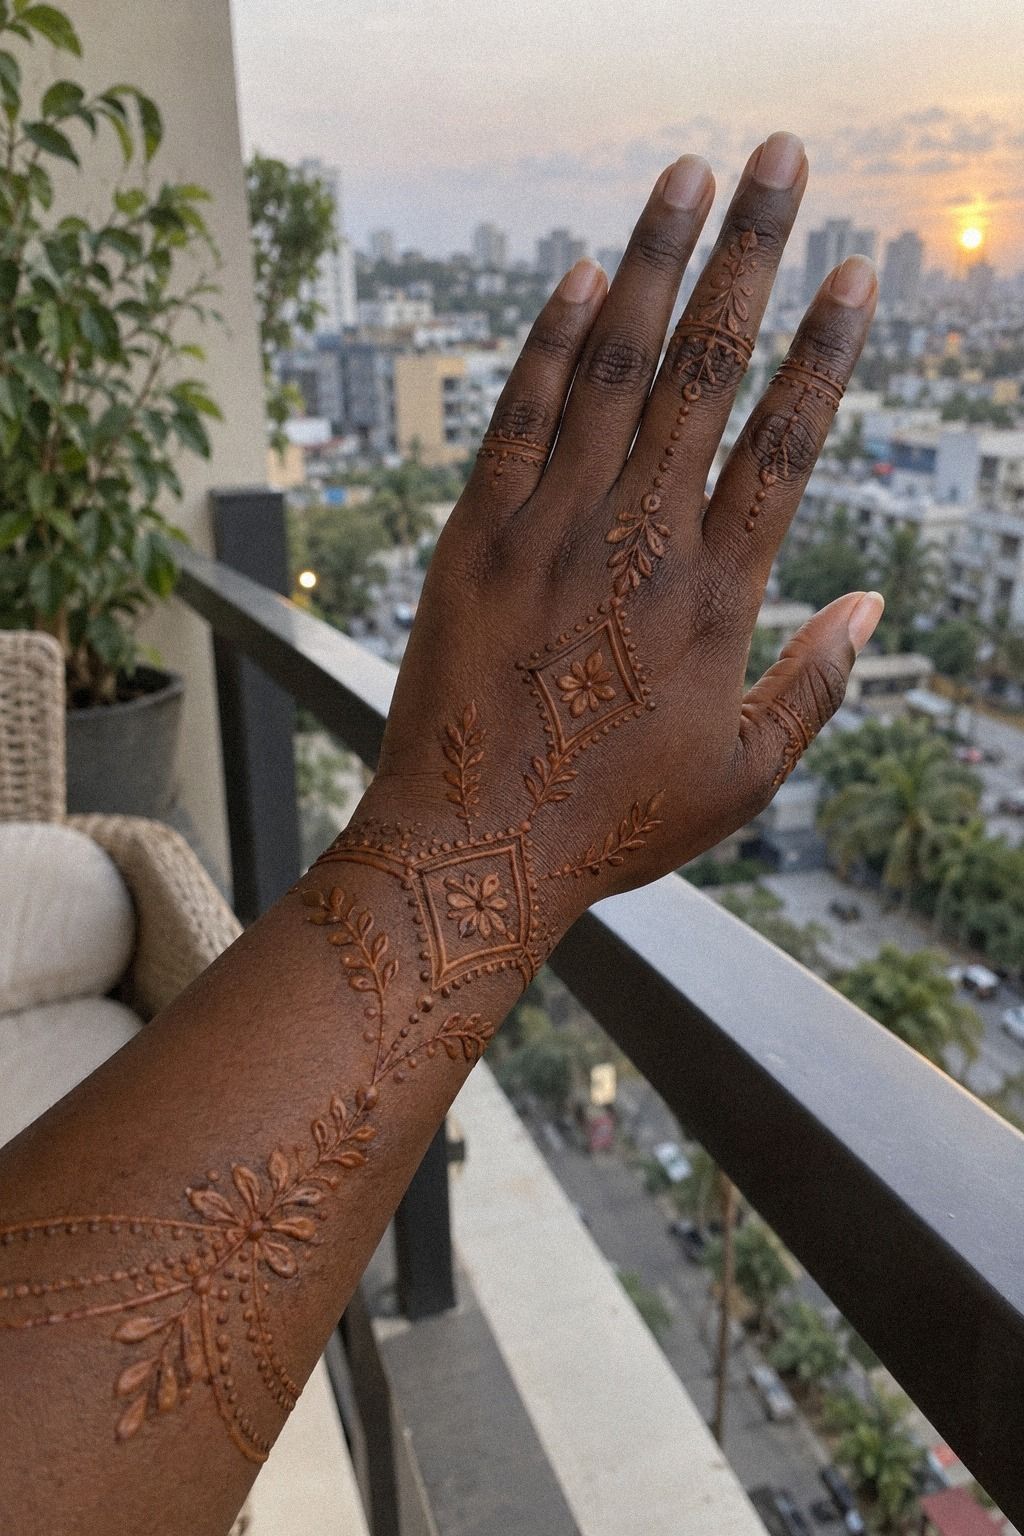
Minimal mehndi is about placement, not emptiness. Choose one symbol, one curved trail, or one small flower for the forearm and hand.
On deep ebony skin, the reddish-brown stain can look subtle at first, then richer after the second day. That changing color is part of the charm.
Use a smooth henna cone tip and pause after every stroke. Your hand will naturally tremble if you rush, especially across the forearm.
A short line followed by a breath gives you more control than trying to finish the motif in one pass. Clean work needs patience, not pressure.
I’d avoid copying a dense bridal pattern into a minimal design. The scale won’t translate.
A single symbolic leaf can look more meaningful than a crowded cluster, particularly if you want something personal and understated. That restraint often offers better value than buying several cones you won’t finish.
The latest simple mehndi designs front hand easy collection is useful when you want a restrained starting point. You’ll see how a few sharp strokes can create an elegant result. And if your first attempt feels too plain, add dots before adding another major motif.
7Add Symbolic Elements With Personal Meaning: The Meaning Map
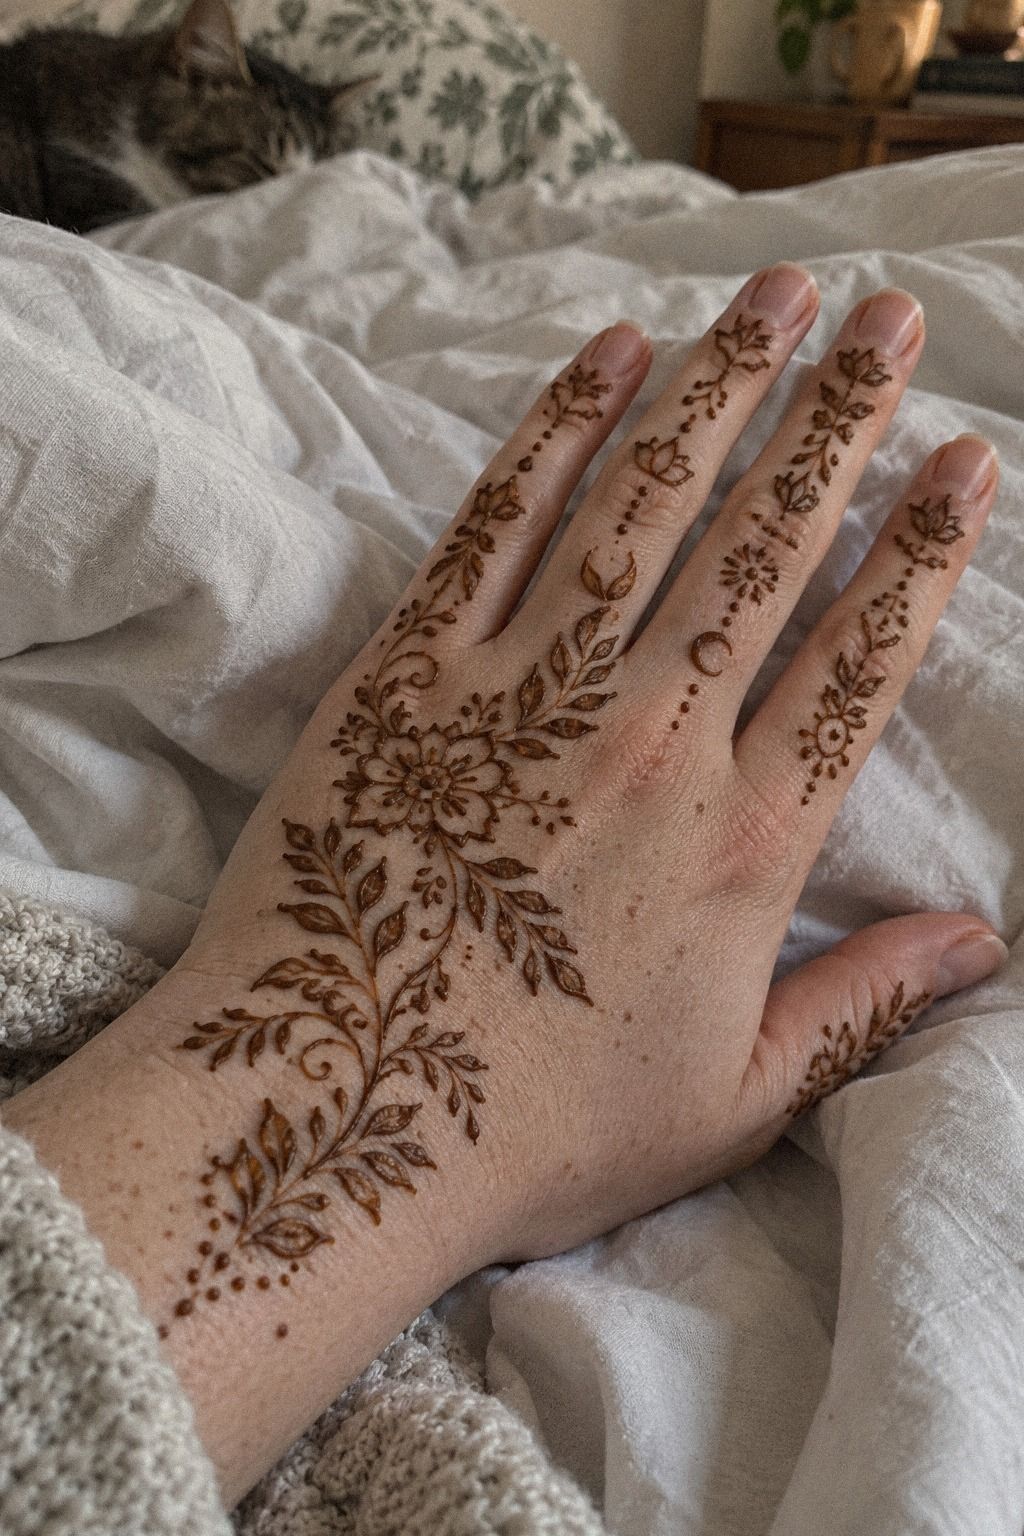
Choose your personal symbol before you decorate it. A peacock can suggest grace, a paisley can suggest abundance, and a lotus can carry a sacred or reflective feeling.
Your meaning doesn’t need to be explained to everyone. It only needs to matter to you.
Sketch the idea with a pencil on paper first, then translate it into reddish-brown henna paste. A meaningful symbol should still read clearly after the paste dries and flakes away. Keep the main shape bold, then use delicate dots or leaves around it.
The Meaning Map gives you three questions: What does the symbol mean? Where should it face?
Which details can you remove? I’d skip adding a dozen unrelated icons.
One personal shape, placed confidently, feels more powerful than a collection that has no connection.
If you like symbolic compositions, latest Pakistani mehndi designs can show you how florals, paisleys, and jaal details work together. Choose one central idea for your hand. Your design will feel more expressive when every supporting mark points back to it.
8Match Flowing Patterns To Hand Shape: The Palm Current
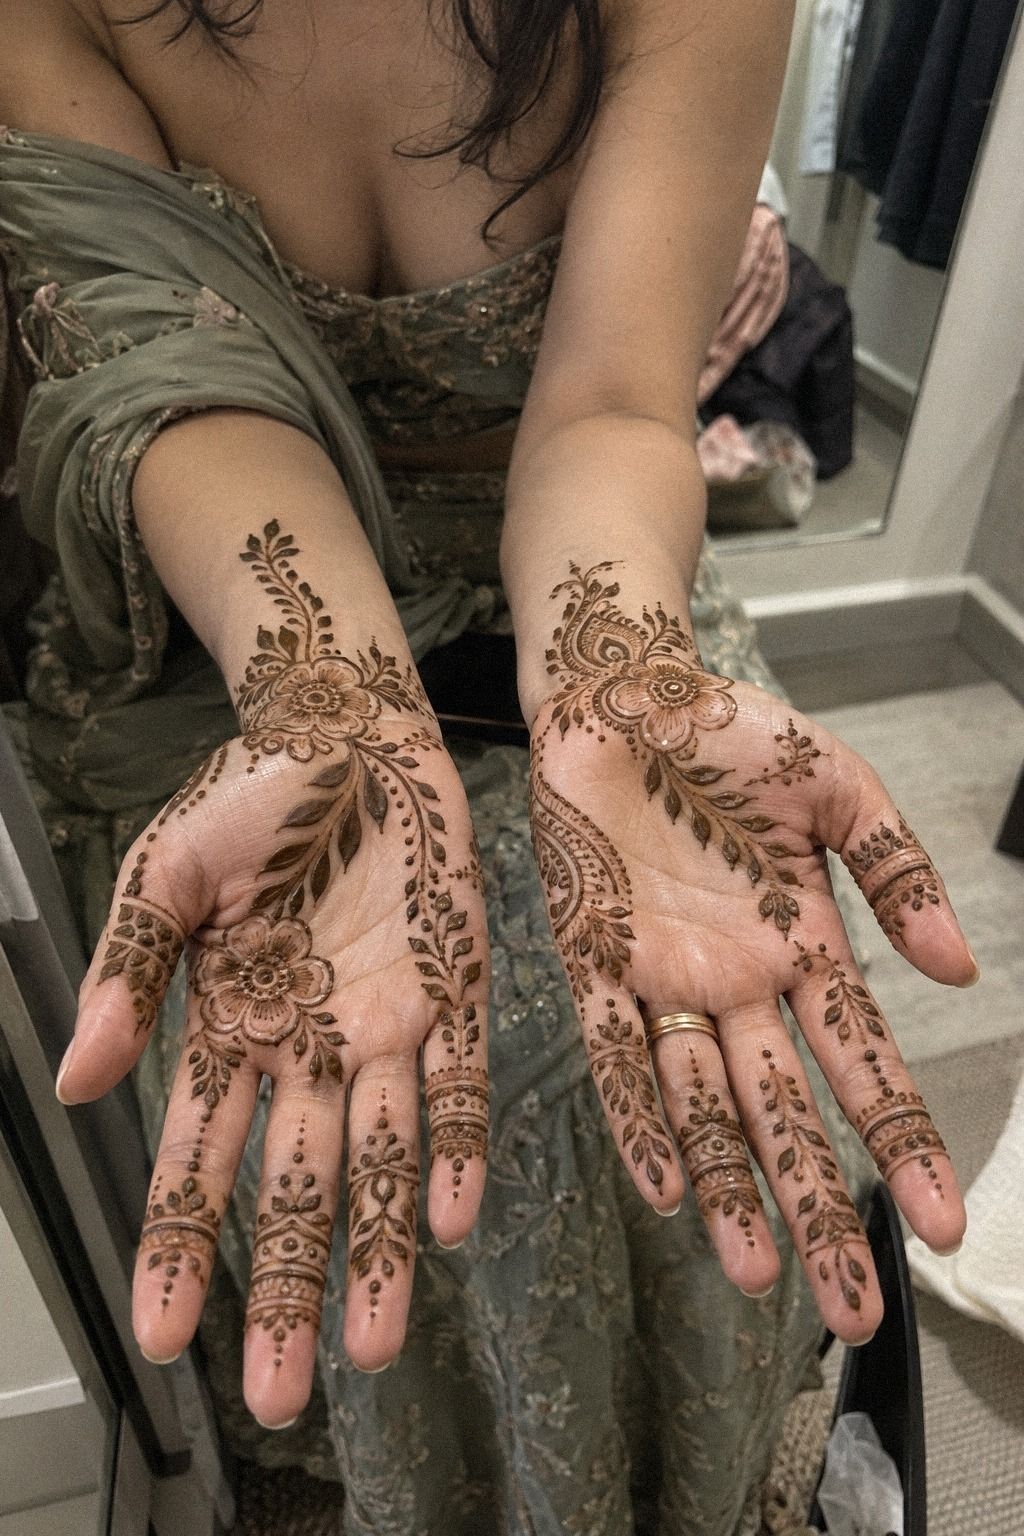
Your hand shape already has a natural direction. Fingers point outward, the thumb creates a side curve, and the wrist gives the pattern a vertical exit.
Follow those paths instead of forcing a centered design. The result will feel graceful, organic, and less stiff.
Start with one smooth henna paste line from the lower palm toward the index finger. Add leaves that open toward the fingertips, then place smaller dots near the wrist. On both hands, reverse the direction so the pair feels connected without becoming a mirror image.
I’d choose a flowing composition over a perfectly boxed pattern for medium warm ivory skin. Boxes can look sharp, but they often interrupt the hand’s natural movement. Your design should travel with the palm when you bend your fingers, making the extra time worth it.
Take a photo of your empty hand before you begin. It helps you see where the broadest areas are and where the pattern needs a lighter touch. For more placement ideas, compare latest new bridal mehndi designs with smaller hand compositions.
9Try Playful Glitter Accents On Fresh Mehndi: The Accent Dot Rule
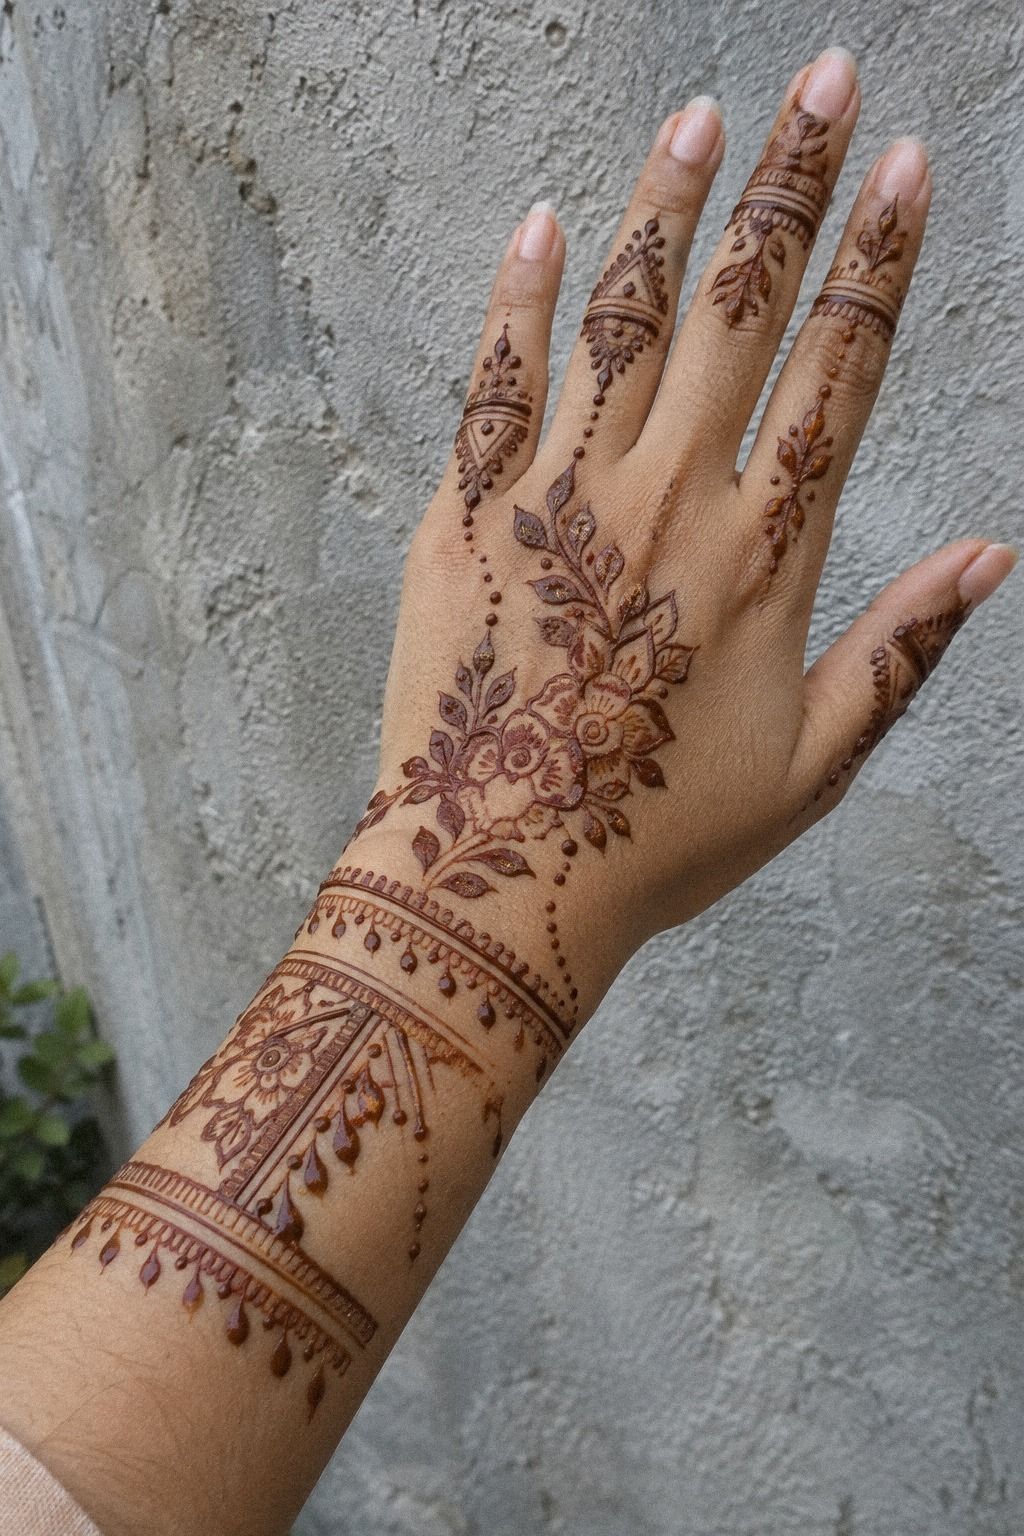
Glitter can make fresh mehndi feel playful, festive, and vibrant, but it should support the paste pattern rather than cover it. Choose one accent color and place it beside a few dots or inside a large flower. On an olive complexion, warm gold can look romantic against the reddish-brown stain.
Wait until the fresh mehndi paste has dried enough to stay in place before adding cosmetic glitter. Keep the accents small around the wrist, fingers, or one palm motif. Your design will look more polished if the glitter appears in three or five intentional spots.
The Accent Dot Rule keeps the finish controlled: one cluster near the hand, one near the wrist, and one tiny echo on a finger. I’d avoid scattering glitter over every line. It can make an intricate design look muddy instead of crisp.
If you’re preparing for Eid, Diwali, or a sangeet, this is a charming way to add occasion without changing the whole pattern. Use cosmetic-grade glitter only, and keep it away from broken skin. The final effect should feel festive, not fussy!
10Balance Ornate Details With Clean Finishes: The Three-Weight Rule
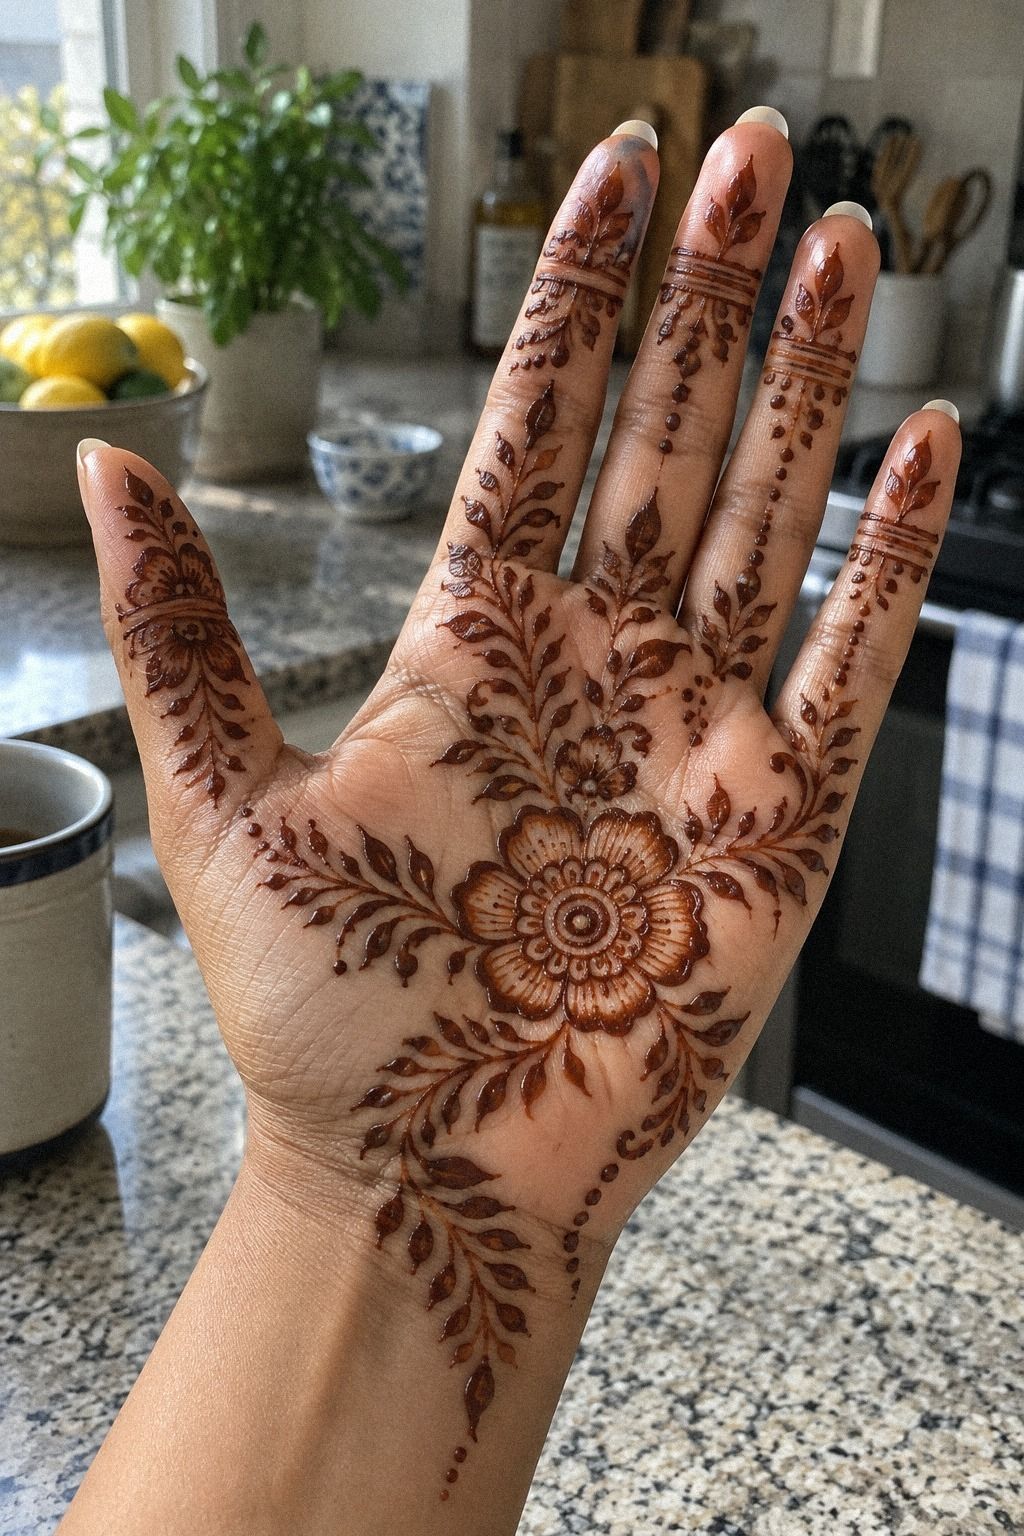
An ornate mehndi design needs three visual weights: one large motif, several medium details, and tiny finishing marks. Start with the large paisley or flower on the palm.
Add leaves around it, then finish with dots. This makes the composition feel classic, refined, and complete.
On golden tan skin, lemon-sugar sealant can help the dried paste stay in place longer, but use only a light amount. Too much moisture can blur the edges. Let the cone work do the talking.
A clean outline will always matter more than extra decoration.
The Three-Weight Rule helps you decide what to remove. If your palm has two large paisleys, skip the third.
If your fingers already have bold bands, keep the wrist vine delicate. I’d rather see one crisp ornate detail than a page of competing marks, especially when you’re watching your budget.
Once the dried paste has set, leave it on for the recommended drying period of about 1 to 2 hours. Let the color deepen on the second day, and protect the stain from unnecessary soaking. Your final pattern will look richer when you give it time.
11Photograph Vibrant Latest Mehndi Designs Clearly: The Warm-Light Frame
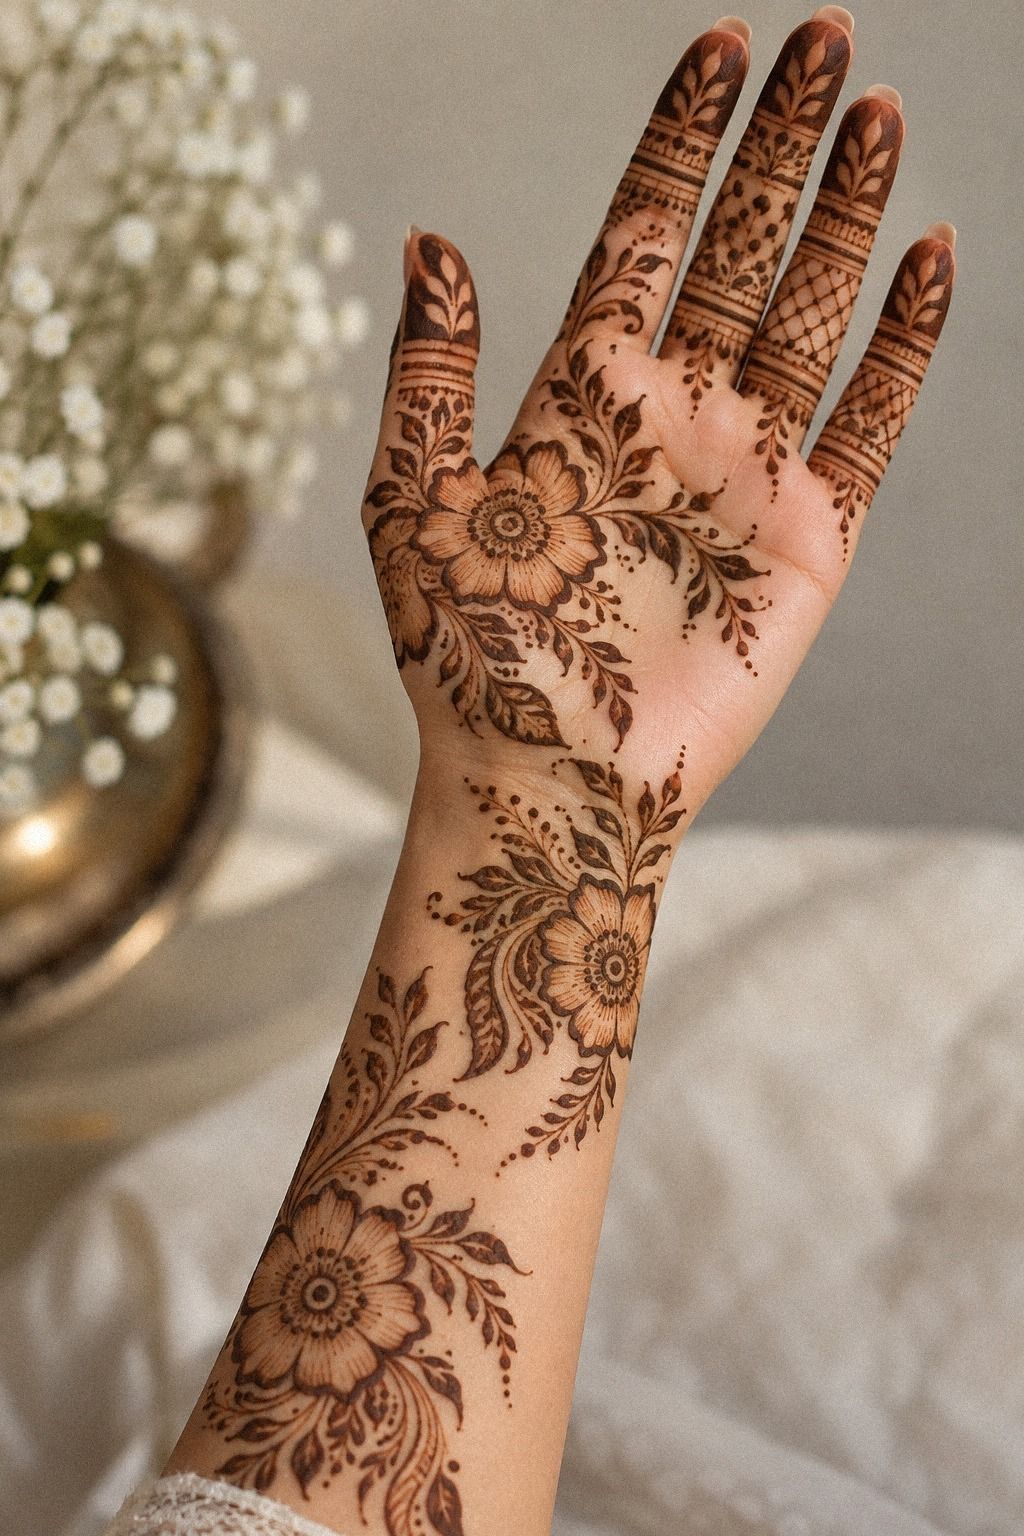
A good photograph should show the full mehndi design, the reddish-brown color, and the negative space around it. Place the hand near a window with soft daylight, then keep the wrist comfortable so the pattern remains easy to read. A gentle, warm result feels honest and editorial.
For feet and ankles, use a clean cotton cloth beneath the hand or foot so the skin tone and stain remain easy to see. Keep the surroundings simple.
Your photograph doesn’t need elaborate styling or heavy filters. The mehndi should remain the focus.
Document the design once the paste has dried, then again after the stain deepens on the second day. You’ll capture the difference between fresh paste and the richer final color. That comparison is especially useful if you’re saving references for your next application.
A simple position works for palms, while a diagonal hand placement shows wrist movement. I’d skip harsh flash because it flattens delicate details. If you want more examples, save latest trendy mehndi designs for hands and compare how each design uses space.
Before You Start With One Cone
One cone is enough when your design is planned before you begin. Gather a natural henna cone, a tissue, a cotton swab, a small paper sketch, and a comfortable place where your hand can stay still. Your paste should be smooth enough to flow without sudden lumps.
Keep these practical references nearby:
Avoid pools of water while the paste is drying, and keep the finished stain away from strong sun when possible. You’ll get a cleaner result if your skin is free from heavy lotion before application. If you’re using a new cone, test a tiny spot first and wait for any reaction before continuing.
For a beginner, one cone is usually worth buying because it keeps the process focused and affordable. You can always add another design later instead of purchasing a large kit before you know which patterns you enjoy. That simple approach feels practical and empowering.
Cone Control: How Do You Keep Every Line Crisp?
Cone control starts with the cone opening. A tiny cut creates delicate dots and narrow curves, while a wider opening gives you stronger borders.
Test the flow on paper first. The line should arrive steadily, without forcing the paste through the tip.
Hold the mehndi cone like a pen, but keep the tip just above the skin. Let the paste touch down rather than dragging the plastic across the surface. This helps you build smooth vines, sharp scallops, and clean paisleys with less pressure.
If the paste suddenly thickens, don’t keep squeezing. Wipe the tip, test again, and adjust your grip. That small pause protects your pattern and saves product, which is useful when you’re working with a tight budget.
You can compare that control with latest stylish mehndi designs for front hand. Notice how the strongest examples use confident pauses between marks. The value is in the line rhythm, not in covering every inch.
Color, Timing, and Aftercare: What Changes From Day One?
Fresh paste usually looks greenish, orange, or light brown before it dries. After removal, the henna stain may appear pale. It commonly deepens during the second day, then gradually softens over 1 to 3 weeks.
Don’t judge the final result too early.
Leave the dried henna paste in place for about 1 to 2 hours, or longer if your paste instructions recommend it. Keep your hand still while it dries. A small lemon-sugar touch can help the pieces stay attached, but too much moisture may blur fine lines.
Avoid soaking the area immediately after paste removal. Gentle washing, normal daily wear, and time will shape the final color. The temporary change is part of what makes mehndi so expressive and meaningful.
For a restrained design, compare latest very simple mehndi designs after the color has developed. Simple patterns often show the color shift more clearly because there are fewer marks competing for attention. That makes them a strong value choice for a first application.
What Does Mehndi Cost, and Where Is the Best Value?
The cost depends on coverage, detail, occasion, location, and whether you apply it yourself or book an experienced mehndi artist. A small guest design may cost around $10 to $40, while larger event work can run higher. Bridal coverage often costs more because it requires several hours and denser detail.
If you’re weighing cost against value, ask what the quote includes. Confirm the number of hands, feet coverage, travel, waiting time, and whether the artist supplies the cone. A written quote prevents awkward surprises.
A home application can be the most affordable option, especially when you want one symbolic motif or a small wrist vine. If you’re booking help, a portfolio with clear paste and final-stain examples is worth more than a vague promise of a trendy result.
For price-conscious inspiration, browse simple trendy mehndi designs before you choose a large pattern. You may find that a crisp, open design gives you the look you want without the cost of full coverage.
Why One Cone Still Feels Fresh in 2026
I think one-cone mehndi is having a moment because people want designs that feel personal without requiring a huge production. A single cone encourages restraint. You choose the symbol, the placement, and the rhythm instead of covering every available patch of skin.
The best modern patterns combine traditional paisley motifs with minimal gaps, bold Arabic trails, crisp finger details, and symbolic centers. That mix feels timeless but not predictable. You can make it feminine, masculine, edgy, sacred, or quietly personal depending on the shapes you choose.
I’ve seen beginners worry that a simple pattern won’t look impressive. Usually, the opposite is true.
When your lines are clean and the composition has room, even a dainty motif can look iconic. You don’t need ten references open on your phone.
What matters most is the relationship between paste, skin, and time. Let the design dry for 1 to 2 hours, expect deeper color on the second day, and remember that the stain fades over 1 to 3 weeks. That temporary quality is part of why mehndi remains so expressive.
What People Always Want to Know
How much does a latest trendy mehndi design usually cost?
There isn’t one honest price because mehndi artists charge differently by location, occasion, coverage, and detail. Ask for a quote before the appointment and show your reference image. A written quote should explain whether the price covers one hand, both hands, feet, travel, or event time.
– Hand coverage – Bridal or guest application – Local or traveling artist – Detail level and appointment length
Are latest trendy mehndi designs a good idea for a first application?
Yes, especially if you begin with a small palm motif, finger pattern, or wrist vine. Mehndi is temporary, so you can test a placement before choosing another design later. Temporary color also lets you learn whether you prefer bold Arabic trails, minimal dots, or ornate mandalas without committing to a costly appointment.
– Small wrist vine – Two-finger pattern – Open-palm paisley – Compact mandala
How do I choose a mehndi artist?
Look for clear portfolio examples showing fresh paste and the final stain. Check whether the artist uses natural ingredients, clean cones, and careful skin preparation.
A consistent portfolio matters more than a large follower count. You’ll want someone whose line control matches the style you’re requesting and the value you expect.
– Natural henna examples – Clean application photos – Traditional style experience – Clear hygiene practices
How long does a latest trendy mehndi design take to dry?
Plan for about 1 to 2 hours of drying before you disturb the paste. The color usually deepens on the second day, so fresh paste won’t show the final reddish-brown result immediately. Patient drying gives your design a stronger, more even stain.
– Firm, matte surface – Minimal rubbing – Deeper second-day color – Gradual fading afterward
How long does the stain last?
A mehndi stain usually remains visible for about 1 to 3 weeks, depending on washing, skin, placement, and daily wear. Hands and feet may fade at different speeds because they’re used and washed so often. Natural fading is expected, not a sign that your design failed.
– Darker first week – Softer edges later – Faster fading on frequently washed areas – Lighter final traces
What’s the best placement for latest trendy mehndi designs?
The palm gives you room for mandalas and bold Arabic compositions, while the wrist suits flowing vines and delicate trails. Fingers are excellent for crisp, minimal details. Your placement choice should match the amount of detail you want and how often that area gets washed.
– Palm for a central motif – Wrist for movement – Fingers for small patterns – Feet for ornate symmetry
For more placement ideas, compare latest new bridal mehndi designs with smaller compositions. The best choice is the one that fits your occasion, budget, and comfort.
Where I’d Start First
If I had to pick one step, I’d start with the wrist vine. It gives your hand movement without demanding a crowded pattern, and a few clean leaves still look expressive after the stain softens. Save your favorite reference from simple latest simple mehndi designs, prepare one cone, and let the design breathe.
One clear motif, a realistic drying window, and a sensible budget are enough. The result can be delicate, daring, and deeply personal!