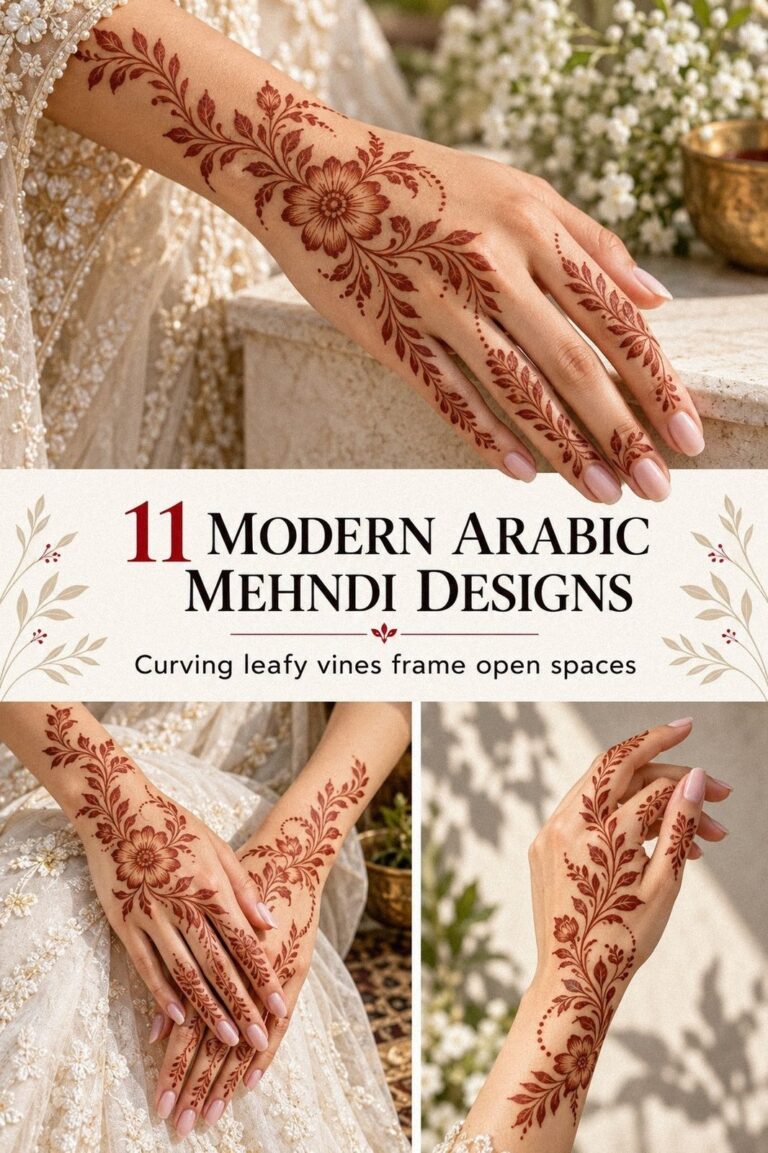
Easy new bridal mehndi designs can look striking without covering every inch of your hands. I once chose a crowded pattern that blurred into one reddish-brown block by the second day, so now I leave breathing room, test the cone, and plan around the occasion. These ideas keep the result delicate, personal, and easy to admire!
Easy New Bridal Mehndi Designs With Finger Details
Finger details give you a crisp bridal pattern without making the whole hand feel busy. Ask your mehndi artist for slim bands, tiny dots, and curved trails that follow each finger naturally. You’ll get definition around the fingertips while your palm still has open space.
A fine henna cone makes the difference here. Your artist can draw small scallops, little leaves, and one repeating paisley shape across the fingers, then leave the back of your hand mostly clear. I’d skip heavy filled fingertips if you want an understated finish, because thick paste can make delicate details look crowded once the color deepens.
For your sangeet, this placement feels stylish and easy to show in photographs. A ring stack, bangles, or a simple floral bracelet won’t compete with it. You can also carry the pattern slightly onto the wrist for a more graceful transition.
– Slim finger bands – Tiny dots between joints – One open paisley – Soft wrist trail – Reddish-brown paste with a warm brown-red stain
If you’re comparing simple layouts, browse these simple new bridal mehndi designs before choosing your final direction. You’ll notice how much difference one empty patch can make!
Latest Easy New Bridal Mehndi Designs For Full Hands
Full-hand mehndi doesn’t have to look heavy. This intricate idea uses repeated arches, small petals, and open channels so both hands feel complete while the reddish-brown design remains readable. You’ll want the palm centers to echo each other, but they don’t need to be exact copies.
Ask for a floral jaal across the palms, with lighter detail toward the wrists and fingers. I prefer a slightly uneven arrangement because handmade paste should retain a personal quality. Perfectly mirrored hands can look stiff, while tiny variations make the finished pattern feel more expressive.
Keep the bridal story visible with a small procession, veil shape, or symbolic couple motif inside one palm. Your artist can balance that focal point with leaves on the other hand. It’s a meaningful choice when you want the design to say something specific without filling every gap.
The paste should dry before you cover your hands. Leave it for about 1 to 2 hours, then remove it gently rather than washing it away. Your color often darkens on the second day, so don’t judge the finished depth too early.
If you want more coverage examples, save these easy full hand mehndi designs. You’ll see how broad palm coverage can still look elegant when the spacing is planned.
Easy New Bridal Mehndi Designs With Arabic Trails
Arabic trails are a flowing choice when you want the eye to travel from your palm toward your wrist. This version uses large leaves, open florals, and curved stems instead of dense repeated filling. You’ll get a bold shape with less paste overall.
Your artist can begin with one bold floral vine near the side of your palm, then extend it diagonally toward the wrist. I’d avoid placing several equal-sized flowers in a straight row, because the design loses movement. One dominant flower and two smaller blooms create a more dynamic rhythm.
The open spaces make this style especially modern for a sangeet. Gold bangles can sit above the wrist trail, while a deep red outfit gives the brown-red stain a rich contrast. You can also add a few sharp leaf tips if you prefer an edgy finish.
– One large flower – Three curved leaves – Small dot clusters – Open palm gaps – A slim cotton swab for cleaning stray paste
You might pair this idea with easy stylish mehndi designs for front hand. That collection can help you compare a diagonal trail with a centered palm arrangement, so you’ll choose based on your hand shape. That movement matters!
Easy New Bridal Mehndi Designs For Minimalist Brides
Minimalist bridal mehndi works best when every mark has a job. Choose a minimal design with one central flower, two finger accents, and a narrow wrist band. You’ll still look bridal, but your hands won’t disappear beneath layers of paste.
A single mandala flower can anchor the palm without making the pattern feel ornate. Add four or five curved petals, a few dots, and one slim paisley near the thumb. I’d skip random filler marks here.
They may seem harmless, but they can interrupt the clean, understated rhythm you’re trying to keep.
This style suits you if your outfit already carries strong embroidery, sparkle, or layered jewelry. The mehndi becomes a quiet counterpoint instead of another loud detail. It’s sleek and polished, and it’s easy to photograph from several angles.
For a personal touch, use your initials, a small date, or a tiny symbol meaningful to your relationship. Keep it simple enough that the shape remains readable after the stain develops. A wooden mixing stick can help a home artist test small dots before committing to the final placement.
If you want a simpler starting point, compare these easy very simple mehndi designs. You’ll find options that keep the composition delicate without making it feel unfinished.
Latest Easy New Bridal Mehndi Designs With Floral Motifs
Floral mehndi on the feet and ankles feels romantic and ceremonial, especially with open-toe sandals or a traditional bridal hem. This design uses flowers across the top of the foot, then lets the pattern narrow as it reaches the ankle.
Ask for small rose motifs mixed with leafy curls rather than one oversized flower. The smaller shapes can follow the natural width of your foot, while a narrow ankle trail gives the whole design a graceful finish. I’d avoid placing the densest paste directly beneath a strap, because friction can disturb the pattern while it sets.
Your artist can leave the toes mostly clear or add tiny bands across two toes. That choice keeps the look feminine without turning it into a solid block. If you’ll be walking between ceremonies, plan the application early enough for the paste to dry undisturbed.
Feet need patience. Keep them away from water while the natural henna paste is setting, and use a loose wrap only if your artist recommends it. Once the dry paste flakes away, the color should deepen into a vibrant brown-red over the next day.
For more floral direction, look through these simple bridal mehndi designs. You’ll find ways to coordinate hand and foot motifs without making them identical.
Easy New Bridal Mehndi Designs For Back Hands
Back-hand mehndi can look fierce when the main shape follows the length of the forearm. This idea uses one large central flower, framed leaves, and narrow finger bands. You’ll get a long, elegant composition that photographs well when your hands are held together.
A peacock feather motif works beautifully along the forearm because its curved eye gives the design a clear focal point. I’d place the widest part near the back of the hand, then taper the detail toward the elbow. That arrangement feels powerful without needing a dense fill.
Your artist can use thicker paste for the main outline and lighter strokes for the small leaves. The contrast adds depth while keeping the result refined. On deeper skin tones, reddish-brown paste can create a rich contrast after the color settles.
Don’t crowd the knuckles. Leave a little breathing room around each joint so you can move comfortably during the sangeet. A small plastic cone with a narrow opening gives better control for those curved edges and tiny dots.
If you like peacock symbolism, compare these easy peacock mehndi designs. You’ll see how the feather can act as a centerpiece rather than a repeated filler shape.
Easy New Bridal Mehndi Designs With Mandala Centers
A mandala center gives your palm a sacred focal point, but it doesn’t need to become a dense circle. Choose two or three rings of petals, then surround them with curved leaves and open dots. You’ll get a balanced shape that feels finished from the center outward.
The best round mandala has clear spacing between each ring. Your artist can vary the petal size slightly so the design feels handmade instead of mechanically repeated. I’d avoid packing dark paste into every center, because too much solid color can overwhelm the graceful geometry.
This placement feels timeless for bridal mehndi. It works with a traditional red outfit, a pastel sangeet look, or a modern ivory ensemble. Add tiny symbolic details inside the outer ring if you want the design to carry a personal story.
For both palms, ask whether the mandalas should match or mirror one another. Matching centers feel classic; mirrored centers can create a more playful visual when your hands meet. Either choice will look intentional if the outer spacing stays consistent.
You can compare this layout with simple mehndi designs front hand easy. Your eye will quickly notice whether you prefer one central focal point or a wider trail across the palm.
Latest Easy New Bridal Mehndi Designs With Bold Lines
Bold lines create a dramatic bridal pattern that stays visible from a distance. This idea uses broad leaves, thick borders, and open palm areas instead of many tiny details. You’ll get a stronger silhouette, especially in group photographs.
Ask for thick floral outlines around the main shapes, then keep the interior lightly decorated. That contrast makes the design readable while the paste is still fresh and after the color darkens. I’d skip filling every flower solid, because the result can become visually heavy.
This look feels daring on both hands, particularly when the wrists carry matching cuffs. You can soften the boldness with tiny dots, narrow arches, or one delicate vine crossing the palm. The mix of strong and light marks gives your hands a more expressive rhythm.
For the boldest effect, have your artist repeat one shape across both palms. A row of pointed leaves, for example, can connect the two sides when you bring your hands together. Use a fine-tip cone for the small finishing details.
If you’re drawn to Pakistani-inspired structure, browse these easy Pakistani mehndi designs. You’ll find fuller patterns that still use clear borders and purposeful spacing.
Easy New Bridal Mehndi Designs For Feet
Feet can carry a delicate design when the pattern follows the ankle instead of spreading randomly across the top. Choose a small central flower, curved vines, and two or three bands around the ankle. You’ll get a neat composition that works with bridal sandals.
A leafy ankle bracelet gives your feet a polished outline while leaving the toes lighter. I’d keep the central foot motif slightly above the widest point, where it’s easier to see when your hem lifts. That placement also creates a more understated look than full coverage.
Your artist can coordinate the feet with your hands through one repeated symbol. A repeated paisley on the palm and another near the ankle is enough to make the designs feel related. You don’t need identical flowers everywhere, and the contrast can look more whimsical.
Remember that feet touch the ground, footwear, and fabric. Give the paste enough time to set before putting on tight shoes, and choose loose sandals for the ceremony when possible. A soft tissue wrap may protect the surface briefly, but follow your artist’s instructions.
If you want more open foot layouts, save the simple bridal mehndi designs collection. You’ll find graceful examples that keep the ankle visible instead of burying it.
Easy New Bridal Mehndi Designs With Personalized Symbols
Personal symbols turn a familiar bridal pattern into something meaningful. Add a shared initial, a tiny moon, a date, or a symbol from your family tradition. You’ll want the detail to remain small enough that it supports the design rather than taking over the palm.
Place the shared initial inside a paisley, between two flowers, or near the wrist. I’d avoid squeezing several symbols into one tiny area, because the paste may blur as it dries and the color deepens. One clear mark usually feels more powerful than a crowded collection.
You can also include a subtle reference to your sangeet, such as a musical note, a dhol shape, or a tiny dancing figure. Keep the surrounding details whimsical and open so the symbol remains readable in photographs. Your artist can sketch the idea on paper first.
Ask your artist to explain how much space the symbol needs. A meaningful design shouldn’t become so tiny that you can’t recognize it later that day. Use a thin bamboo applicator for testing the shape, then approve the final version before paste is applied.
For more motif inspiration, explore these easy new bridal mehndi designs for hands. You’ll see how personal details can sit naturally inside a larger ornate composition.
Latest Easy New Bridal Mehndi Designs With Fine Linework
Fine trails can create an ethereal bridal finish when they’re supported by a few stronger shapes. This design uses narrow vines, tiny petals, and open spaces across the feet and ankles. You’ll get a light pattern that still feels special for the ceremony.
Ask for fine floral trails that curve with the ankle rather than crossing it in stiff lines. Your artist can use small dots to soften the transitions and a slightly wider outline around the main flower. I’d avoid making every mark equally thin, because contrast helps the design stay crisp.
The result can feel vintage and elegant with traditional footwear, or more modern with simple sandals. You’ll want to protect the paste while it dries, since smudged details can change the shape of the whole trail. Plan the appointment when you won’t need to walk around.
For this style, the color matters. Fresh paste looks greenish or nearly black in places, then develops into a warmer brown-red shade. It often deepens on the second day and usually fades over one to three weeks, depending on contact, washing, and skin.
If you’re comparing fine details with fuller layouts, browse these latest easy new bridal mehndi designs. You’ll be able to decide whether your final look should feel subtle or more ornate.
How Much Should Bridal Mehndi Cost?
Your bridal mehndi budget depends on coverage, detail, location, travel, and the artist’s experience. Before you book, ask whether the quoted price covers both hands, both feet, the cone, travel, and the full appointment. A clear estimate makes it easier to judge the value.
Here’s a practical starting point for typical pricing:
These figures are planning ranges, not fixed prices. A minimalist application may be worth it when your outfit and jewelry already carry strong detail, while fuller coverage can offer better value if you want the mehndi to become the main visual feature.
Ask for a written price rather than relying on a vague message. Confirm the deposit, cancellation policy, travel fee, and whether a second artist is needed. Spending a little more for reliable timing can be worth it before a packed wedding schedule.
If you’re working with a tight budget, choose one expressive focal area instead of reducing every motif. A detailed palm with simpler fingers can still feel iconic, and it usually gives you more visual value than thin, rushed coverage everywhere.
What Changes for a Sangeet?
A sangeet usually involves movement, dancing, jewelry, and several outfit changes, so your mehndi needs to remain readable and comfortable. A sangeet ceremony is a strong reason to keep the wrist and knuckles flexible rather than covering every joint.
Ask your artist whether a lemon-sugar sealant suits the paste recipe. The lemon-sugar sealant can help dry details stay attached, but it should be applied carefully and only according to the artist’s method. Too much moisture can make fine lines run.
Think about your bangles, sleeves, and footwear before choosing placement. A bold back-hand design may show beautifully during dancing, while an open palm motif keeps the center visible when you hold your hands together. That timing is worth it!
If you’ll be performing, choose a pattern that won’t be rubbed repeatedly during rehearsals. Wedding bangles can catch fresh paste, and tight shoes can disturb foot details. Apply early enough that the surface has dried before you start getting dressed.
You can also keep one hand slightly more detailed than the other if your outfit has an asymmetrical sleeve or statement accessory. That small contrast feels fierce and intentional without making the two hands compete.
A Practical Mehndi Timing Guide
The most honest way to plan bridal mehndi is to treat drying and color development as part of the design. Fresh paste won’t show the final shade immediately, so schedule your application with the ceremony and photographs in mind. You’ll get a more polished result when you leave enough time for the paste to set.
I’ve learned that rushing this part is the easiest way to lose the delicate details you paid attention to. Keep your hands relaxed, avoid water while the dry paste is setting, and ask your artist whether a lemon-sugar sealant suits the recipe. Your goal is a clean stain, not a thicker layer of paste.
For an occasion like a sangeet, you can choose a charming finger pattern if you need a quicker application, or reserve fuller palms for a longer appointment. Both can look bridal when your artist understands spacing, contrast, and the way the pattern will read after color develops.
Why does bridal mehndi keep returning in fresh forms?
Bridal mehndi stays iconic because the tradition allows personal interpretation. Artists can use paisleys, mandalas, Arabic trails, peacocks, floral jaal, or family symbols while keeping the ritual recognizable. You’ll see lighter layouts gaining attention because they suit modern outfits and let jewelry remain visible.
The strongest direction is personal rather than trend-chasing. I’d choose a motif you can explain, a placement you’ll enjoy seeing, and a level of coverage that fits your event. Your design should feel connected to the celebration, not copied from a random reference.
The biggest mistake is assuming more paste means more bridal impact. A bold focal point with open space can photograph better than a dense palm, especially under bright event lighting. You’ll notice the details more clearly when the artist gives each shape room to breathe.
If you’re still comparing styles, start with simple new bridal mehndi designs, then narrow your choice by placement. That process keeps the decision understated and practical.
Hands, Feet, or Both: Which Coverage Is Worth It?
Choosing coverage is partly a style decision and partly a budget decision. Hands usually receive the most attention during greetings and ceremonies, while feet can create a more traditional, romantic finish when sandals or a raised hem reveal them.
If you want stronger value, start with both hands and add feet only if the extra cost fits comfortably. A focused hand design can feel more elegant than a rushed full-body plan, especially when the artist has enough time for clean curves and controlled dots.
Hands and feet do not need to match exactly. Repeat one paisley, flower, or leaf shape, then let the placement change. This gives the set a flowing relationship without forcing identical patterns onto different surfaces.
Consider comfort too. Fresh paste on the feet can make walking difficult, while hand paste may interfere with dressing, eating, or phone use. Ask your artist to schedule the most detailed area first and leave the simplest area for the end.
For a clear comparison, browse easy full hand mehndi designs and note which coverage level feels realistic for your event.
The Motifs I’d Ask For by Name
When you meet your artist, specific motif names make the conversation easier. I’d bring a short list: paisley, peacock, mandala, leafy vine, floral jaal, scalloped arch, and fine dot clusters.
A paisley can feel classic when it is repeated along the wrist, or more playful when it becomes a small finger detail. Ask whether the artist can change its size so the motif follows your hand instead of looking stamped into place.
Peacock details create a graceful focal point, especially on the back of the hand. A curved feather eye gives the artist a clear center, while smaller leaves can taper toward the wrist without making the composition feel heavy.
A floral jaal brings fuller coverage, but it doesn’t have to become a solid field of paste. Ask for open channels between the flowers so the stain remains readable after it darkens.
A mandala works best when the rings are spaced with intention. You can make it sacred, personal, or symbolic by adding a tiny initial, date, or family mark inside the outer circle.
For more motif combinations, compare easy new bridal mehndi designs for hands before your appointment.
When Should the Cone Touch Your Skin?
The henna cone should touch your skin only after you’ve settled the design, placement, timing, and ingredients. Last-minute decisions often lead to crowded palms or details that do not suit your jewelry and clothing.
Ask to see the artist’s recent work and confirm that the paste is fresh and naturally prepared. You can request a small test mark if you’re unsure how the paste behaves or how quickly it dries on your skin.
A small patch test is sensible if you’ve never used that particular paste. Stop if you notice itching, burning, swelling, or unusual irritation. Natural henna should stain the skin gradually rather than create an immediate harsh reaction.
If your artist uses essential oils, ask which ones and how much. Eucalyptus oil is sometimes included in henna recipes, but the artist should know the formula and explain it clearly.
Keep your appointment length realistic. A simple pattern may take under an hour, while intricate bridal hands can take several hours. Paying for enough time protects the final result and gives your artist room to work calmly.
My Honest Take on Choosing Easy Bridal Mehndi
I’ve changed my mind about what makes bridal mehndi memorable. I used to believe a fuller design automatically looked more special, so I asked for layers of flowers, bands, dots, and tiny figures all at once.
The result was ornate, but my eyes couldn’t find the main idea. Now I’d choose one strong motif, two supporting details, and generous open space every time.
The best designs aren’t necessarily the most complicated ones. A clean mandala can feel more timeless than a crowded palm, while one Arabic trail may look more elegant than matching blocks on both hands. You’ll make a better choice if you judge the pattern from several angles, not only from a flat reference.
I also think brides should ask practical questions before the cone touches the skin. How long will the paste dry?
When will the color deepen? Which areas will rub against clothing or footwear?
Is the artist comfortable drawing the specific floral motif you chose? Those questions aren’t fussy.
They protect the final result.
If your outfit is heavily embroidered, I’d lean toward a minimal palm and expressive fingers. If your clothing is simpler, a full-hand pattern can provide the visual richness. You’ll know the balance is right when the mehndi supports your look instead of competing with it.
One more thing: don’t copy a design simply because it photographs well on someone else. Hand shape, finger length, skin tone, and event timing all affect the result. A personalized paisley adapted to your hand will look more convincing than an exact copy that doesn’t fit your proportions.
You can use easy stylish mehndi designs for front hand to compare the feeling of different layouts. Save two or three references, show them to your artist, and let the final pattern become your own. That’s where the expressive quality comes from!
The Questions I Get Asked Most
How much does easy new bridal mehndi usually cost?
The price varies by artist, region, coverage, travel, and the amount of detail you request. Ask for a written quote that explains both hands, feet, travel, and appointment time. A clear price breakdown helps you compare artists without guessing.
Where can I find a mehndi artist for a sangeet?
Look for an artist with recent bridal examples, clean paste work, and experience with your preferred motifs. Ask friends, wedding planners, or local cultural groups for recommendations. A reliable portfolio should show different hand shapes and both fresh paste and developed color.
How long should bridal mehndi paste stay on?
Let the paste dry for about 1 to 2 hours, or follow your artist’s specific instructions. Keep the surface away from water while it sets, then remove the dry paste gently. The color often deepens on the second day.
How long does bridal mehndi last?
A typical stain lasts about one to three weeks, depending on washing, friction, placement, and your skin. Palms often develop a deeper color, while areas exposed to frequent contact may fade sooner. Gentle care helps preserve the pattern.
Can I apply these designs at home?
Yes, you can practice simple motifs at home with a fresh natural henna cone and paper first. Test your pressure, dot size, and paste flow before working on your hands. For a wedding, an experienced artist usually gives you more consistent spacing and timing.
Which placement is best for an easy bridal design?
Finger details, back hands, open palms, and ankle trails are all practical choices. Choose based on visibility, ceremony timing, and how much coverage you want. A back-hand trail photographs clearly, while a palm mandala gives you a stronger traditional focal point.
For more hand-focused examples, compare easy full hand mehndi designs and easy very simple mehndi designs. You’ll quickly see which coverage level feels right for your event.
Where I’d Start First
If I had to pick one, I’d start with finger details and one open mandala. It gives your hands a clear focal point without hiding your jewelry, and the spacing stays readable as the color deepens. Save the idea for later and compare it with these simple bridal mehndi designs before your sangeet.
That combination feels vibrant, personal, and manageable on a real wedding schedule. Start there!