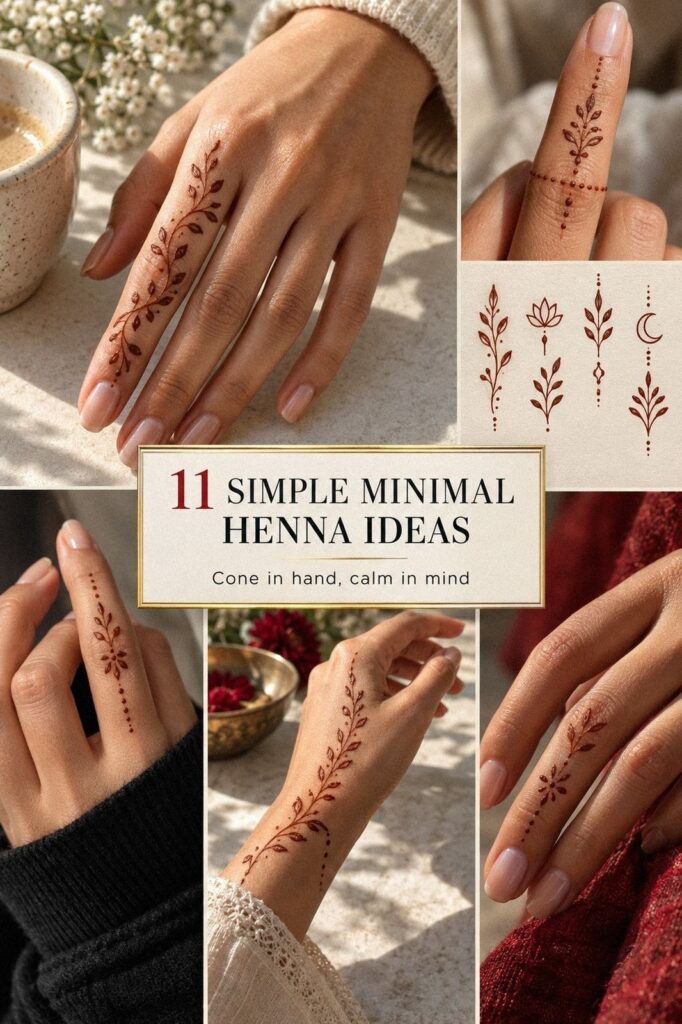
Simple minimal henna designs work best when the line, placement, and meaning are decided before the paste touches your skin. I once chose a pattern that was too dense for my fingers, and it blurred into visual noise. These ideas keep the detail delicate, personal, and easy to test in one sitting. Start small!
My one rule is simple: choose a shape you’ll still recognize when tiny details soften. A fine henna cone can create an intricate result, but your spacing matters more than the number of marks. You’re testing movement, comfort, and meaning before you spend money on a fresh application.
Quick answer: the most comfortable option is usually an open design on the outer forearm, shoulder, or upper thigh. Hands, fingers, ribs, feet, and the sternum can require more patience because the skin moves and receives more friction. You can browse these simple henna designs before narrowing your sketch.
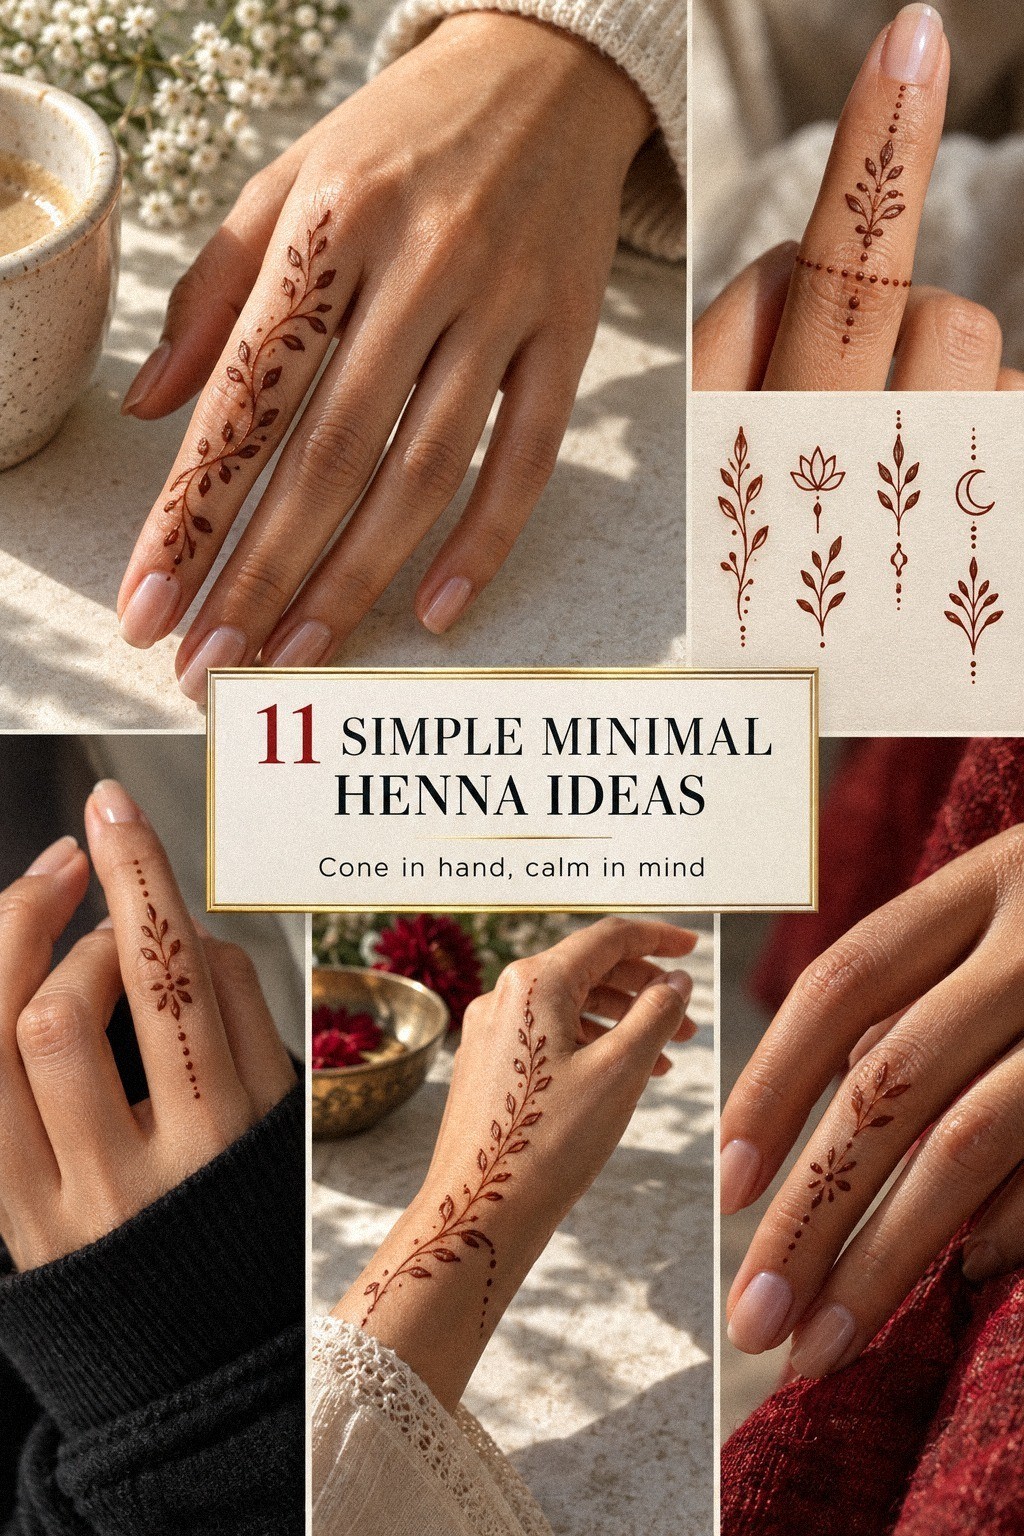
- Single-Finger Minimal Henna Vines
- Delicate Wrist Cuff Henna Designs
- Simple Geometric Palm Henna Patterns
- Tiny Henna Flowers Along Knuckles
- Minimal Arabic Henna Hand Lines
- Latest Negative-Space Henna Finger Designs
- Simple Henna Mandala Centerpieces
- Fine-Line Henna Anklet Patterns
- Minimal Henna Initials On Fingers
- Bold Dotwork Henna Hand Accents
- Graceful Henna Designs For Backhands
1Single-Finger Minimal Henna Vines
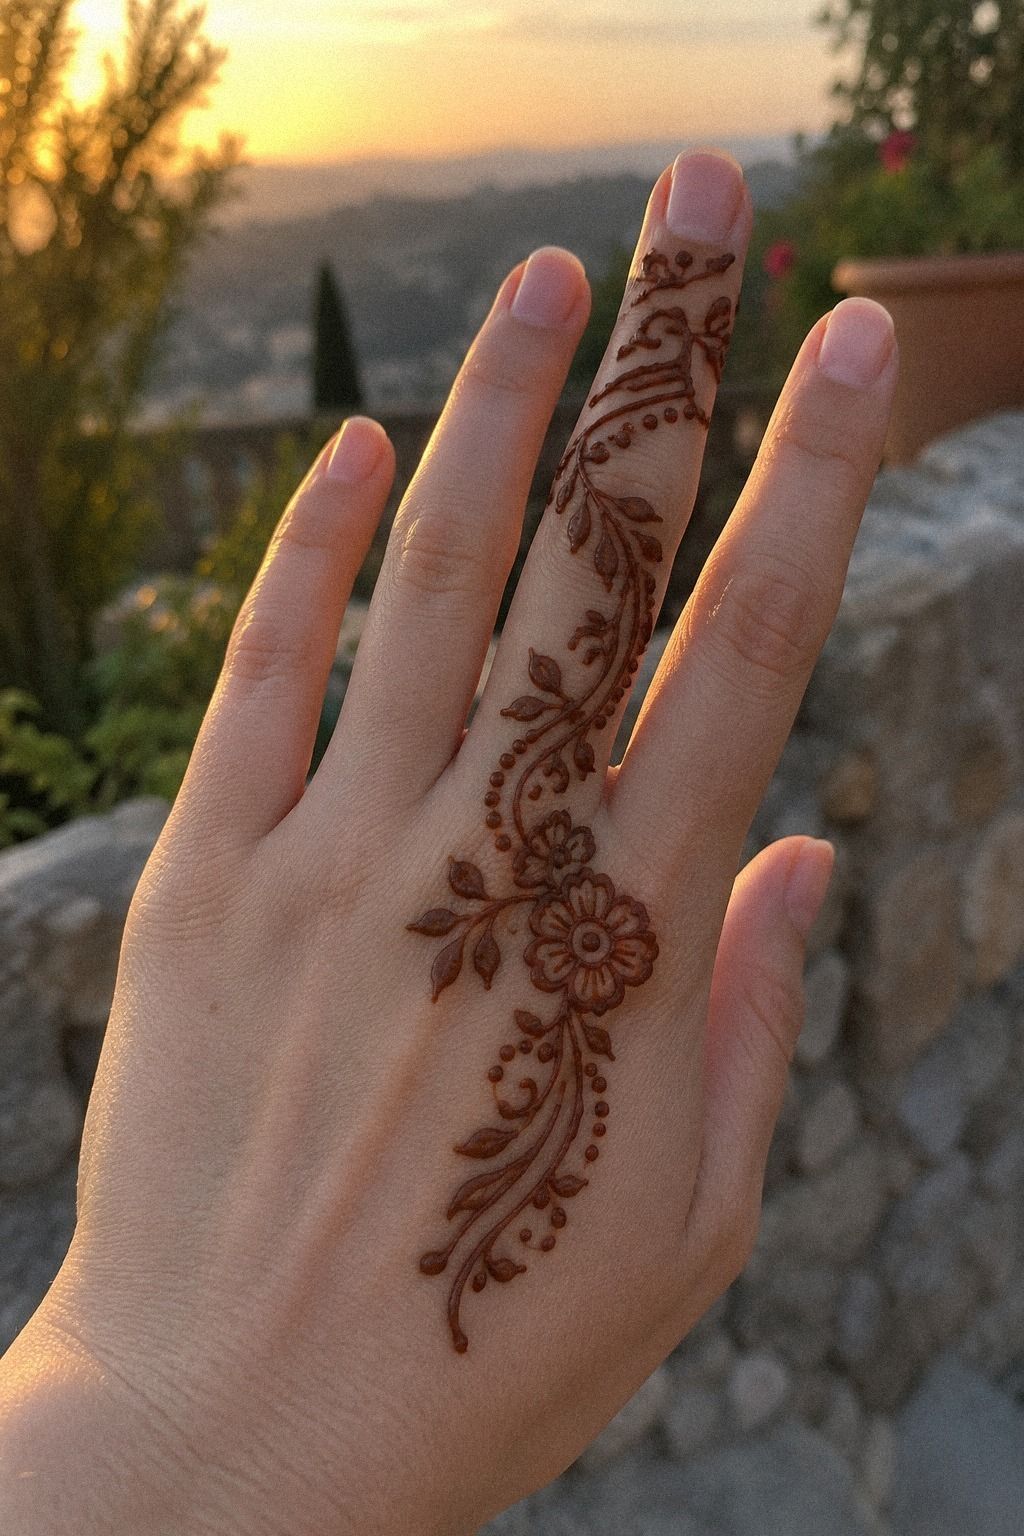
A single-finger vine gives you an intricate look without covering your whole hand. Let the stem curve from the side of the finger toward the knuckle, then stop before the line becomes crowded. Your eye should follow the movement instead of getting trapped in a dense block.
Keep the vine slightly asymmetric. A mirrored pattern can feel stiff, while a flowing line feels more expressive and personal. You’ll notice the difference if you draw both versions with washable pencil and move your hand through ordinary tasks.
Choose a narrow cone opening for crisp stems and tiny leaves. I’d use a light touch, with a few solid dots at the leaf joints. I wouldn’t fill every leaf because the open paste lines need breathing space.
Open skin helps the design stay readable while the paste dries and the stain develops. You can compare more variations through these simple henna designs. I’d also hide one tiny initial inside the curling stem if you want the pattern to feel more personal.
The finger placement is practical, but it isn’t maintenance-free. Hands face friction, washing, and sunlight every day. If you want the stain to develop evenly, keep the paste on for the recommended drying period and protect the hand friction areas afterward.
2Delicate Wrist Cuff Henna Designs
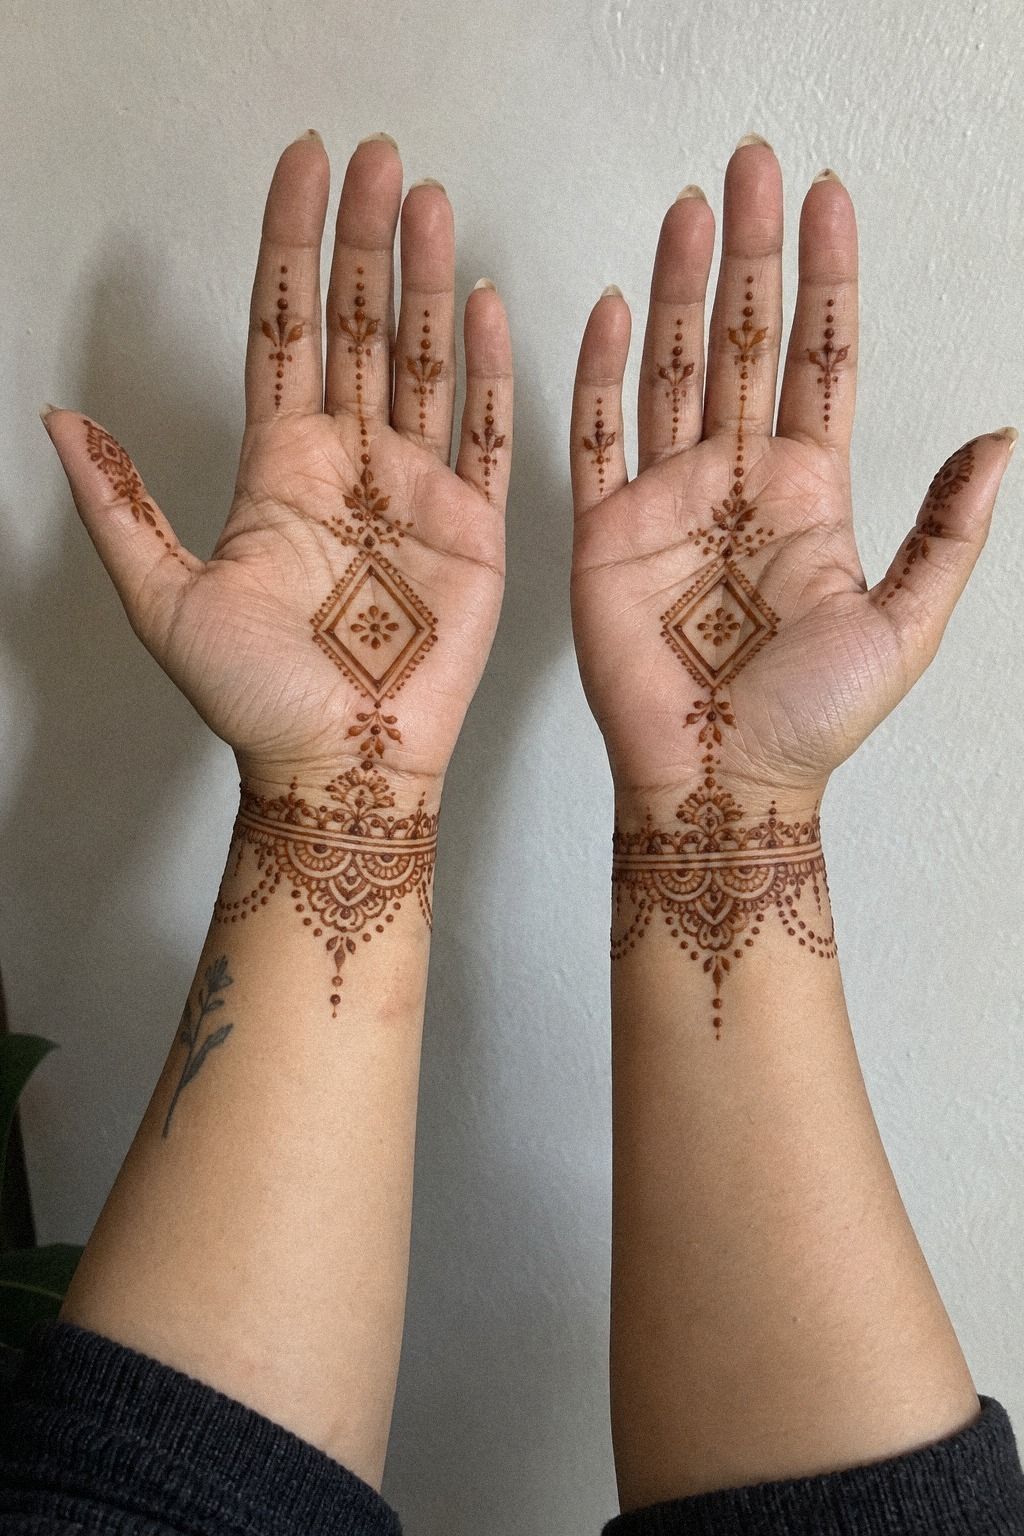
A wrist cuff gives you structure without turning the whole hand into a dense pattern. Keep the band delicate, with one graceful border and enough open skin to make the shape feel crisp.
3Simple Geometric Palm Henna Patterns
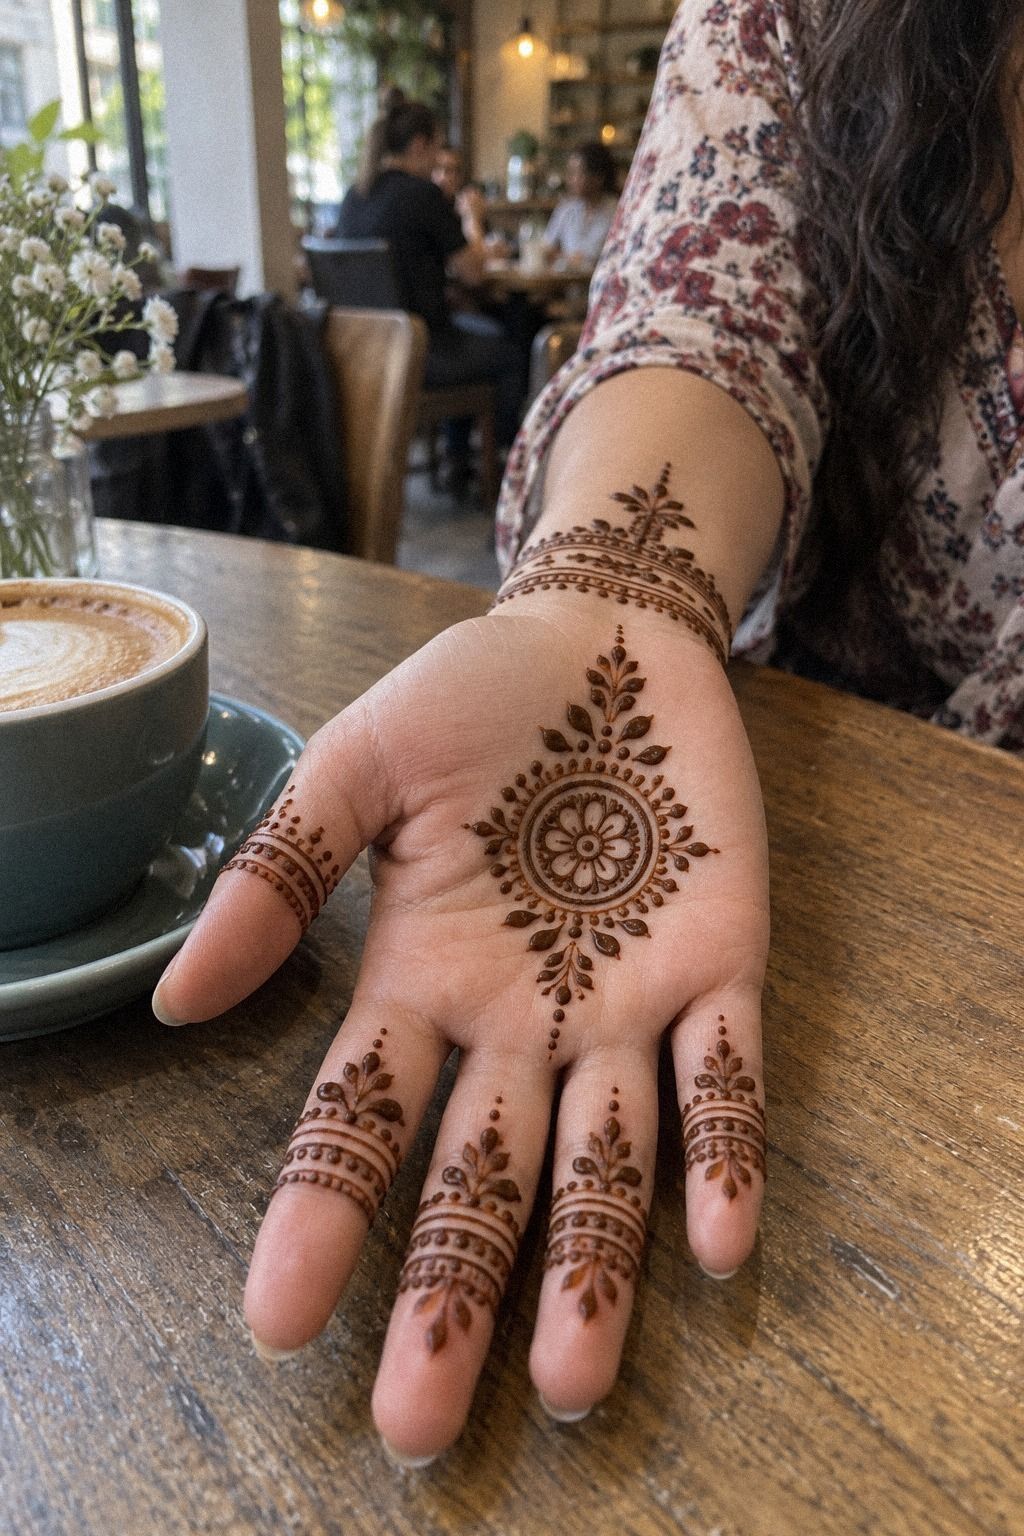
Geometric palm patterns can look powerful when the shapes stay limited. Start with one central diamond, circle, or crossing line, then build outward. You’ll create a clearer focal point when every mark has a job.
Keep the central diamond slightly smaller than your first instinct. A palm moves, grips, and creases, so a compact symbol usually stays more readable than a large, complicated grid.
Your palm moves constantly, so the pattern should be forgiving. I’d keep the thickest lines near the center and let smaller marks travel toward the wrist. The result can feel ornate without becoming visually heavy.
Use crisp geometric dots instead of extremely tiny details everywhere. Black-brown dotwork gives the design a reliable anchor while the paste sits on skin and dries.
Ask yourself whether you’d recognize the design if half the tiny dots softened during the stain’s first day. That question is useful before you commit to a higher-detail layout. If the answer is no, simplify until the central shape still feels timeless.
I’d use the simple trendy mehndi designs collection for extra layout references, then redraw the pattern in your own proportions. Copying every detail may save time, but creating your own spacing gives the final result more meaning. Your own proportions matter more than an exact copy.
4Tiny Henna Flowers Along Knuckles

Tiny flowers along the knuckles create a playful rhythm across your fingers. Let each bloom act as a separate accent instead of connecting every flower into one heavy band. Your hand will look lighter when the empty areas remain intentional.
Use precise henna lines for the petals, then add one dot at each center. I’d avoid filling every petal because open centers feel raw and keep the pattern readable while the paste dries. A precision henna cone will help you control the smallest marks.
Vary the flowers slightly in size and direction. Identical blooms can look stamped on, while small differences make the pattern feel hand-drawn. You can let two flowers lean toward the side of your hand while another sits closer to a knuckle.
Petal direction will keep the row from looking mechanical.
A bold center or one short leaf is enough to make each bloom readable. Every flower should still be visible when your fingers curl!
A micro-flower arrangement needs more than a pretty sketch. Check whether the design still reads at its actual size, especially if the flowers sit near creases or receive constant friction.
5Minimal Arabic Henna Hand Lines

Arabic-inspired lines work beautifully when they travel rather than spread. Try a graceful vine, a small paisley, or one expressive curve that leaves the palm visible.
6Latest Negative-Space Henna Finger Designs
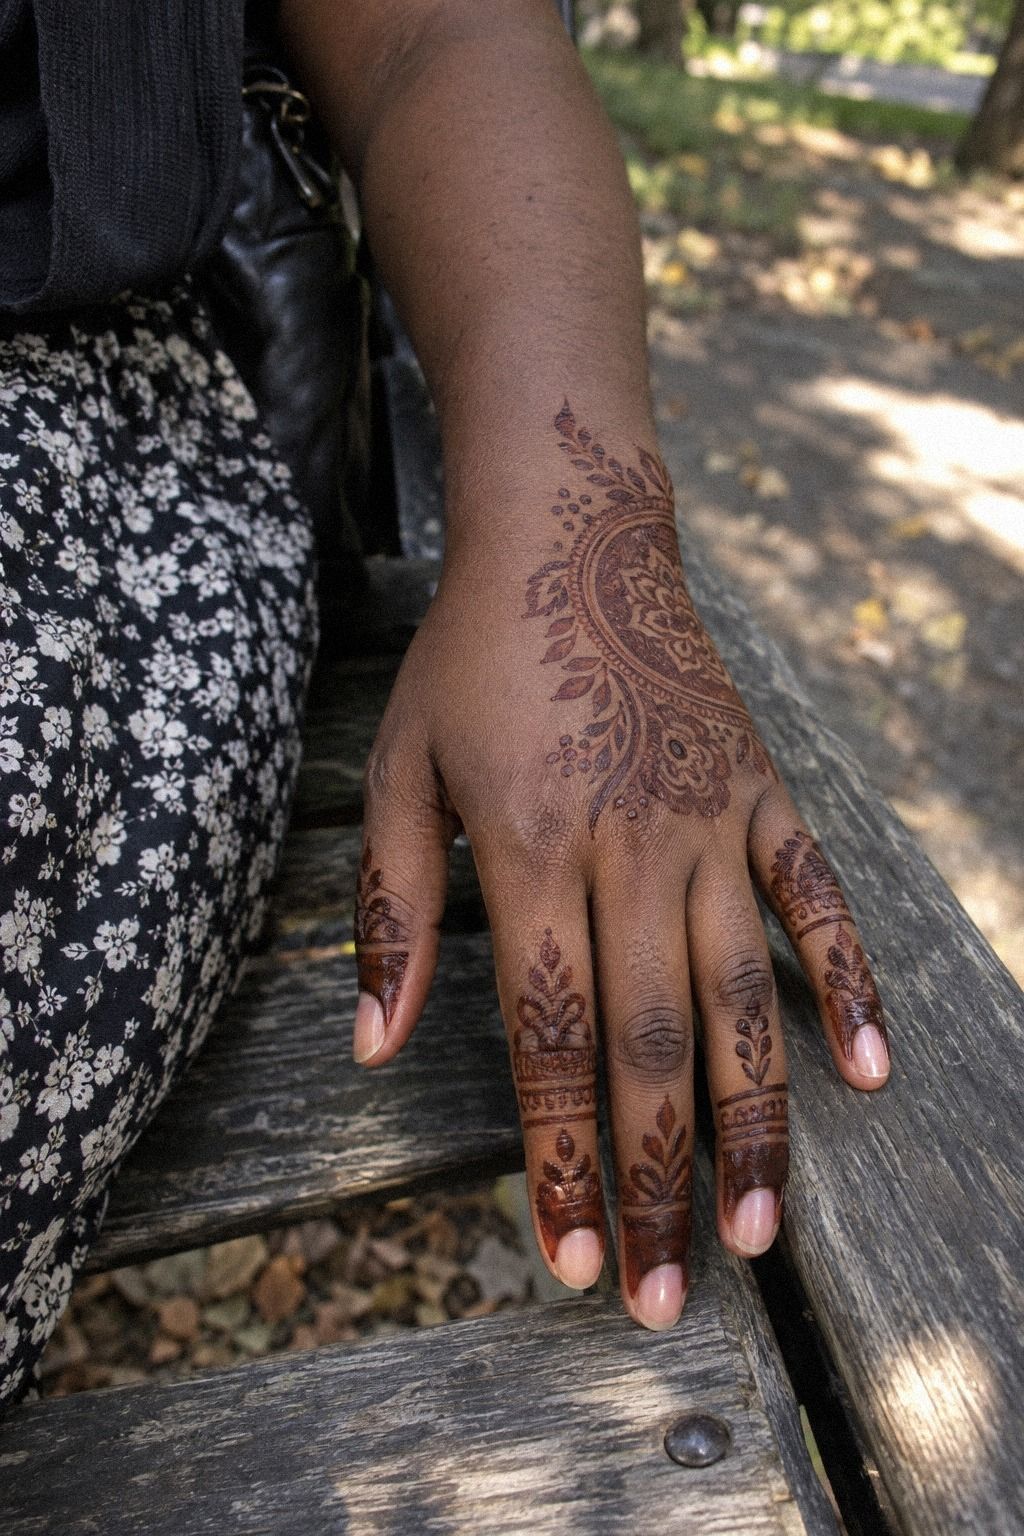
Negative space does the heavy lifting in this design. Instead of covering every area, let your skin become part of the composition. Narrow bands, open gaps, and small marks can create a striking result with very little paste.
Plan the empty spaces before you draw the filled sections. A fine-tip cone gives you control, but the gaps should be wider than the smallest detail. Negative-space patterning loses its impact when neighboring marks merge.
I’d use one strong anchor line with a few bold dots. That combination feels daring without depending on microscopic details that may blur as the stain develops. The dark paste anchor should be easy to identify from several feet away.
I’d skip a dense fingertip cap if you work with your hands. Repeated friction can make the result fade unevenly, and your budget deserves a design that has a realistic chance of looking graceful for its full one-to-three-week life. A fingertip cap is one of the least forgiving choices.
This is one of the best options if you want a small but dramatic mark. Your skin remains visible, so the pattern doesn’t feel overloaded.
Try the temporary version for a full day first. The contrast can look dramatic!
A full-day test tells you more than a quick mirror check.
You can compare additional proportions through minimalist henna designs before deciding how much of the finger should remain bare.
7Simple Henna Mandala Centerpieces

A small mandala gives the back of your hand one clear focal point. Start with a dot, then add a ring of petals around it. The structure can feel sacred without becoming overly formal or crowded.
Keep the mandala center compact enough that the outer petals remain visible. If the middle grows too large, the design can lose its balance before you add the final ring.
Your outer shapes don’t need mathematical precision. Slight variation makes the mandala feel organic. Keep the fingers lightly decorated so the center remains the first detail people notice.
Balanced dotwork petals will help with that hierarchy.
A completely filled mandala may look impressive while the paste is fresh, but tight spacing can become difficult to read once the stain settles. Open outer petals create a more elegant, understated result.
Avoid placing the largest detail directly over a knuckle. Movement can interrupt the circle, and you may find the placement less comfortable than expected. The back-of-hand placement offers room, but it can fade faster from washing and sunlight.
Compare smaller references through simple very simple mehndi designs. Then remove one ring.
The understated version is often easier to read and more affordable to apply. Open outer petals will also give the skin more visual space.
8Fine-Line Henna Anklet Patterns

An anklet pattern can be dainty without looking faint. Use a crisp chain of dots, tiny leaves, or a graceful paisley near the ankle, then leave a narrow break so the design can breathe.
9Minimal Henna Initials On Fingers
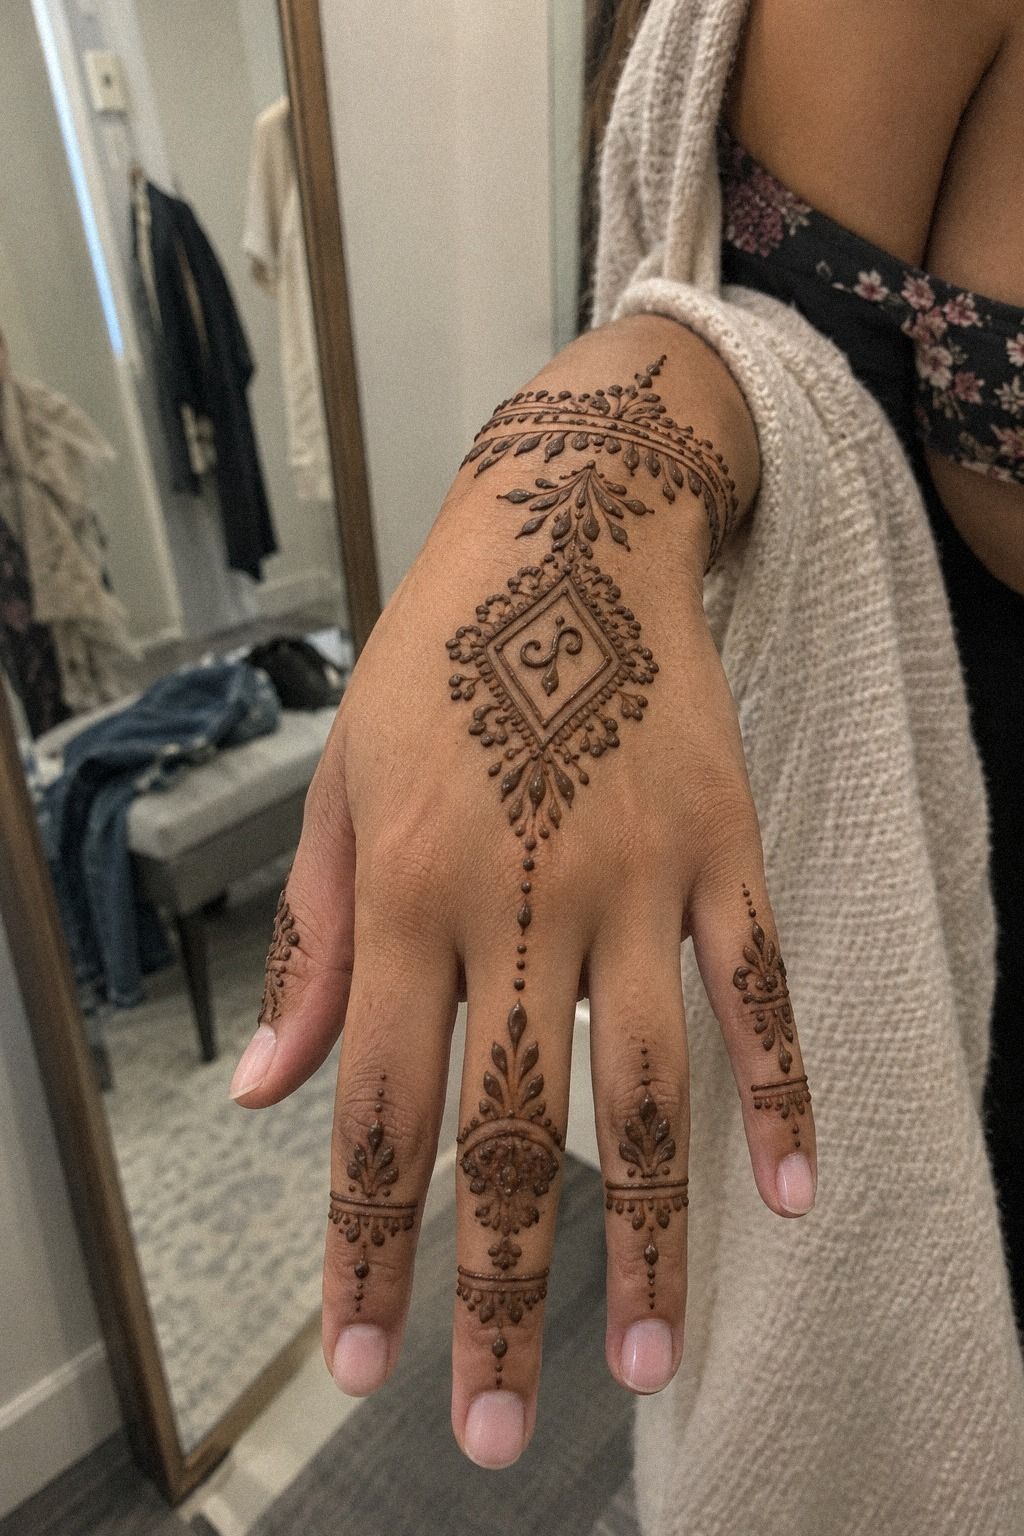
Initials make a small design feel personal without requiring a large symbol. Place one letter beside a vine, dot cluster, or tiny crescent. A symbolic initial can carry private meaning while still looking like part of the pattern.
Your first decision is whether the letter should be obvious. I prefer a graceful monogram hidden inside a leaf or curved line. If you want a clearer result, place the single initial along the side of one finger.
Choose clean monogram shapes and avoid elaborate scripts that depend on microscopic strokes. Finger designs can soften as the stain fades, so a slightly stronger outline may remain readable longer than a fragile flourish. Monogram shape matters more than decorative lettering.
I’d skip a full word in this placement. One letter has more visual strength and less clutter.
You’ll know the design is working when the initial looks like a pattern first and a message second. A finger initial needs to remain readable when your hand bends.
Test several letter shapes in washable ink-free pencil before deciding. A meaningful idea still needs a readable form, and that extra hour can protect your budget from an application you never wanted. One-letter mark designs are easy to compare at actual size.
You can study compact layouts in minimalist henna designs before adapting one letter to your own hand.
10Bold Dotwork Henna Hand Accents
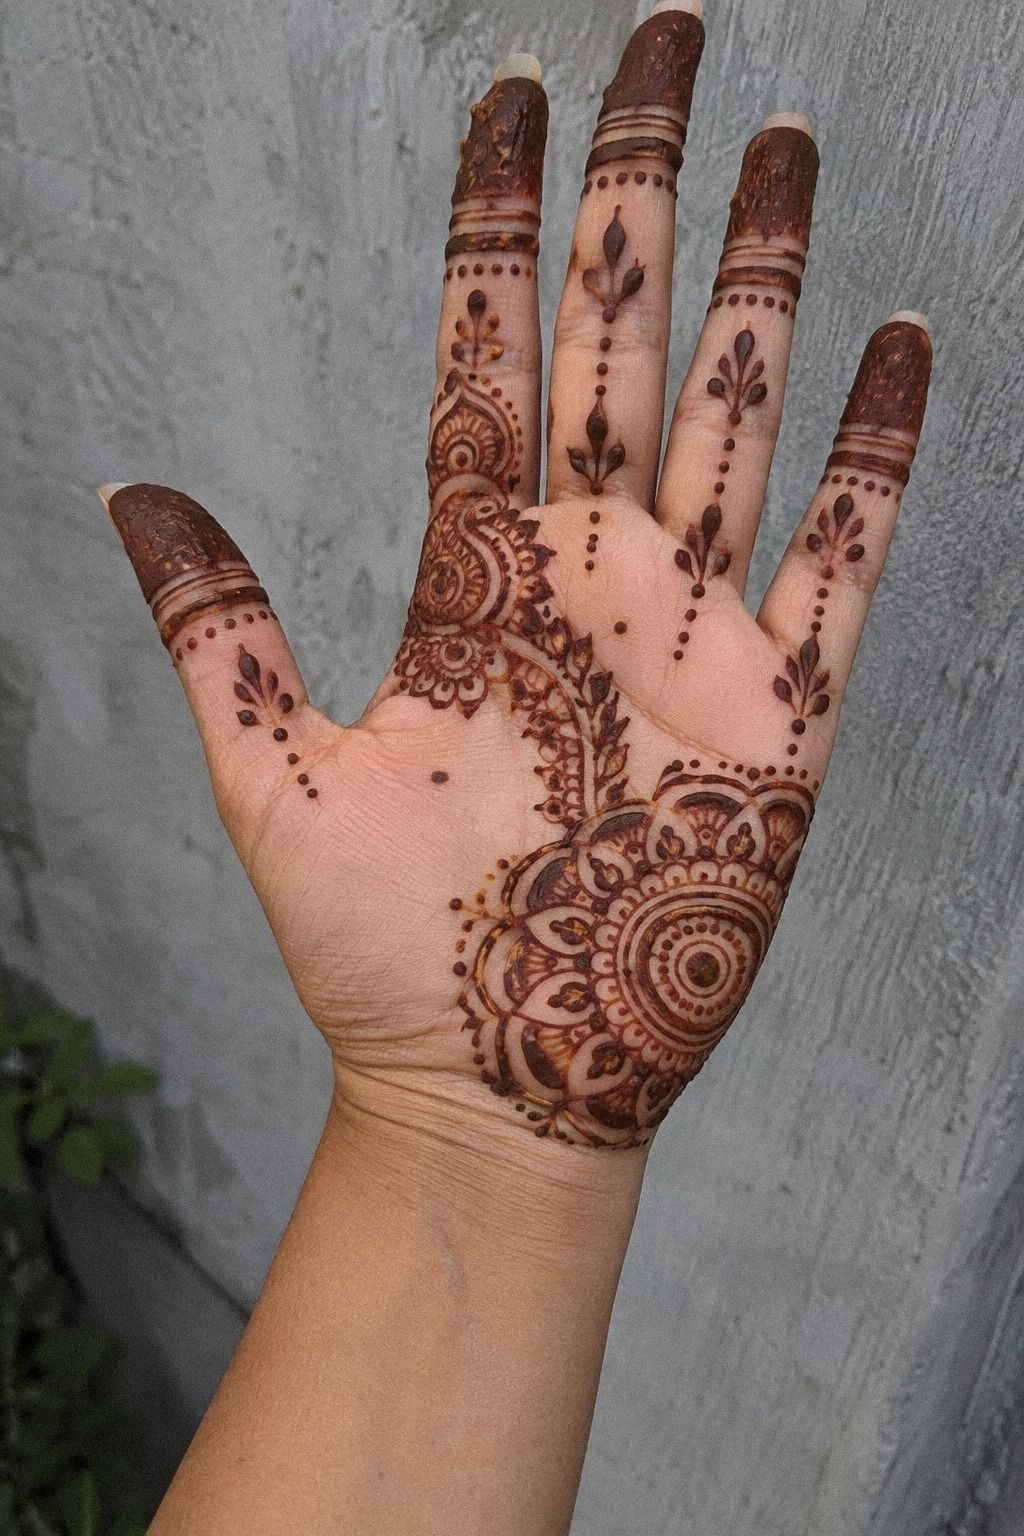
Dotwork gives a hand design texture without requiring large filled areas. Place one line of dots along a finger, then repeat the rhythm near the palm. The pattern can feel fierce even when the marks are small.
Keep the dots similar in size within each cluster. You can vary the density instead of scattering everything evenly.
I’d begin with the largest dot near the palm and taper toward the fingertips. Dot size should change gradually.
Choose warm reddish-brown paste around one simple symbol. The contrast feels edgy and polished, but the design remains minimal because the marks stay separated. A dark central symbol gives the eye somewhere to land.
Leave one or two fingers nearly bare so your eye has somewhere to rest. That contrast makes the finished design more elegant and gives your mehndi artist a clearer structure to follow. Bare fingers can make a small pattern feel more intentional.
This idea works if you want something expressive without a flower or vine. It can look masculine, feminine, or neutral depending on the spacing. Let the paste dry fully before judging the stain!
Ask to see fully developed examples if you’re comparing different paste mixtures. Fresh paste can look sharper than the reddish-brown stain that appears after removal and darkens on the second day.
For another compact direction, browse simple trendy mehndi designs and remove any marks that don’t improve the rhythm.
11Graceful Henna Designs For Backhands
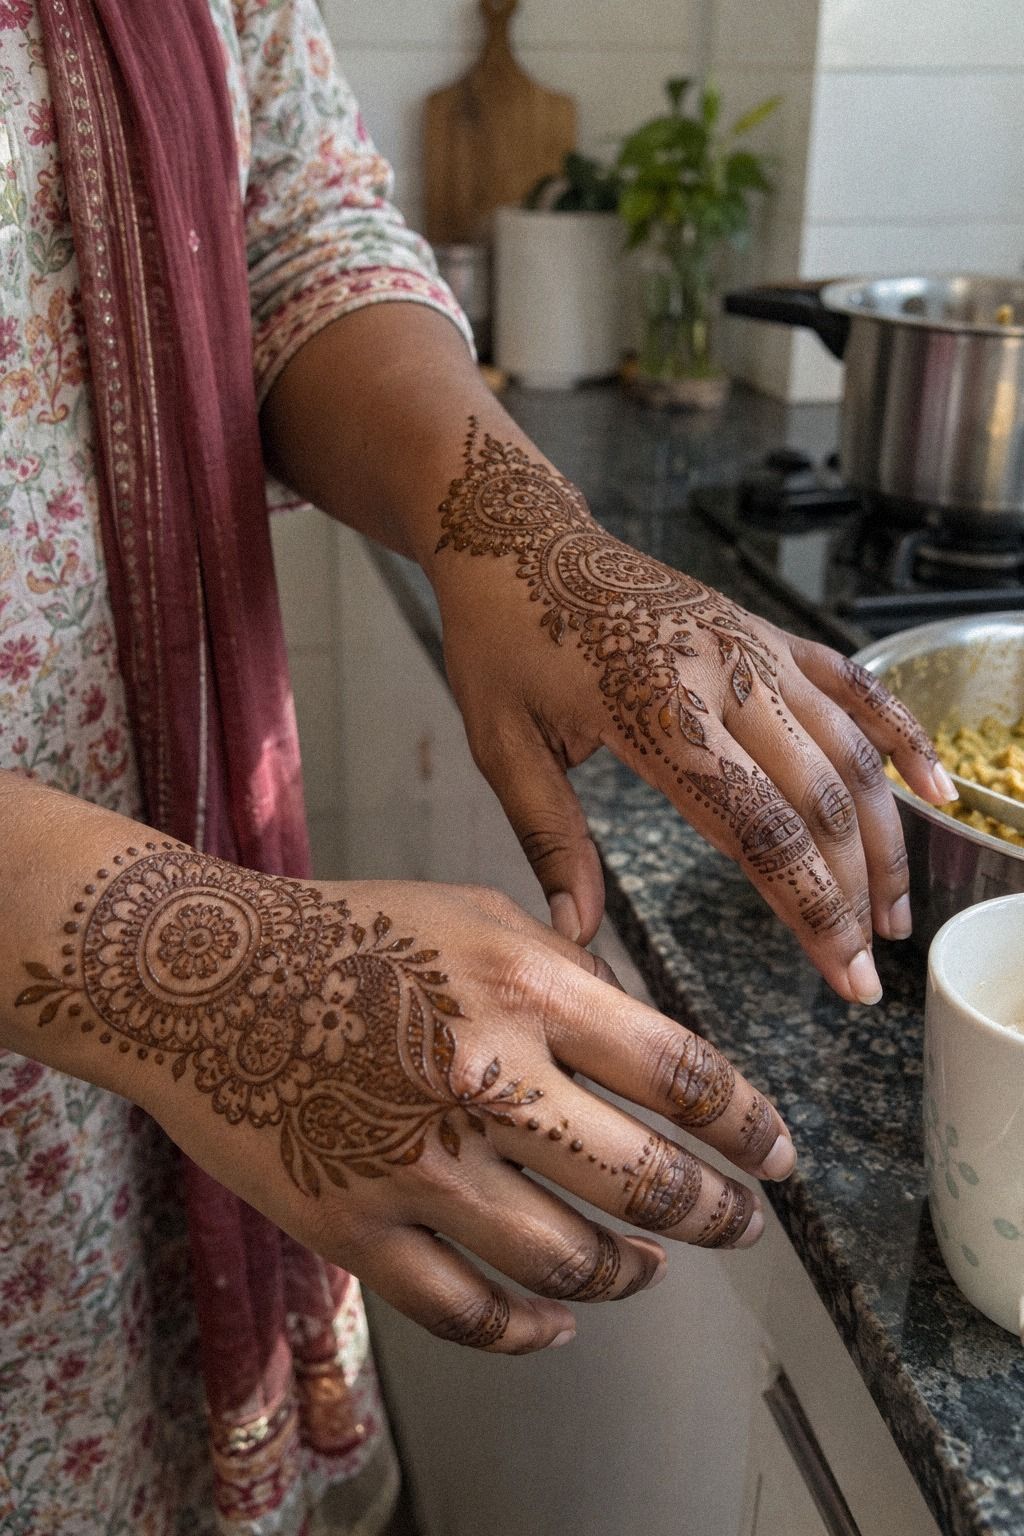
Backhand designs give you room to combine ideas while staying controlled. A flowing vine, sacred mandala, or delicate peacock detail can feel expressive without covering every inch.
Design Rules I Use Before Henna
I begin with one strong idea. Maybe it’s a vine, an initial, a flower, or a geometric center.
Combining all four can sound exciting, but your result may lose its understated quality before the paste even dries. One anchor idea is usually enough.
Then I choose the direction. A line that follows your wrist can feel flowing, while a centered symbol feels more grounded.
You’ll get a better result when the movement matches how you naturally hold your hand. Direction of movement should guide the sketch.
I also decide what I’m willing to maintain. Fingers and hands may need more attention than an outer forearm because they face washing, friction, and sunlight.
A beautiful design isn’t automatically worth the price if you’ll resent its fading. Build an aftercare plan before you book.
Finally, I leave the sketch alone for a day. If I still want to wear it tomorrow, I know the idea has more than a passing appeal.
That pause can protect your investment. A 24-hour pause is simple, but it can expose a weak concept.
For extra low-detail references, look through simple henna designs and mark only the shapes you’d genuinely wear.
Where Minimal Lines Hold Up Best
Outer forearm placement is often a practical starting point. You’ll have visibility, a relatively forgiving surface, and enough room for the line to breathe.
It’s also easier for you to protect while the paste dries. Outer-forearm skin is a useful first test.
Upper arm and shoulder placements can feel more private. A small design there may be easier to keep out of direct sunlight, and you can choose clothing that won’t rub the area during the first hours. Upper-arm placement also gives a mehndi artist more stable skin.
Hands and fingers are visually daring, but they’re high-maintenance. Washing, friction, and sun can affect fine details quickly.
You’ll want a mehndi artist who has clear examples from those placements. Hand designs need realistic maintenance expectations.
Feet, ribs, and sternum can be more intense for many people because of pressure and movement during application. Comfort varies, so don’t treat someone else’s experience as a promise.
If ease is your priority, choose a location that lets you stay relaxed. Rib placement is rarely my first suggestion for a first application.
You can compare placement ideas in simple very simple mehndi designs before transferring a pattern to temporary paste.
A Budget Check Before You Commit
A small henna application may start around $5 to $30, while experienced artists may charge roughly $25 to $250 depending on detail, location, occasion, and travel. $5 to $30 is a starting range, not a guarantee.
The lowest price isn’t always the best value. Clean cone control, safe ingredients, and clear examples matter more than finding the cheapest appointment.
You’re buying skill, not just paste. $25 to $250 can be reasonable when detail and occasion vary widely.
Ask what’s included before you book. A small appointment minimum may apply even when your design takes only a short time.
Knowing the total price helps you set a realistic budget. Confirm the appointment minimum before sending a deposit.
A temporary henna application costs less, but it can still be useful. You’re paying for information about placement, shape, and meaning.
That small spend may prevent a pattern you’d later regret. Temporary henna is a practical test, not wasted money.
If a design needs an adjustment, ask whether that’s included. A transparent quote is a good sign, and it makes the whole process feel more empowering. Confirm the adjustment policy in writing.
For more simple layout references before spending, browse minimalist henna designs.
Questions I Ask Before Choosing Henna
Can I still see the main shape from a short distance? If the design disappears into tiny marks, I’d simplify it. A readable outline usually gives you better value.
Check the main silhouette from several angles.
Does the placement match my daily habits? If you wash your hands constantly or wear tight shoes, your design may need extra planning. Your lifestyle belongs in the decision.
Think about daily habits before choosing fingers or feet.
Would I choose this without a trend attached to it? I love current ideas, but a classic shape may serve you longer.
You don’t need to reject trends; you just need to know why you’re choosing one. A classic shape should still feel right next year.
Does the symbol still feel meaningful when I remove the decoration? This test is useful for initials, moons, flowers, and spiritual motifs.
The core idea should stand on its own. Protect the core symbol from unnecessary detail.
Can I afford the mehndi artist I actually trust? If not, wait and save. A patient decision is often more powerful than a rushed application.
Choose a trusted artist before choosing a date.
Temporary Henna and Design Testing
Temporary henna lets you test scale, direction, and emotional response. You’ll notice whether you like seeing the design every day or only enjoyed it as an idea. The temporary stain gives you useful information.
Henna also helps you test movement. Hold your phone, type, walk, and wash your hands.
If the design constantly catches your attention in an irritating way, it may not be the right choice. Try the phone grip and other ordinary movements.
The stain gives you a short, honest trial. It begins as paste, dries for about one to two hours, deepens from orange to reddish-brown, and usually darkens on the second day before fading over one to three weeks.
I like using both stages when the design is meaningful. The temporary version answers practical questions, and a consultation with a mehndi artist answers technical ones.
Neither stage needs to replace the other. A meaningful symbol should survive both tests.
I also consider the occasion. A delicate design may suit a wedding, sangeet, Eid, or Diwali, while a bold palm pattern can make an ordinary day feel more expressive.
You can collect a few options from simple new bridal mehndi designs and simplify them before your test application.
How to Keep Fine Details Readable
Use fewer marks than your first sketch suggests. A crisp outline with open space often reads more clearly than a crowded pattern full of tiny flourishes. Start with a crisp outline and add detail only when necessary.
Keep neighboring lines far enough apart that they won’t merge visually. Your mehndi artist can suggest spacing based on the size and location you choose. A minimum gap is especially important on fingers and knuckles.
Strong contrast helps. One darker anchor surrounded by lighter details can make the whole design easier to understand.
That structure feels vibrant without requiring a large filled area. Use a dark anchor instead of darkening every line.
Avoid copying details that only work at screen size. What looks intricate on a phone may become muddy on skin.
Draw your design at its actual size before you decide. An actual-size sketch will reveal weak spacing.
Aftercare matters, too. Follow your artist’s instructions, avoid unnecessary sun, and don’t scrub or pick at drying paste.
Keep the lemon-sugar seal in place if recommended, and use only skin-safe oils such as eucalyptus oil when advised. Respect the drying instructions even if the paste seems ready after a few minutes.
For spacing ideas, review simple henna designs at the size you plan to wear.
A Personal Test for Meaningful Symbols
I write down what the design means in one sentence. If I can’t explain the feeling without listing ten symbols, the concept may need editing. A one-sentence meaning keeps the final mark focused.
Then I remove anything that only fills space. The remaining marks often feel more expressive because they’re connected to a real memory, person, belief, or choice. Remove unused marks before adding new ones.
You don’t need a dramatic story. A tiny flower may remind you of someone important.
An initial may mark a private promise. A simple curve may represent movement through a difficult year.
Your meaning can stay private. You’re allowed to choose a symbol because it makes you feel calm, brave, playful, or seen. A private decision doesn’t need public approval.
The best design is usually the one you can explain to yourself without needing anyone else’s approval. That’s what makes it empowering.
You can compare restrained references through simple trendy mehndi designs before reducing one to its essential marks.
A Few Things Worth Answering
How much does a simple minimal henna design usually cost?
A small application often starts around $5 to $30, while detailed handwork or event bookings may range from $75 to $500 or more. The final cost depends on the artist, location, occasion, design detail, guest count, and travel. Ask for the full price before booking.
Are simple minimal henna designs a good idea for a first application?
Yes, especially when you choose open lines and a comfortable placement. I’d test the idea with a small cone application first, then observe the shape as the stain develops. A delicate design can still be meaningful, but small doesn’t always mean effortless to apply.
How do I choose a mehndi artist for simple minimal henna designs?
Review clear examples, not only promotional sketches. Look for controlled cone work, consistent spacing, safe ingredients, and experience with your chosen placement. Ask about drying time, aftercare, lemon-sugar sealing, and the total price before you book.
How comfortable are simple minimal henna designs?
Henna paste is generally comfortable to apply because it rests on the skin rather than piercing it. Some placements can feel awkward when you must hold still, especially fingers, feet, ribs, or the sternum. Choose a location that lets you relax for the full application.
How long does a simple minimal henna design take to fade?
The paste usually dries for about one to two hours. The stain begins orange, darkens on the second day, and commonly fades in one to three weeks. Washing, friction, sunlight, paste quality, and placement all affect the final duration.
What’s the best placement for simple minimal henna designs?
The outer forearm is often a strong choice for visibility, comfort, and easy protection while the paste dries. The backhand gives you a more feminine or expressive look, but it may fade faster because of washing, friction, and sun.
Where can I find simple minimal henna designs without buying through an affiliate link?
You can browse editorial references such as simple new bridal mehndi designs and simple henna designs, then redraw the layout yourself. This article contains no affiliate or Amazon links.
Where I’d Start First
If I had to pick one, I’d start with the single-finger vine. It’s personal, readable, and easy to test before a full application. The open spacing gives the stain room to develop clearly.
My second choice would be the outer-forearm version of the same idea. It offers better visibility, a comfortable application for many people, and a practical balance between style and fading.
Save the minimalist henna designs you like, test the shape for a full day, and ask your mehndi artist to simplify it once more. The final design should feel timeless, personal, and easy to live with.