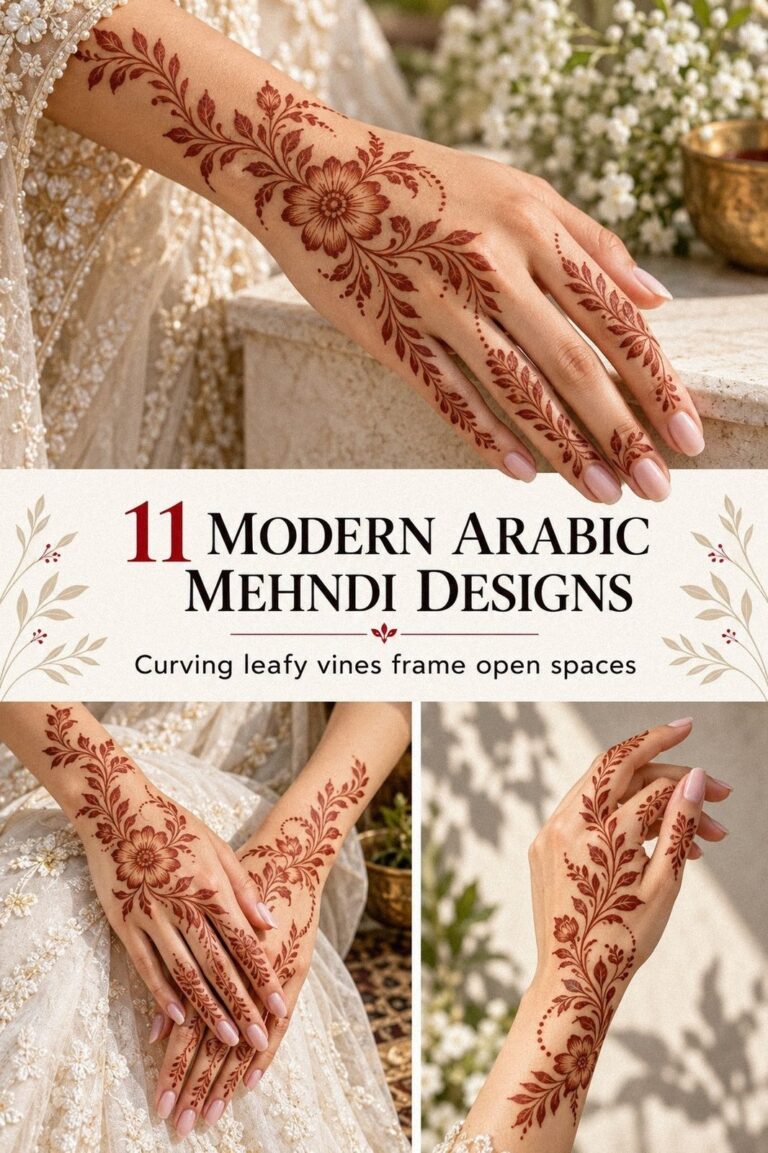
Latest very simple mehndi designs can be finished in one evening when the pattern stays open and the paste does the talking. I once crowded every finger with tiny details, then watched the design blur into one dark patch. Now I leave more breathing space. It looks better!
The best designs balance natural henna paste, clear placement, and a little patience. You don’t need an intricate bridal pattern to create something meaningful.
Choose one strong gesture, keep your lines graceful, and let the color deepen naturally. For more starting points, browse these simple henna designs.
- Latest Very Simple Mehndi Designs for Fingers
- Which Minimal Mehndi Design Fits the Palm?
- Latest Very Simple Mehndi Designs with Dots
- Wrap the Wrist with a Delicate Mehndi Trail
- Floral Lines on Feet: Detail Without Density
- Follow the Arabic Mehndi Trail
- Back-Hand Mehndi: Classic Shape, Light Coverage
- Can Geometric Mehndi Stay Soft and Simple?
- Latest Very Simple Mehndi Designs for Bridesmaids
- Bold Outlines, Open Centers
- What Works for Kids’ Mehndi?
1Latest Very Simple Mehndi Designs for Fingers

Finger mehndi looks striking when each finger gets one clear idea instead of a full sleeve of detail. Try a thin chain of henna paste dots down the middle finger, a tiny paisley near the index finger, and two curved leaves on the ring finger. Your palm can stay mostly bare, which keeps the result minimal and crisp.
The best version is delicate, not timid. You’ll want the cone tip held lightly, with your wrist resting on a folded cloth so your lines don’t wobble. A single paisley is enough.
No crowding. If you’re new to this, browse these simple finger mehndi designs for spacing ideas before you begin.
I’d skip filling every fingertip. Solid coverage can look heavy beside a graceful central motif, especially once the color deepens on the second day. Use a small mehndi cone for narrow curves and wipe the tip after every few strokes so the paste doesn’t build a blunt edge.
Keep the design symbolic with one flower, one leaf, and one small circle repeated across the hand. That rhythm feels intentional without demanding perfect symmetry. You’ll find that slightly uneven lines can look personal rather than unfinished, and the reddish-brown stain will soften the contrast as it fades.
Give the paste 1 to 2 hours to dry before brushing it away. Don’t wash immediately. Your fingers will look bright at first, then the color usually deepens by the second day, so you shouldn’t judge your final result too early.
2Which Minimal Mehndi Design Fits the Palm?
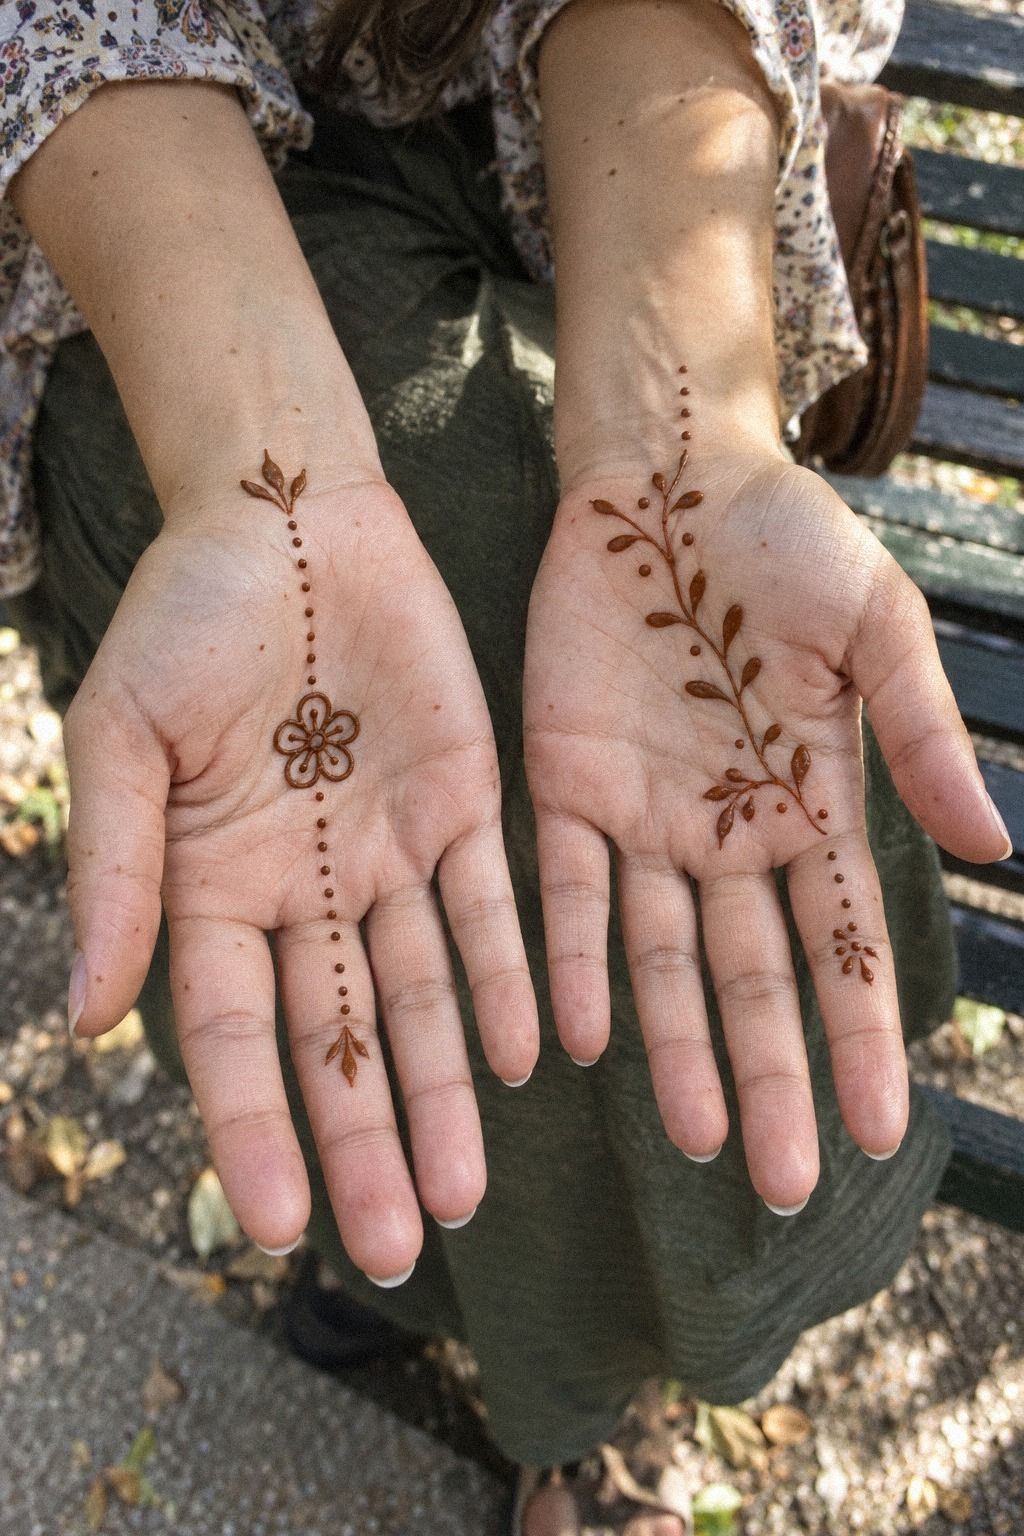
Palm designs need a strong center because your hand already has natural folds and movement. A small mandala center at the base of your fingers can anchor the pattern, while three open arcs follow the palm lines without copying them. The effect is elegant, understated, and easy to recreate.
Why cover every inch when one meaningful shape can hold your eye? Leave a clean border around the mandala, then add short petals with a pointed wooden applicator or a fine cone tip. Your palm will read clearly from a distance, and the open skin will keep the design from looking tangled.
For a more expressive version, use a half-mandala that begins at the wrist and opens toward your fingers. I prefer this over a full circular block because you can turn your hand and still see the pattern’s movement. Compare it with simple stylish front-hand mehndi designs if you like that direction.
A gentle dot border gives the design a polished finish, but make the dots different sizes. Perfectly identical dots can feel stiff. Your smallest dots should sit near the fingertips, while the larger ones belong closer to the wrist where the composition needs more visual weight.
Keep your paste fresh and smooth, with no dry flakes near the opening. A clean henna cone gives you sharper edges and fewer accidental blobs. After the paste has dried, brush it off instead of rinsing it away, then let your palm deepen naturally overnight.
3Latest Very Simple Mehndi Designs with Dots

Dots can make a simple design look playful, bold, and surprisingly polished. Start with one large dot beside your wrist, then taper into smaller points toward the back of your hand. Add three tiny dots beside each curve.
This creates a graceful trail without requiring complicated flowers or dense shading.
Choose a single dot cluster as your repeated motif. You’ll get better balance if every cluster has a little space around it, especially near the wrist bone. Your lines don’t need to match perfectly, but the direction should feel consistent from one cluster to the next.
The most flattering version uses dots as punctuation, not decoration everywhere. I’d avoid covering the spaces between your fingers because paste can smear there while you move. Instead, place one dot at each finger base and connect only two fingers with a slim curved line.
For a vibrant result, pair the dots with a small leaf motif on the outer hand. The leaf can be one long almond shape with a central vein, or two short leaves facing opposite directions. Both options are simple enough for a first evening and expressive enough to feel finished.
Try the pattern first on paper with a pencil. That tiny rehearsal helps you decide where your wrist trail should stop. If you want more references, these easy peacock mehndi designs show how open spacing keeps a small pattern readable.
Don’t rush the drying stage. The paste may look pale and dull before it is ready to remove, but that’s normal. Your color should deepen gradually over the next day, and the dots will look more defined once the stain settles into its reddish-brown tone.
4Wrap the Wrist with a Delicate Mehndi Trail
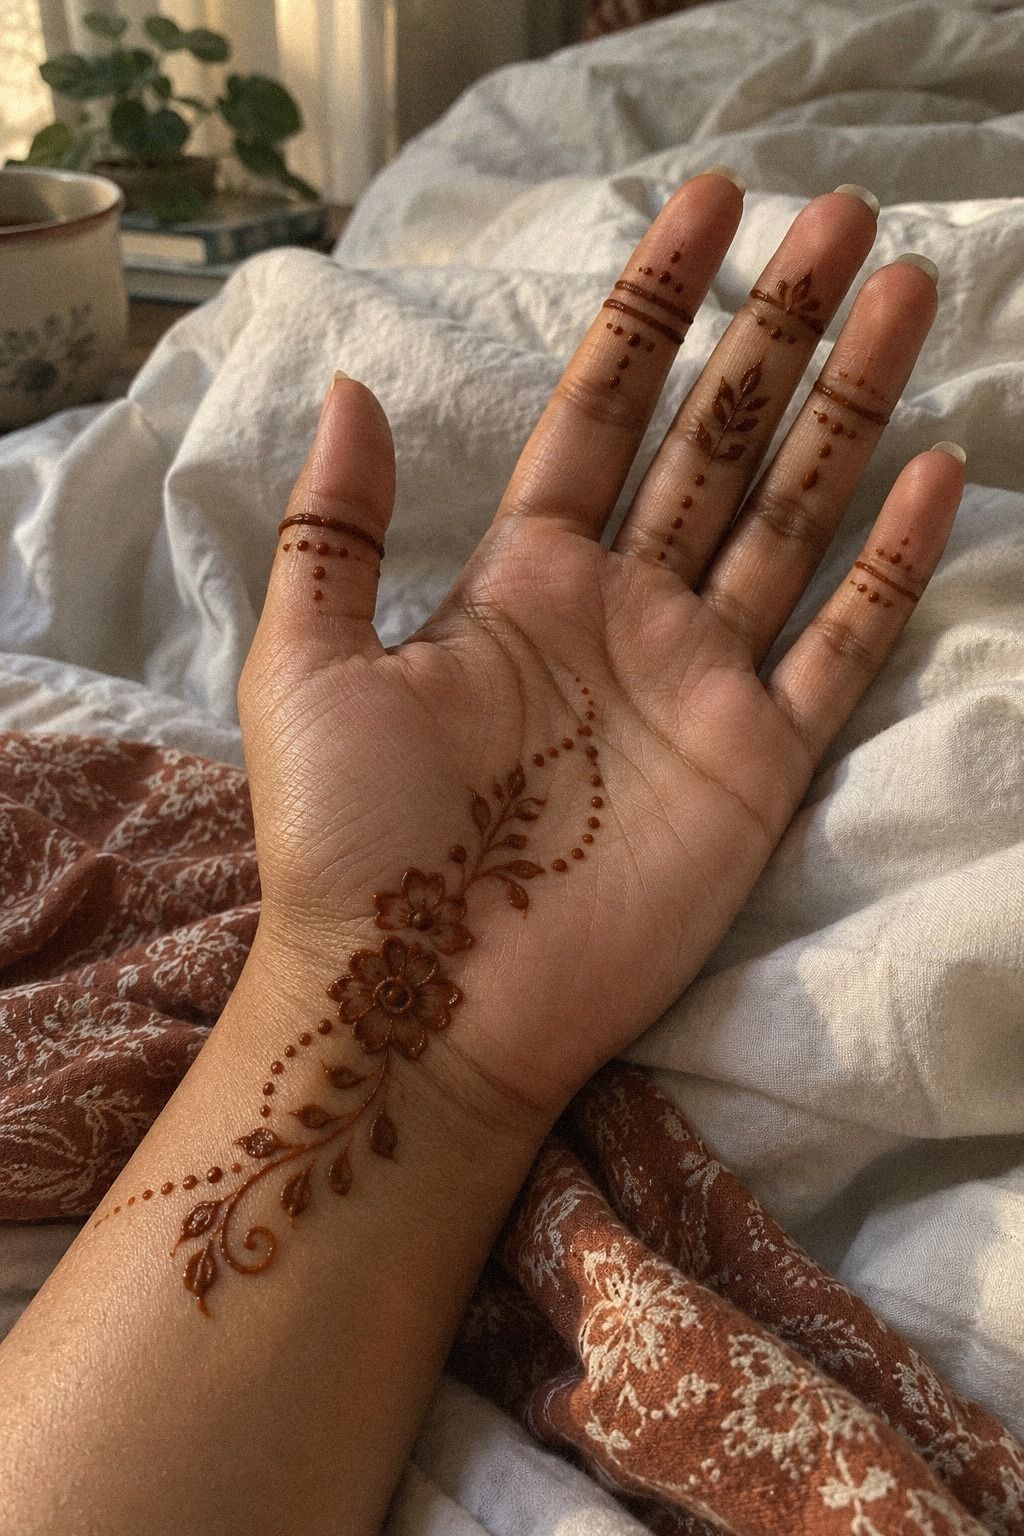
A wrist design works best when it behaves like a bracelet without becoming a heavy band. Draw three flowing vines around the wrist, leaving small gaps between them. Add one floral chain at the center, then let the ends taper rather than meeting in a thick block.
This approach feels feminine, graceful, and personal. You’ll want to check the placement with your hand relaxed, not stretched flat, because your wrist changes shape as you move. A pattern that looks perfect while posed can twist when you reach for a cup or turn a handle.
Use a repeating leaf shape, but vary the angle slightly so the chain doesn’t look stamped. I’d choose a thin floral line over a dense bracelet here. It’s easier to apply, it dries more quickly, and it keeps the wrist visible as the design fades over one to three weeks.
If you’re making this for a celebration, add one small paisley above the bracelet. That single detail can make the design feel ornate without turning it into a full bridal pattern. You can find related placement ideas in these simple full-hand mehndi designs.
Let each section dry before touching the next one. Your palm may rest on a folded cloth, but the outer wrist still brushes against clothing easily. Keep a loose sleeve nearby and avoid tight cuffs until the paste has dried completely.
5Floral Lines on Feet: Detail Without Density

Floral lines on the feet can look romantic without becoming overly ornate.

6Follow the Arabic Mehndi Trail
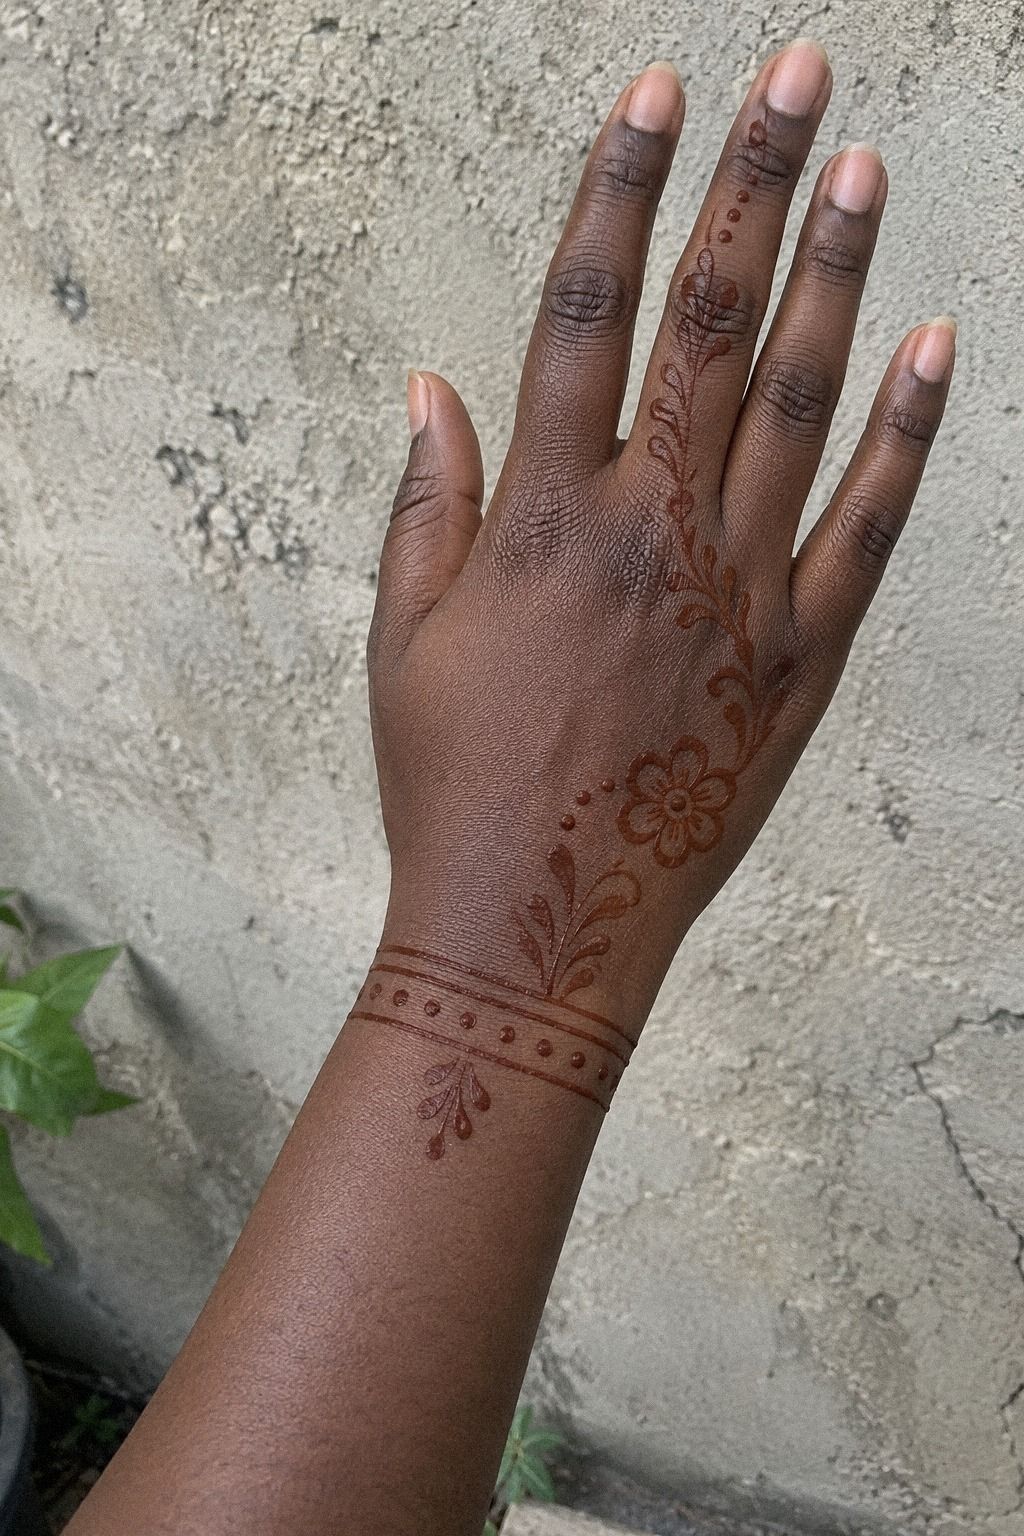
Arabic mehndi is recognizable for its bold, flowing trail and generous open spacing. Begin near the wrist with a large paisley motif, then connect it to two flowers that travel diagonally toward the hand. The composition feels powerful and modern because your eye follows one clear direction.
A sharp diagonal is more important than a complicated pattern. You’ll want the first curve to be confident, even if your smaller leaves are imperfect. I’d avoid placing separate flowers everywhere because the design loses its movement and starts to look scattered.
Use a thicker cone line for the outer edge and a finer tip for the inner veins. This contrast gives the pattern a striking silhouette without needing heavy fill. The paste should glide, not drag, so test a small line on paper before you begin.
For darker detail, fill only one leaf or the center of one flower. That bold patch creates contrast while the rest of the pattern stays open. Your hand will look expressive, but it won’t be hidden beneath a solid layer of paste.
Don’t copy every reference exactly. Take the diagonal trail, the open spacing, and the large central shape, then change the leaves to suit your hand. These simple Pakistani mehndi designs can help you compare denser pattern language with an understated Arabic arrangement.
Let the design sit flat while it dries. If the paste cracks naturally, that’s fine. Brush it off only when it feels dry to the touch, and keep water away for a little while afterward so your stain has time to deepen.
7Back-Hand Mehndi: Classic Shape, Light Coverage

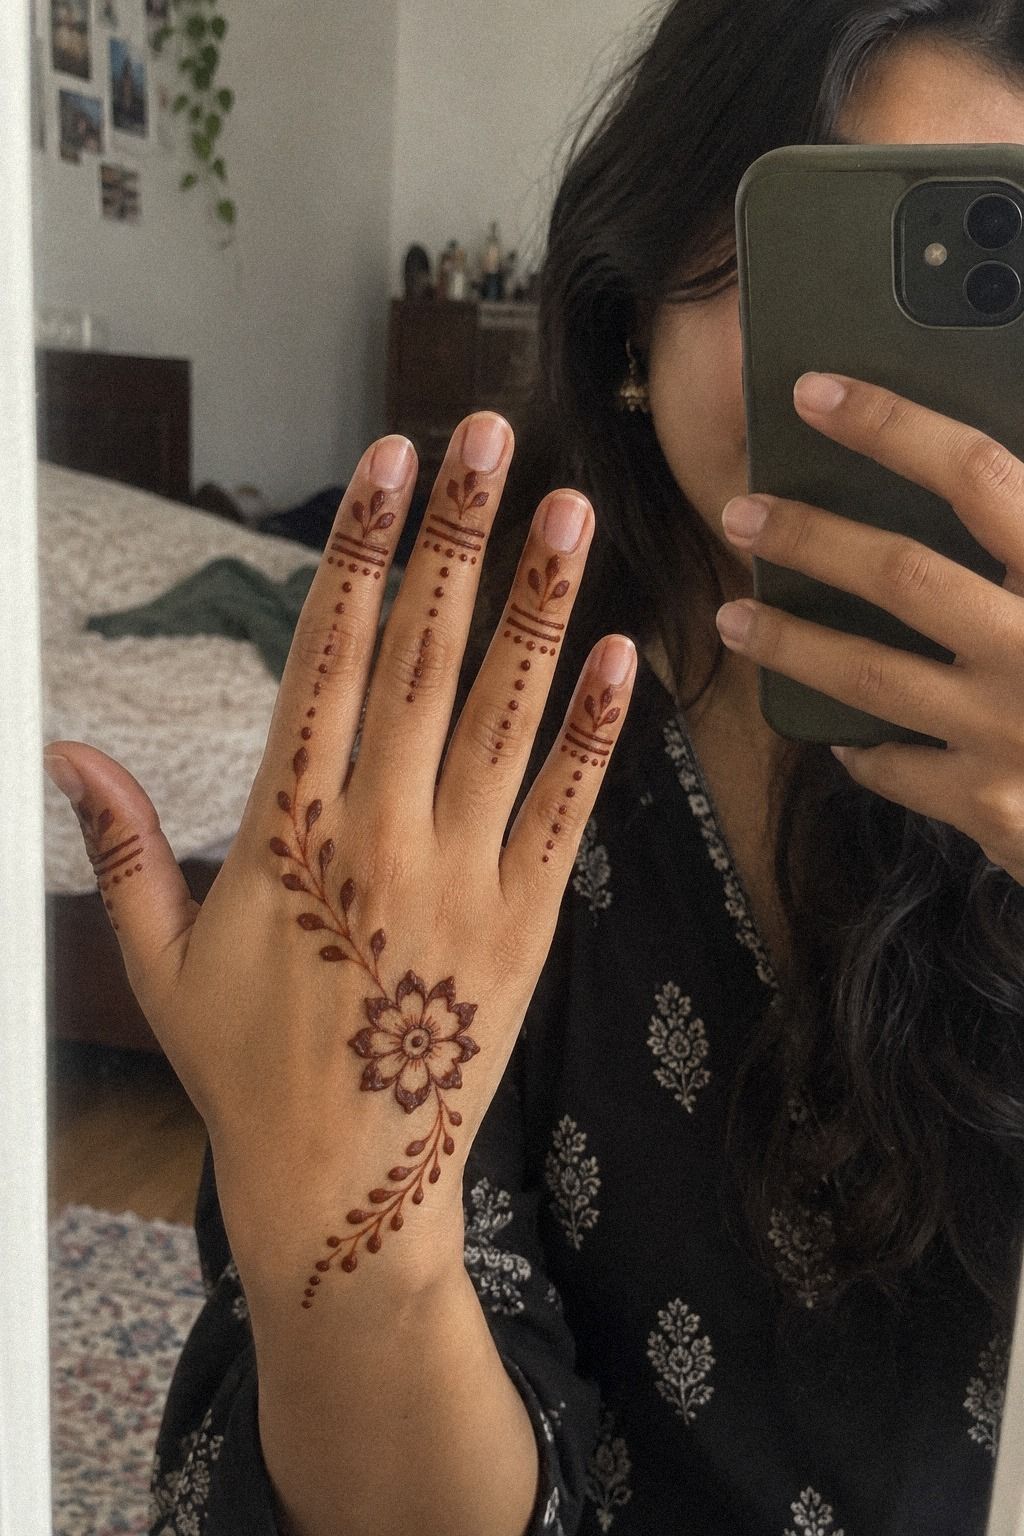
The back of the hand gives you more room for a classic, polished composition. Place a small central flower near the knuckles, then run two leaves toward the wrist. Let your fingers carry only short lines or small dots, so the main shape remains easy to see.
This style is timeless because it reads clearly and doesn’t depend on dense detail. You’ll want to keep the flower slightly below the knuckles rather than directly on top of them. That placement follows the hand’s movement and keeps the design looking natural when you bend your fingers.
A crisp border around the petals can make a simple flower feel more refined. I’d use five petals instead of ten, especially if you’re applying the paste yourself. The fewer shapes you need to repeat, the more graceful your final result will look.
Try one circular jaal detail inside the flower, but stop before the center becomes muddy. Jaal means a net-like pattern, and even a few crossing lines can suggest it. Your version doesn’t need to be dense to feel intricate.
For a more stylish finish, add three tiny dots between the flower and wrist leaves. That bridge keeps the composition connected without creating a heavy stripe. You can compare this approach with simple trendy mehndi designs for a newer interpretation.
Remember that the back of your hand will touch surfaces more than you expect. Keep your fingers lifted while the paste dries, and avoid resting your palm on a hard surface. A short pause now can protect the sharpest parts of your pattern.
8Can Geometric Mehndi Stay Soft and Simple?

Geometric mehndi can look edgy and elegant when you use only two or three shapes. Start with a small diamond shape near the center of each palm, then connect the diamonds with short lines. Leave the surrounding skin open so your design doesn’t become visually crowded.
You’ll find this style easier if you sketch the placement with a washable cosmetic pencil first. Your shapes don’t need mathematical precision, but their scale should feel related. One oversized diamond beside several tiny squares will make the composition feel accidental rather than expressive.
I prefer a triangle and dot combination over a full grid. The grid can look rigid on a moving hand, while a geometric border gives you structure with a little softness. Add one short arc beside the triangle to keep the design connected to traditional mehndi movement.
Use the cone tip carefully at every corner. If your paste rounds off the point, wait a moment and add a tiny extension after the first line dries slightly. Your final shapes will look sharper, and the reddish-brown stain will preserve the graphic quality.
A meaningful option is to repeat one shape from your jewelry, invitation design, or clothing embroidery. That makes the pattern personal without adding more detail. Why pile on decoration when one repeated symbol can carry the idea?
If you like this clean approach, look through easy modern mehndi designs for patterns that use short lines and open centers. Finish with a careful drying period, because smudged corners are much harder to repair than a missing dot.
9Latest Very Simple Mehndi Designs for Bridesmaids

Bridesmaid mehndi should feel coordinated without making every person wear the same pattern. Choose one small floral motif for everyone, then let each person decide whether it sits on the wrist, back of the hand, or fingers. That gives you a shared detail with a personal finish.
A delicate diagonal trail looks especially graceful during a celebration. You can begin with one flower and two leaves, then add three dots near the wrist. The arrangement is romantic, but it won’t compete with a bouquet, bracelet, or embroidered sleeve.
I’d avoid copying a full bridal design for a bridesmaid group. It takes longer, requires more paste, and can look visually heavy beside a simpler outfit. Your goal is a polished accent that lets everyone move, eat, and celebrate without worrying about wet paste.
Use a reddish-brown stain rather than chasing an artificially dark result. The color should deepen during the second day, and each person’s skin may develop a slightly different tone. That variation is part of the charm, not a flaw that needs correction.
Set up a small station with tissues, cones, and a place for each person to rest her hand. You’ll work faster when nobody is balancing a phone or reaching for a sleeve. And yes, a little organization makes the whole evening more relaxed!
For more group-friendly references, save these simple back-hand mehndi designs before the event. Pick one pattern family, then simplify it until every person can wear a version that suits her hand.
10Bold Outlines, Open Centers
Bold outlines create an iconic look with very few ingredients. Draw one large peacock motif along the outer hand, then use a thicker outline around the body and a finer curve for the tail. The contrast makes the design readable even when the pattern stays simple.
You’ll want to keep the interior mostly open. A peacock can become crowded quickly, especially around the feathers, so use three or four curved sections instead of filling every shape. That gives you an elegant silhouette with enough detail to feel finished.
This is where a firm hand helps. I’d practice the main curve several times on paper, then apply the paste in one slow movement. If you stop halfway, the outline may look uneven, but a small dot or leaf can disguise a rough transition without changing the whole design.
Add one solid leaf fill beside the peacock for a fierce accent. Don’t fill the entire tail. The single dark shape will draw attention to the outline and keep the rest of your hand visually light.
The design is expressive, but it can still be understated if you reduce the size. A peacock about 2 to 3 inches long can read clearly on the back of a hand without taking over every finger. Your placement matters more than adding extra feathers.
If you prefer a sharper style, compare it with simple latest mehndi designs and borrow the cleanest outline ideas. Let the paste dry fully before moving your hand, because a bold edge shows every accidental smear.
11What Works for Kids’ Mehndi?

Kids’ mehndi should be playful, quick, and easy to remove as it fades. Choose one tiny flower on the back of the hand, two leaves near the wrist, or a simple trail across the ankle. A small design feels special without requiring a long, restless sitting.
You’ll want to check the ingredient list before applying any cone. Use natural henna from a trusted source, and avoid products marketed as instant black henna. Test a small spot first, especially if your child has sensitive skin or has reacted to cosmetic products before.
A whimsical pattern can still look polished. Try a smiling sun, three dots, and a curved stem, or use a small heart motif with two leaves. Keep the paste away from broken skin, and don’t let a child touch food while the cone is open.
I’d skip fingers for very young children because they touch everything while the paste dries. The top of the hand or ankle is easier to protect. Your child can sit with a story or quiet activity while the pattern sets for 1 to 2 hours.
The color usually becomes deeper on the second day, then fades over one to three weeks. That short lifespan is useful for children because they can enjoy a new design for a celebration without carrying it indefinitely.
Keep the design cheerful rather than intricate. One clear shape, a few dots, and a little space will look more charming than a crowded pattern. For gentle references, browse these simple mehndi designs for beginners and reduce the details to a single curved mark.
A Quick Cost Check for a Small Mehndi Evening
The cost depends on whether you’re applying the paste yourself or inviting a mehndi artist. For a basic at-home session, the value usually comes from buying one reliable cone and keeping the design simple. A larger appointment may be worthwhile for a wedding, but it isn’t necessary for an evening project.
If you’re working on a budget, choose a pattern that uses open lines instead of dense filling. That reduces paste, drying time, and the chance of smudging. The cheapest option can still look stylish when the placement is thoughtful.
These easy fancy mehndi designs can be simplified for a smaller session.
Before booking an artist, ask what the price includes, how much coverage you’ll receive, and whether the paste is natural. That quick conversation tells you whether the service is worth it. You shouldn’t have to guess what you’re paying for.
Let the Color Change on Its Own
Fresh paste often looks pale, greenish-brown, or dull when you first brush it away. Don’t assume the result failed. The reddish-brown stain normally deepens during the second day, then softens gradually over one to three weeks.
Keep water away for a little while after removing the dried paste. You don’t need a complicated routine. Gentle care gives the stain time to settle, especially on the palms where the color can become especially vibrant.
The final shade varies with the paste, skin, warmth, and placement. A palm may become deeper than a wrist, while the top of a foot may fade more quickly from friction. That variation is normal and often gives the design a raw, individual quality.
If the color looks lighter than expected, don’t immediately add another layer. Wait until the second day before deciding whether you like it. The stain is still developing, and a second application can make a simple pattern look heavier than planned.
For more open patterns, see these simple stylish mehndi designs.
The One-Shape Test
Before squeezing the cone, ask yourself what the eye should notice first. Is it the paisley, flower, mandala, or diagonal trail? That first shape becomes the anchor, and every smaller mark should support it.
A good beginner design passes the one-shape test when you can describe it in one sentence. For example: “A paisley travels diagonally from my wrist.” If you need five sentences to explain it, the pattern may already be too busy.
This test is useful for children’s designs, bridesmaid groups, and quick palm patterns. It keeps the result personal without forcing perfect symmetry. You can be daring with one focal shape and restrained everywhere else.
I’ve found that a slightly uneven line can still look intentional when the overall direction is clear. That’s the trick! Let the motif lead, then stop adding details once the design has its identity.
Choosing Between DIY and a Mehndi Artist
DIY mehndi is usually the better value when you want a small, personal design and have one quiet evening available. You control the pace, placement, and pattern. You’ll also learn which line thickness feels natural in your hand.
An artist becomes worthwhile when you need coordinated designs, intricate coverage, or a fixed appointment time. Ask for examples of simple work, not only elaborate bridal pieces. A graceful dainty pattern requires a different kind of control.
Your budget shouldn’t decide everything. Consider the occasion, the number of people, and how much patience you have for drying.
If the design needs to be finished quickly, paying for experienced help may be worth it. Start with these simple latest mehndi designs when discussing your preferred style.
My Rule for Mehndi That Still Looks Intentional
I used to think a successful mehndi design needed more detail. More petals, more dots, more filled shapes.
Then I noticed that the patterns people remembered were usually the ones with one strong gesture, a clear center, and enough open skin for the stain to breathe. That’s my rule now: choose the shape first, then stop before the design loses its identity.
The second rule is to respect the material. Natural henna paste needs time to dry, and the color won’t show its full depth immediately. The usual pattern is simple: paste dries for about 1 to 2 hours, the stain darkens by the second day, and the design gradually fades over one to three weeks.
I also think placement should follow your life, not just the reference pattern. If you’re cooking, typing, or moving around, a palm design may need more patience while it dries.
If you want a quick evening project, the back of the hand or outer wrist is a more practical choice. You’ll enjoy the result more when you aren’t guarding every movement.
Finally, don’t confuse ornate with meaningful. A single paisley can carry a stronger feeling than a crowded composition if it echoes a wedding, a family tradition, or a celebration you’re marking.
That personal connection matters more than perfect symmetry. Yes, it can be that simple!
The Questions Worth Answering First
How much do latest very simple mehndi designs usually cost?
At-home mehndi costs depend on the cone and supplies you choose, while an artist’s price depends on coverage, occasion, region, and time. Ask for the full price before booking. A small design usually takes less planning than a full-hand or bridal arrangement, so it can be a practical budget choice.
Where can I buy a safe mehndi cone?
Buy from a supplier that lists ingredients clearly and explains how the paste was made and stored. Avoid instant black products with vague labels. A transparent ingredient list is your best starting point, especially when you’re applying mehndi to a child or sensitive skin.
What color will mehndi be in 2026?
Reddish-brown remains the classic mehndi color, with deeper brown tones developing after the second day. Your final shade depends on the paste, skin, and aftercare. I’d treat natural variation as part of the result rather than judging the color immediately after removing the dried paste.
Can I do these designs on a small budget?
Yes. Choose one cone, practice on paper, and use a simple motif with open spacing.
You don’t need many supplies for a polished result. I’d start with a floral or dot design because it gives you the most control while you’re learning.
How long does mehndi take to dry?
Most designs need about 1 to 2 hours to dry before you brush away the paste. Larger or denser patterns may need more patience. Keeping your hand still protects the edges, so plan a quiet activity while the design sets.
How long does the color last?
Mehndi commonly lasts one to three weeks, depending on placement, washing, friction, and your skin. The color usually deepens on the second day, then fades gradually. Gentle washing can help the design stay clearer for longer, but no stain lasts permanently.
What is the best placement for a simple design?
The back of the hand, outer wrist, and ankle are practical choices because they give you visible space and a clear surface. Palms can develop deep color but need more care while drying. Choose the placement you can protect during the first evening.
Where I’d Start First
If I had to pick one, I’d start with Latest Very Simple Mehndi Designs with Dots. The dots give you control, the open spacing forgives small mistakes, and the pattern still looks crisp after the color deepens. Save it for later, then compare your version with these easy very simple mehndi designs.