
Simple henna designs can become meaningful patterns when you plan the symbol, flow, and placement before the cone touches skin. I learned that a tiny vine needs more thought than a crowded palm because every curve stays visible. Start with the motif, then test how your design moves with your hand. That’s the part people skip!
Quick answer: choose one symbolic idea, keep the lines crisp, and test the placement before you book the appointment. A minimal design can still feel striking, intricate, and deeply personal when every mark has a reason.
Before You Start: The Two-Loop Rule
You’ll need two separate plans: one for the image and one for how it will sit on your body. Sketch the motif on paper first, then redraw it over a hand outline. I call this the Two-Loop Rule because your design should work as a flat drawing and as a moving part of you.
Gather natural henna paste, plain paper, a fine pencil, a ruler, and a phone camera. If you’re preparing for a wedding, Eid, Diwali, or another celebration, add a clean paper guide and a short consultation with an experienced mehndi artist.
Your goal isn’t to copy every curl from a reference. Your goal is to see whether the pattern still reads when your fingers bend.
A temporary test can reveal problems early. A vine that looks graceful across a flat palm might bunch up beside a knuckle crease.
A circular flower might look symbolic from above but lose its shape when your wrist turns. Why would you apply the paste before watching the design move?
Your budget will depend on the mehndi artist, region, size, occasion, and drying time. A small custom application in the United States is often about $15 to $40, while a larger bridal or event booking commonly ranges from $50 to $250. You don’t need the cheapest artist, and you don’t need the most expensive one.
You need fresh paste, clean tools, and a design that matches your idea.
- Start With Minimal Henna Linework
- Which Symbol Will You Keep?
- Place Dainty Vines Along Fingers
- Keep Curves Crisp And Balanced
- Plan Symmetrical Palm Details
- Flowing Wrist Patterns, Or A Closed Band?
- Trace Intricate Floral Outlines
- Add Bold Fingertip Accents
- Match Latest Henna Design Trends
- Test Delicate Patterns Before Application
- Protect Meaningful Lines During Drying
1Start With Minimal Henna Linework
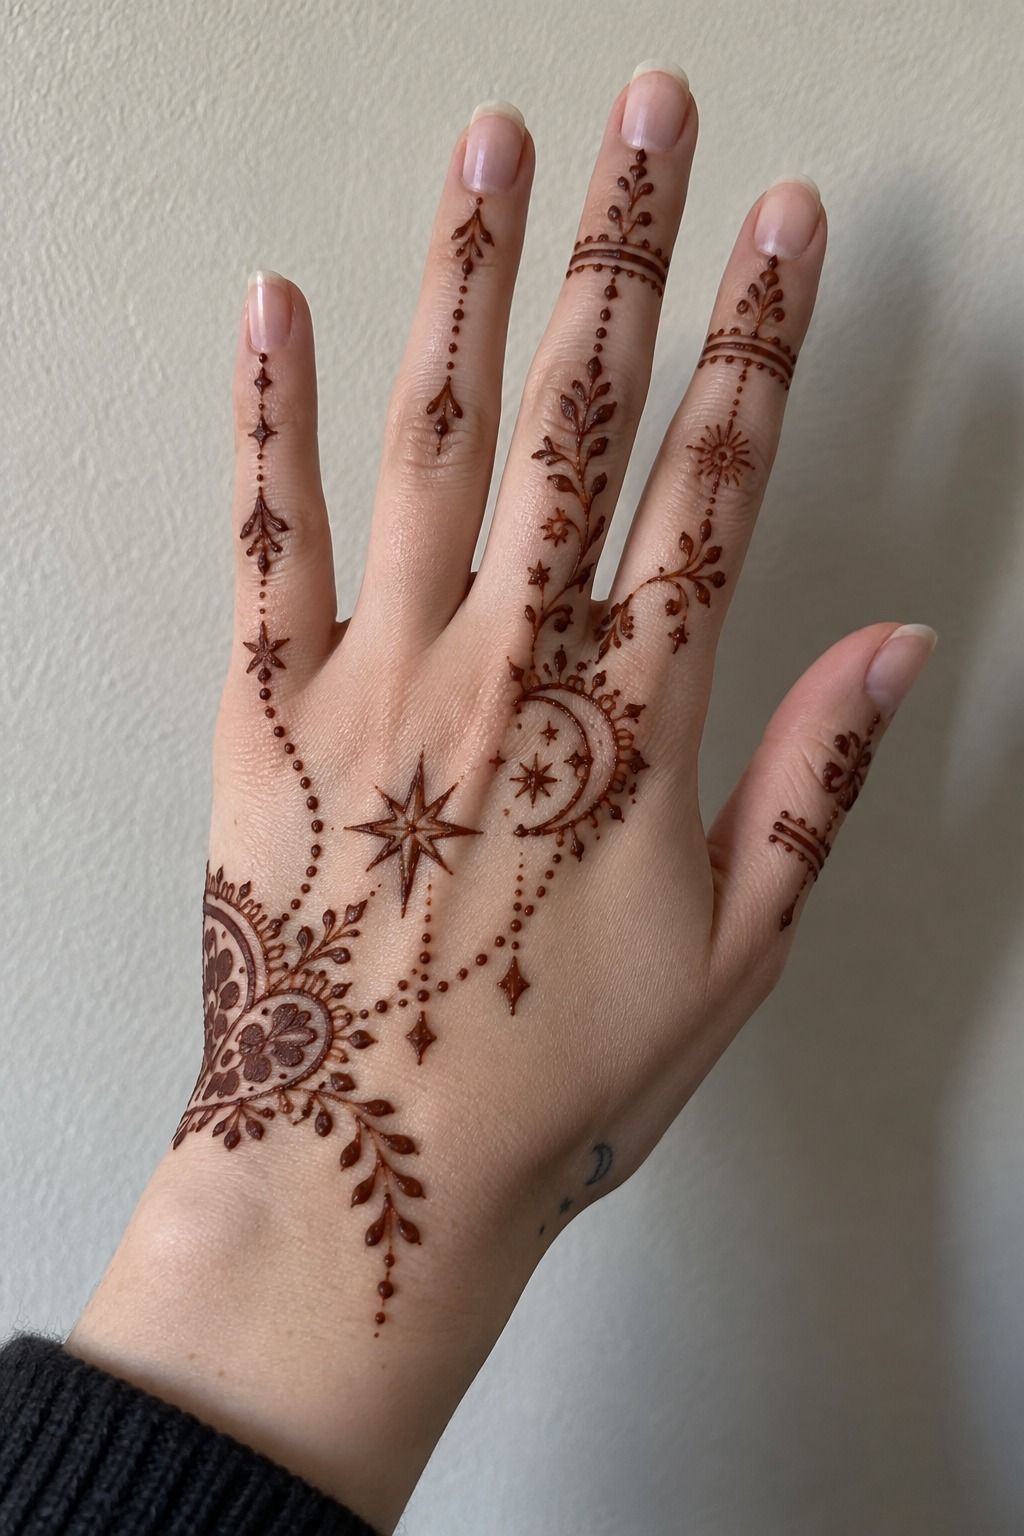
Begin with a fine-detail cone tip that produces a narrow, controlled mark. Simple henna designs work best when the first outline has breathing room between each curve. Keep the central shape small enough to read from a few feet away, then leave the decorative details for the second pass.
For a hand placement, trace one main stem from the wrist toward the base of the index finger. Add two or three leaves, not ten.
That restraint gives the design a minimal and understated quality, while the reddish-brown paste keeps the pattern recognizable as henna. You’ll see the shape more clearly if your skin is relaxed and your fingers are naturally open.
I prefer a single focal line over a dense cluster. The first time I drew a palm design, I kept adding petals until the original symbol disappeared.
Don’t make that mistake. Let your cosmetic pencil mark the path lightly, and check the design from the side before you apply the paste.
For more inspiration, compare this approach with simple very simple mehndi designs. You’ll notice that the strongest examples don’t rely on heavy coverage. They use spacing, one clear symbol, and a few sharp accents.
That combination can look delicate without becoming fragile.
2Which Symbol Will You Keep?
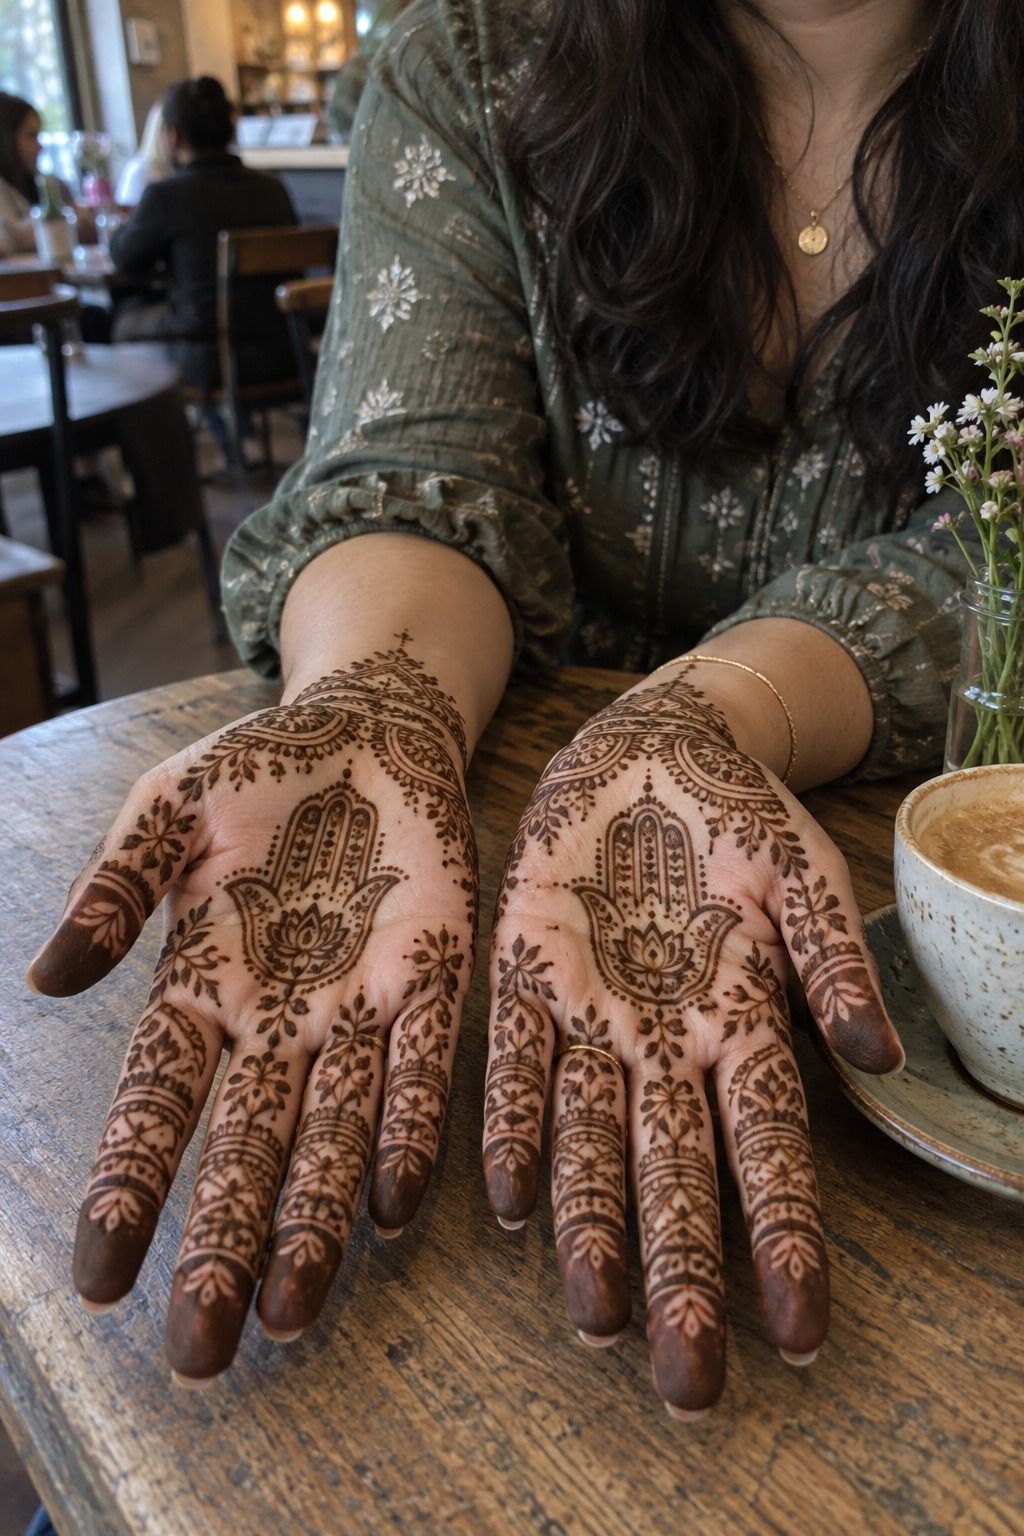
Choose one symbol that means something to you before you choose the decoration around it.
The Symbol Comes First
Your best design usually begins with a decision, not a pattern. Write the idea beside your personal symbol before you collect references. The emotional goal will guide the shape, density, and placement.
I’d rather see one elegant mark with a clear reason than ten ornate details competing for attention. You’ll save money, reduce editing time, and give the mehndi artist a cleaner brief. That usually creates better value than adding decoration you don’t truly want.
A reference can be graceful and intricate while still leaving room for your own story. Browse simple stylish mehndi designs for front hand for structure, then change the motif until it feels personal.
3Place Dainty Vines Along Fingers

Use the finger as a path, not a blank strip. A fine-detail cone can create one narrow vine that begins near the wrist, crosses the hand, and tapers before the first knuckle. Your design should feel connected rather than stamped on.
Keep the leaves angled in the same direction. Alternating every leaf can make the vine look stiff, while slight changes in angle give it a flowing rhythm. You’ll want the smallest leaves near the fingertips because those areas bend, rub, and receive more daily contact.
I’d avoid wrapping a delicate vine completely around a finger. It sounds dainty, but constant friction can make a narrow design look uneven as the stain fades. A partial band with one open break is more polished and easier for your mehndi artist to place.
If you like this placement, browse simple stylish mehndi designs for front hand before you sketch. Your hand has several visual zones, and the most stylish result usually respects those zones instead of forcing one pattern across every surface.
4Keep Curves Crisp And Balanced

Build your curves from large movements first, then add the small accents. A white cosmetic pencil can help you mark the central arc across the palm before the mehndi artist traces the guide with paste. Balanced spacing matters more than heavy coverage.
Use one dominant curve and repeat its direction in the petals, leaves, and fingertip marks. If your main line bends left, let the smaller details echo that motion. You’ll get a crisp finish when the negative spaces are nearly as intentional as the stained areas.
The common mistake is chasing symmetry with a ruler. Human hands aren’t perfectly mirrored, and a design that looks mathematically exact can feel stiff once it’s on skin. I’d rather see two related sides with slightly different details than a forced copy.
For a close comparison, save a few simple trendy mehndi designs and inspect their curves at full size. Look for clean turns, controlled line weight, and a clear focal point. If you’re squinting to understand the pattern, it needs editing before your appointment.
When a Curve Meets a Knuckle
A curve that looks sleek on paper may need to widen, shorten, or stop before it reaches a knuckle. Your hand changes shape constantly, so the most graceful design often leaves a deliberate break near high-motion areas.
Test the mark while you grip a cup, open a door, and make a loose fist. If the line folds into itself, move it rather than asking the mehndi artist to add more paste. Extra decoration won’t solve a placement problem.

5Plan Symmetrical Palm Details

Start with the center of the palm, then mirror the idea outward without duplicating every mark. A narrow cone tip can keep the core outline controlled when the design includes a flower, mandala, or geometric point.
Choose one central flower, mandala, or geometric point. Place matching leaves on both sides, then allow the outer details to change slightly with the shape of each hand. Your palms may look similar, but their creases and pressure points won’t line up perfectly.
I call this the Palm Compass Rule: the center gives direction, and the outer details guide the eye. Don’t fill every gap just because the palm offers space. A sacred or symbolic center can feel more powerful when it has clean skin around it.
Palms are demanding placements. They bend, wash, grip, and shed skin more than many other areas.
If you’re considering a palm design, ask your mehndi artist how the pattern may fade there. You can also compare the layout with simple Pakistani mehndi designs for open-space ideas.
6Flowing Wrist Patterns, Or A Closed Band?

Let the wrist act as a transition between the hand and forearm.
Palm Compass Rule
The Palm Compass Rule is simple: place the most meaningful mark where your eye naturally lands first. Let surrounding leaves, dots, or lines guide attention toward it rather than burying it.
This approach creates an understated henna pattern with a clear focal point. It can feel classic, timeless, and polished without becoming predictable. You don’t need a large design to make the idea memorable.
For more placement references, compare simple very simple mehndi designs with simple trendy mehndi designs. Notice how a small focal mark can control the entire composition.
7Trace Intricate Floral Outlines

Draw the flower as a structure, not as a pile of petals. A fine cone tip can create a controlled outer contour. Start with the center, add the largest petals, and finish with only a few interior lines.
Keep the outer petals slightly larger than the inner ones. This gives the flower a polished hierarchy and prevents the center from becoming muddy. Your design will look more intricate when every line has a job.
I’m partial to flowers with one imperfect petal. A completely identical bloom can look digital, while a tiny variation gives it a raw, hand-drawn quality. You’ll still have a refined result if the overall circle stays balanced.
If you want a more traditional reference, explore simple peacock mehndi designs. You can borrow the feather rhythm without copying the entire bird. A single curved feather, leaf, or eye detail may be enough to make your floral design feel iconic.
8Add Bold Fingertip Accents

Treat the fingertips as punctuation. A darker henna paste can help you preview how stronger fingertip accents will contrast with lighter palm lines, even while the fresh paste remains soft and greenish-brown.
Choose one fingertip pattern and repeat it across three or four fingers. Small dots, half-moons, crosshatching, or filled tips can work, but don’t use every option at once. You’ll get a stronger result when one repeated accent creates the rhythm.
Fingertips need special care because they’re always touching surfaces. Keep the paste on for one to two hours, then follow the artist’s instructions for lemon-sugar sealing and gentle removal. Those steps help the stain deepen without smearing the design.
And if the fingertips feel too intense, leave one finger open. That small break can make the whole arrangement more playful and less formal. Your hand will look expressive without becoming visually heavy.
For more layout references, save several simple new bridal mehndi designs and study how darker details are distributed.
9Match Latest Henna Design Trends
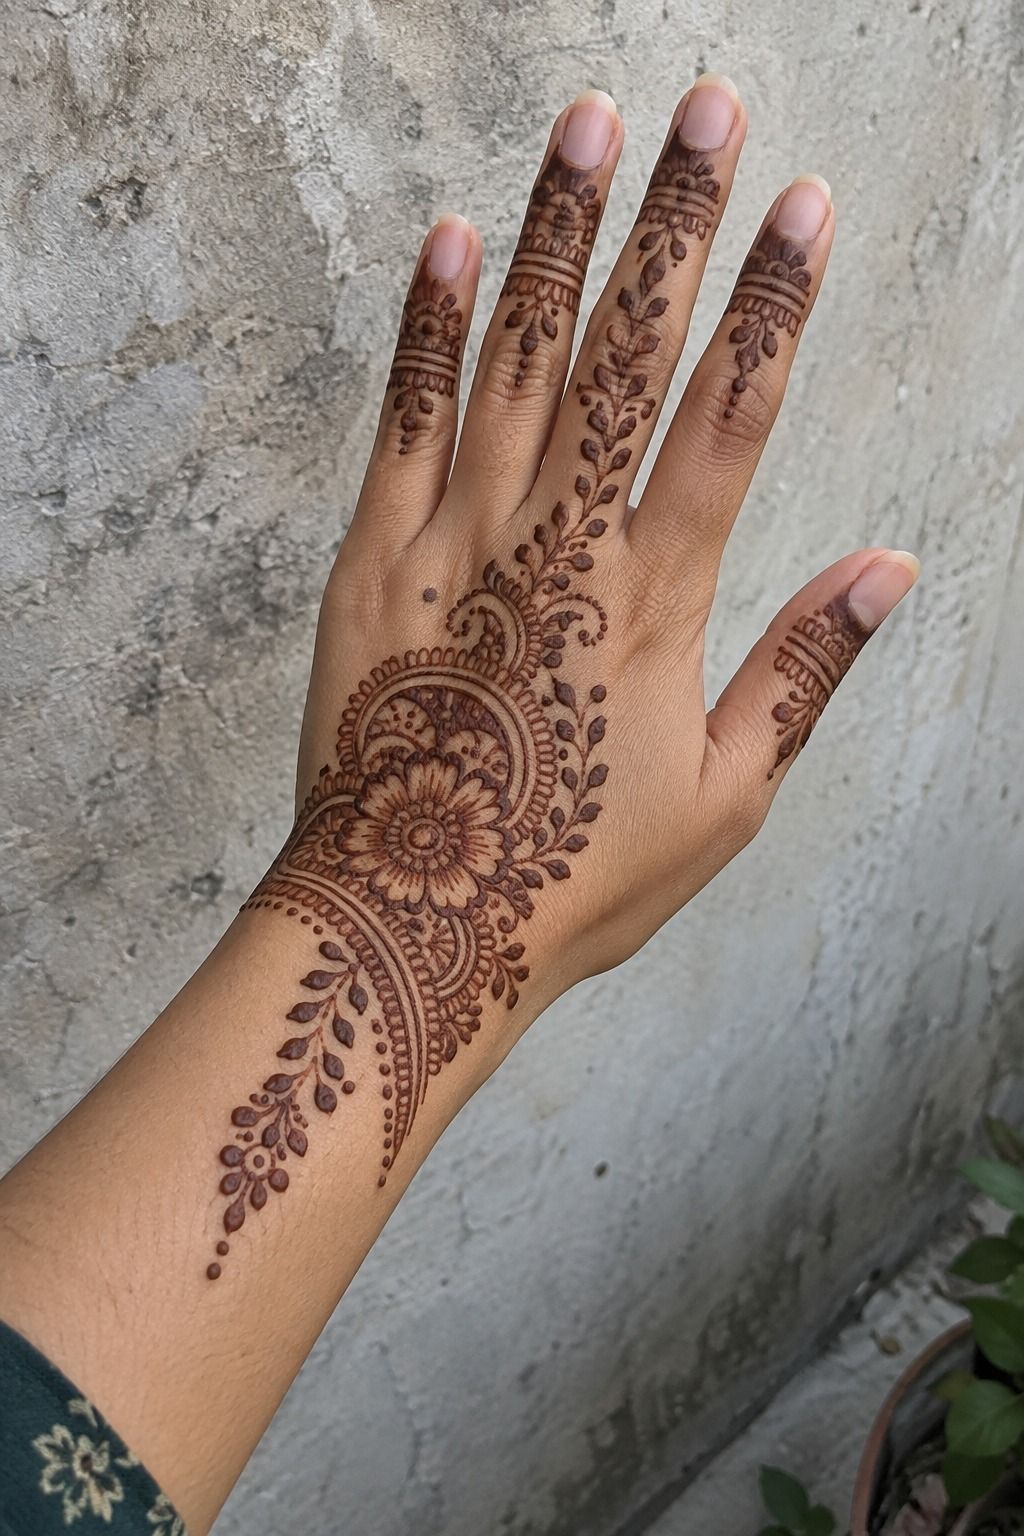
Use current references to notice techniques, not to surrender your own idea. The latest simple henna designs often combine negative space, thin botanical lines, small geometric marks, and one stronger focal shape. A paper hand guide lets you test that mix before you apply the paste.
To keep your version current, simplify the density and choose one unexpected detail, such as a tiny star inside a flower or an open paisley with a single dark edge. Your design can feel modern while still respecting the visual language of henna.
I’d avoid chasing every trend in one appointment. A fashionable detail can feel dated quickly when it’s surrounded by other fashionable details.
Pick one direction, such as geometric spacing or botanical movement, then let the rest stay classic. That balance gives your design a timeless quality.
You can compare trend direction with simple trendy mehndi designs and simple modern mehndi designs. Notice which patterns still look strong without an explanation. If the design needs several sentences to make sense, your own focal point probably needs editing.
Current Or Classic?
A daring detail can make a simple henna pattern feel edgy, but it shouldn’t overpower the symbol. Ask whether the trend adds meaning or only makes the design look newer for a few months.
Classic motifs often have stronger long-term appeal because they give you room to adjust scale and spacing. You can still add one vibrant detail without turning the entire concept into a trend checklist.
10Test Delicate Patterns Before Application

Make a temporary version before you approve the final design. A natural henna cone can show how a delicate pattern reads across fingers and the palm.
Test the design with your hand open, closed, and holding a cup. Movement changes everything.
Photograph the test in daylight and under indoor light. You’ll notice whether the motif sits too close to a crease, whether the flower points in the wrong direction, or whether your wrist needs another inch of open skin.
I once tested a delicate line too close to a finger crease and loved it in one pose. Then I bent my finger.
The entire curve folded into a dark little knot. Don’t trust one position. Your test should answer practical questions before the appointment.
If you’re booking a mehndi artist, bring the temporary reference and your edited sketch. Ask the artist to resize it without changing the symbol.
A skilled artist may suggest a slightly wider line or a different placement so the stain stays readable. That advice can protect the meaningful part of your idea and improve the value of your budget.
11Protect Meaningful Lines During Drying

Keep the paste undisturbed while it dries, especially if your design includes a lemon-sugar sealant.
The Cost of a Meaningful Mark
A low price isn’t automatically good value, and a high price isn’t automatically proof of skill. Compare a finished stain portfolio, hygiene, communication, placement experience, and the artist’s ability to edit your concept.
Ask what the quoted cost includes. Some mehndi artists charge a consultation fee, some have a minimum booking, and some include a short design-planning period. A clear answer helps you decide whether the appointment is worth it before you pay a deposit.
For additional reference points, compare simple Pakistani mehndi designs with simple peacock mehndi designs. You’re looking for line control and spacing, not a design to copy exactly.
The Meaning Behind the Palm Compass Rule
I’ve changed my mind about simple henna designs more than once. At first, I thought the smallest pattern would be the easiest choice.
Then I watched a tiny small flower disappear beside a moving knuckle, and I understood that simplicity isn’t the same as minimal effort. A small design has nowhere to hide.
Every curve, gap, and dark mark carries more weight.
The best designs begin with a decision about meaning, then move toward shape. If the symbol matters, your placement should help it stay visible. If the placement matters, your pattern should respect how that area bends and rubs.
I don’t think you need a dramatic image to make a powerful statement. A dainty vine on the wrist can hold more emotional weight than a crowded pattern chosen in a hurry.
I also think artists should be honest about difficult placements. Hands, fingers, feet, and palms can be beautiful locations, but they experience friction and movement every day.
A sharp fingertip accent may fade sooner. A delicate wrist design may need more open space than you expected.
That isn’t a failure. It’s part of choosing a design that can live with you for one to three weeks.
Your best reference is only a starting point. You’ll need to edit it for your skin, your anatomy, and your story. Keep the line that makes you stop scrolling.
Remove the decoration that only fills space. That’s how a simple henna idea becomes expressive, personal, and worth carrying!
A Few Things Worth Answering
How much does a simple henna design usually cost?
A small custom henna design commonly costs about $15 to $40 in the United States, depending on the artist, region, placement, and size. Bridal and event bookings may range from $50 to $250. Clear pricing should include the cone, design time, drying guidance, and any travel or booking fee.
Are simple henna designs a good idea for a first application?
Yes, simple henna designs can suit a first application because the pattern is readable and the concept can stay personal without becoming overwhelming. Choose clean paste, a comfortable placement, and an artist with finished mehndi work. A focused design is easier to enjoy than a rushed large piece.
How do I choose a mehndi artist for simple henna designs?
Review an artist’s mehndi portfolio for clean curves, consistent line weight, and photographs taken after the stain has darkened, not only images of fresh paste. Ask about their experience with hands, fingers, or palms if that’s your chosen location. The artist should also show strong hygiene practices and explain drying and aftercare clearly.
Does applying simple henna hurt?
Henna paste rests on the skin without needles or cutting, so the application should not hurt. You may notice cool paste, mild tightness as it dries, or sensitivity to a fragrance or essential oil. Ask about the ingredients first, especially if you have reactive skin or plan to use eucalyptus oil.
How long does a simple henna design last?
A simple henna design usually lasts one to three weeks. Keep the paste on for one to two hours, use a lemon-sugar seal if recommended, and avoid scrubbing the stain away. The color often darkens on the second day before gradually fading as the outer skin sheds.
What’s the best placement for simple henna designs?
The forearm and wrist are practical choices because they offer visibility and smoother skin. Hands and fingers create a stronger mehndi resemblance, but they experience more friction and may fade sooner. A readable forearm design should match your occasion, daily routine, and preferred level of detail.
Start With the Palm Compass Rule
If I had to pick one step, I’d start with testing the design while your hand moves. A pattern that survives an open palm, a bent finger, and ordinary light has a better chance of staying crisp and meaningful.
Save your favorite reference, show it to your mehndi artist, and edit until the symbol still feels personal. That’s the test!


7 responses to “How to Create Simple Henna That Means More Than It Says – 11 Ideas”
[…] It can look heavy beside an organic vine. If you want more inspiration, compare this placement with simple very simple mehndi designs and easy henna tattoo […]
[…] more references, I looked through simple minimal henna designs, especially when I wanted to compare open spacing with heavier traditional work. A cotton swab […]
[…] you’re practicing, copy the spacing from these simple minimal henna designs before trying your own variation. A single dot cluster can teach you more about cone pressure than […]
[…] Choose one strong gesture, keep your lines graceful, and let the color deepen naturally. For more starting points, browse these simple henna designs. […]
[…] you’re comparing layouts, save these simple mehndi designs for front hand easy application before you start. You’ll notice that the strongest examples leave open skin around the wrist and […]
[…] a related idea, browse these simple minimal henna designs before you begin. You can borrow the spacing, then make your own finger trails more personal with a […]
[…] you’re new to hand placement, compare these ideas with our simple minimal henna designs. You’ll see how much negative skin changes the entire result. Fingers need restraint, especially […]