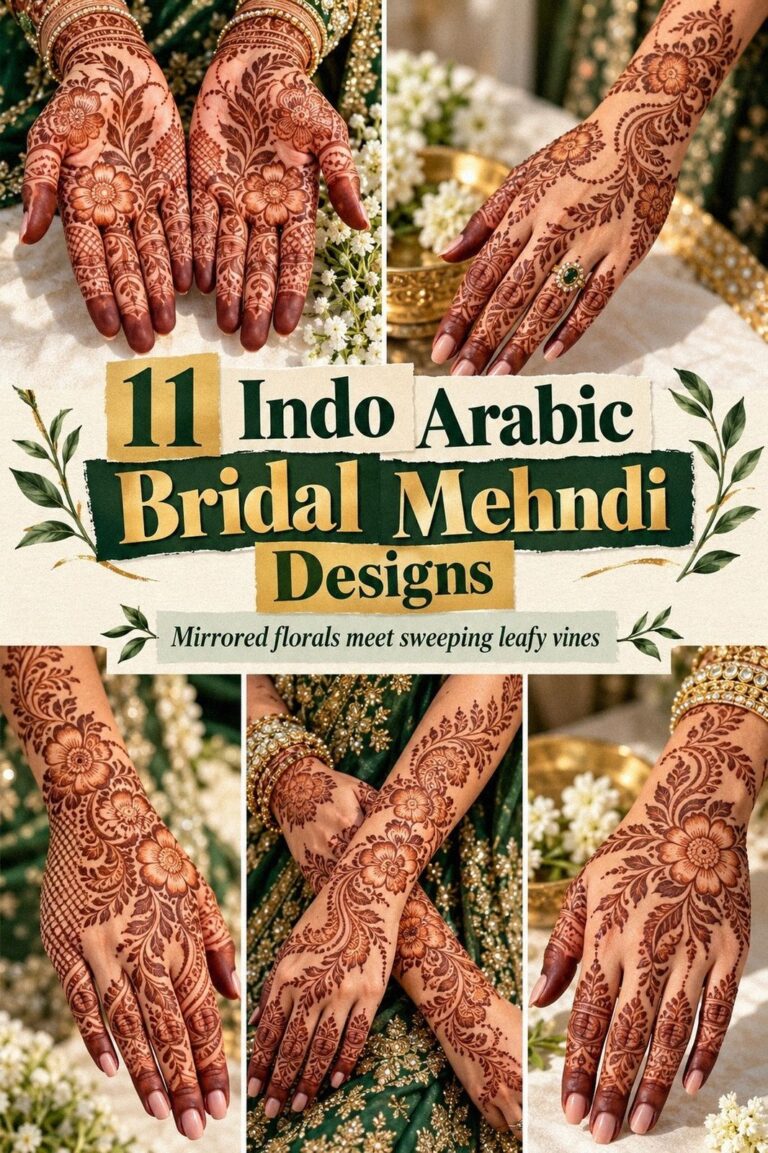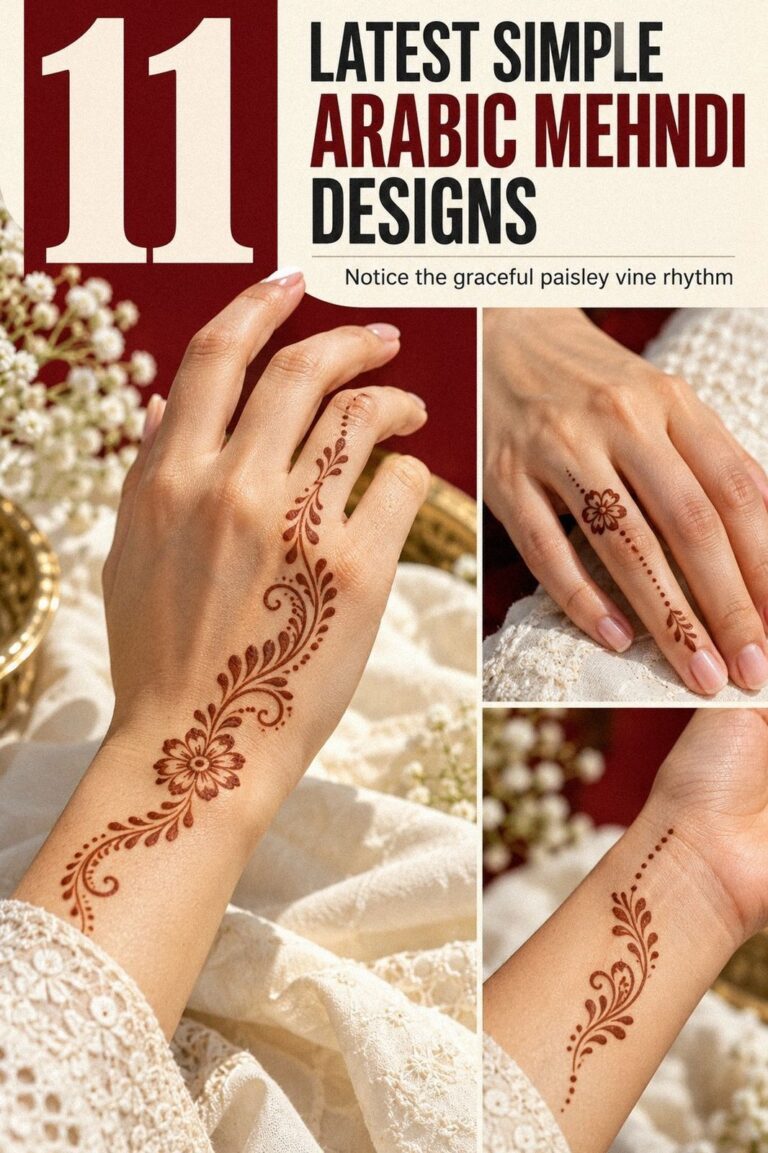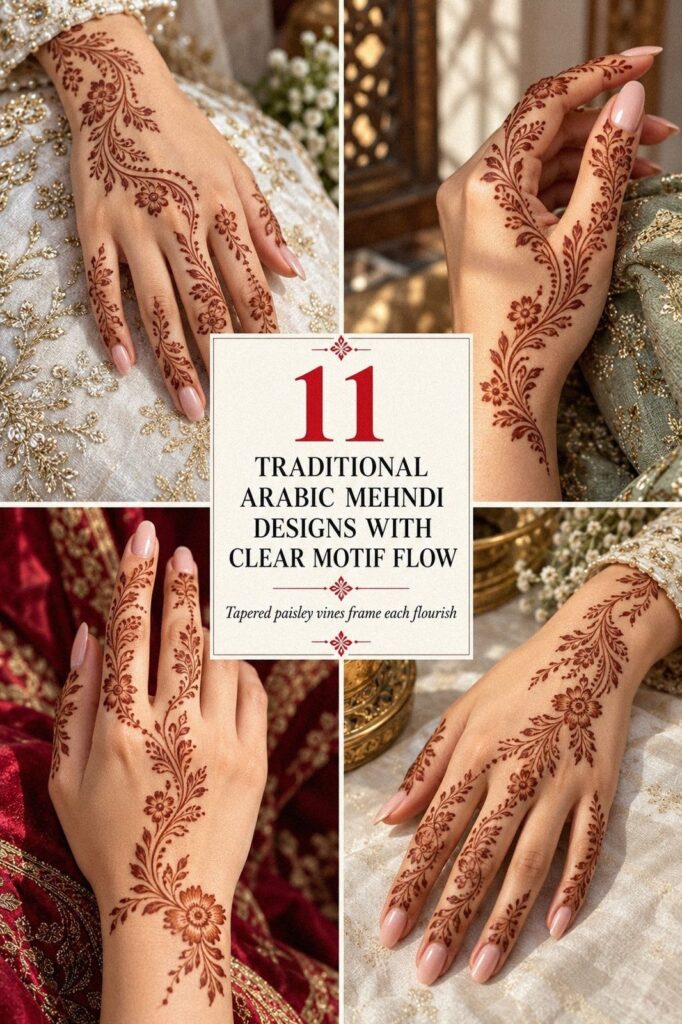
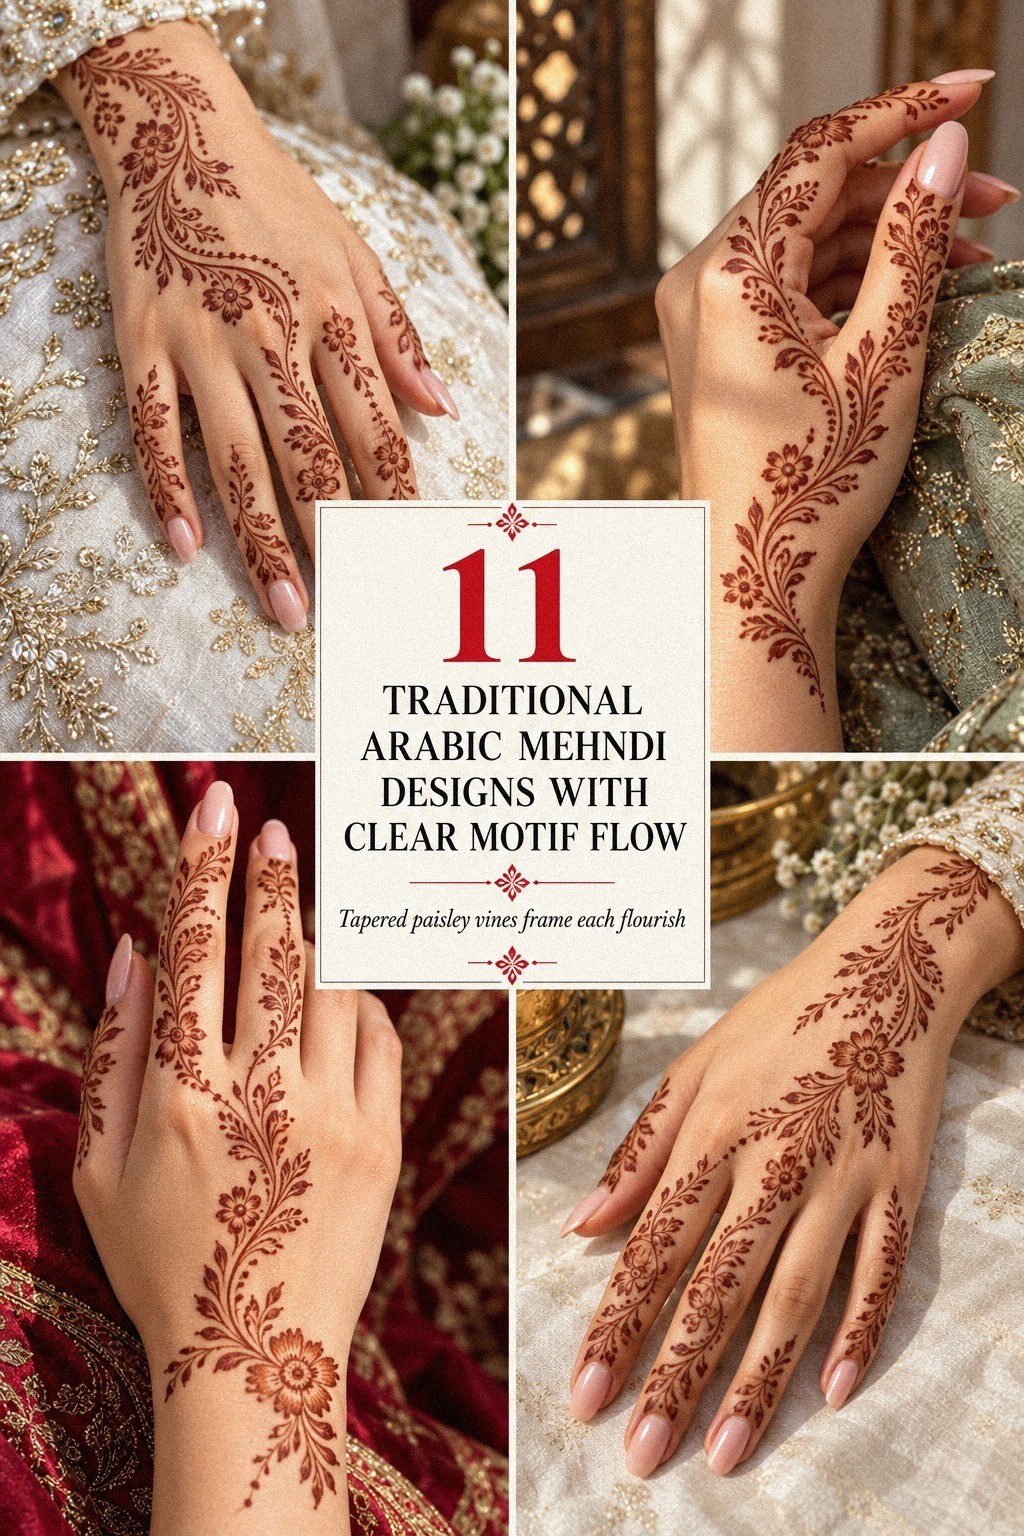
Traditional Arabic mehndi designs can look intricate without needing a complicated kit. I’ve squeezed a heavy paisley onto every finger before, and I regretted it when the paste cracked before drying. A clean cone, reddish-brown henna, and deliberate open skin work better. These ideas keep the motifs elegant, symbolic, and wearable!
I’ve kept every idea practical for application, whether you’re preparing for Eid, a wedding, a sangeet, Diwali, or an ordinary afternoon of practice. If you’re comparing one cone with a larger kit, this guide focuses on designs that create plenty of visual impact without wasting paste.
- Draw Simple Traditional Arabic Mehndi Designs For Fingers (The Finger-Vine Rule)
- Build Traditional Arabic Mehndi Designs With Bold Wrist Vines (The Wrist-Anchor Method)
- Shape Latest Traditional Arabic Mehndi Designs For Palms (The Palm-Window Rule)
- Trace Traditional Arabic Mehndi Designs In Fine Linework (The Single-Flow Test)
- Shape Feet With Traditional Arabic Mehndi Designs And Symbolic Floral Motifs (The Petal-Path Rule)
- Draw Traditional Arabic Mehndi Designs Along The Ankle (The Open-Chain Method)
- Extend Delicate Traditional Arabic Mehndi Designs Along The Forearm (The Long-Vine Rule)
- Can Traditional Arabic Mehndi Designs Use Geometric Negative Space? (The Open-Grid Rule)
- Choose Traditional Arabic Mehndi Designs For Hand Backs Over Dense Fill (The Open-Gap Choice)
- Add Traditional Arabic Mehndi Designs With Dramatic Peacock Details (The Peacock Curve)
- Keep Traditional Arabic Mehndi Designs Minimal With Deep Reddish-Brown Accents (The One-Cone Finish)
1Draw Simple Traditional Arabic Mehndi Designs For Fingers (The Finger-Vine Rule)
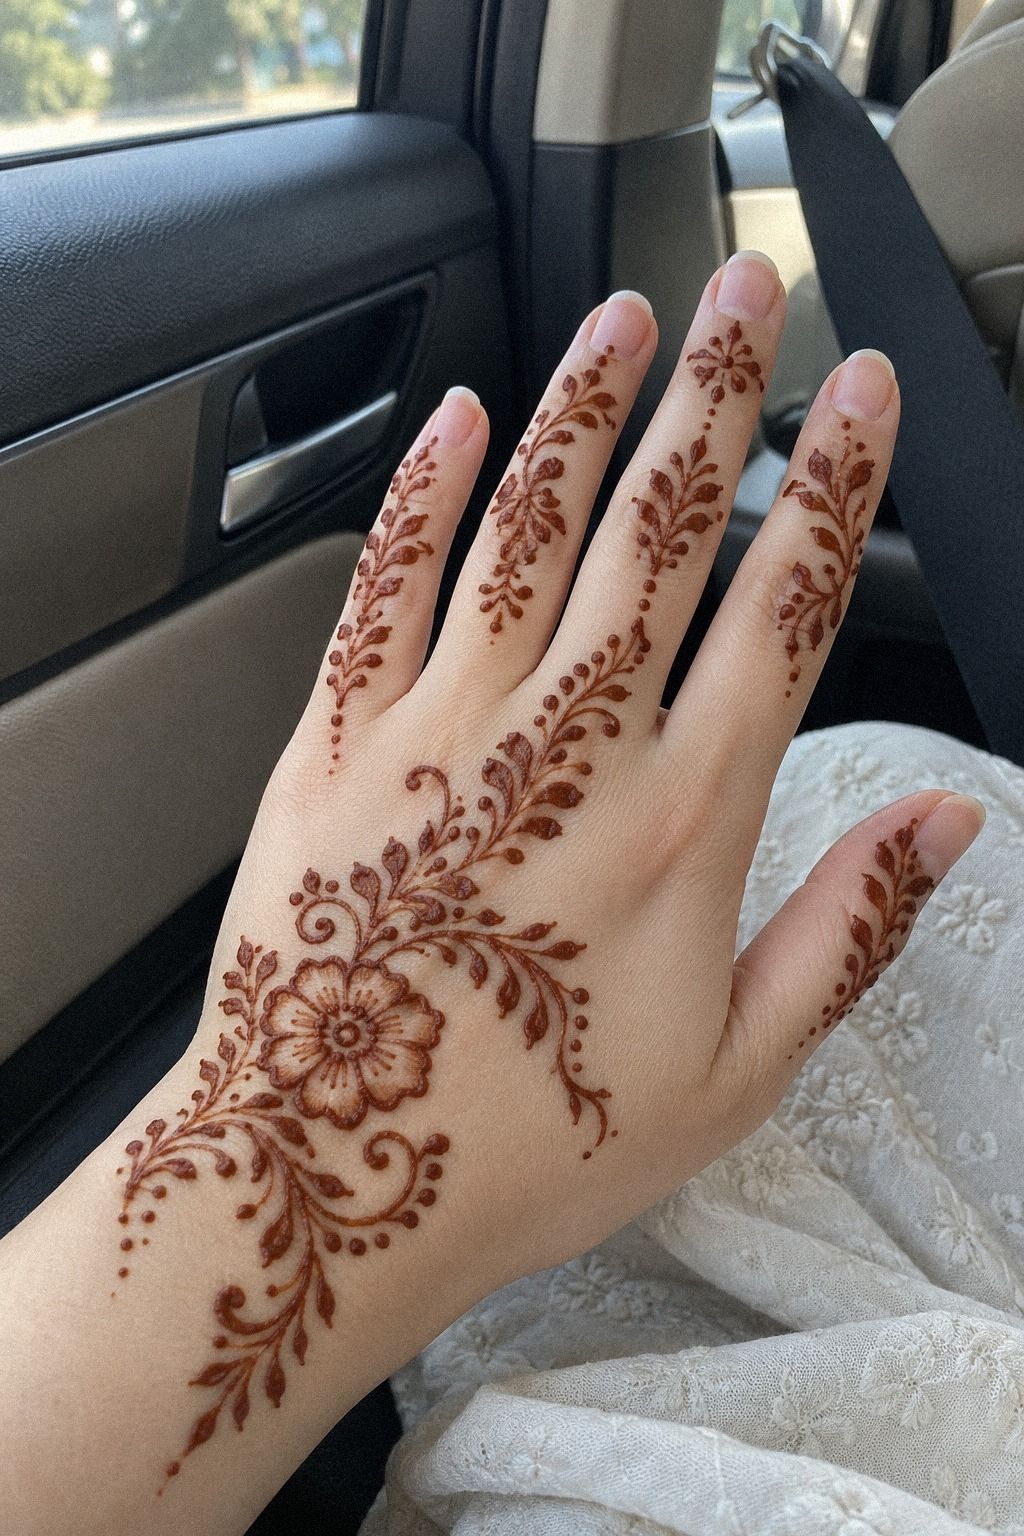
Start with a slim vine that travels along one finger, then give each leaf room to breathe. Natural henna paste will look orange at first, so the finished design will deepen into a reddish-brown stain as it rests. Keep the fingertip motif smaller than the palm accent, or the whole hand can look crowded.
Choose one central paisley for the back of the hand and let three crisp leaves point toward the index finger. You don’t need matching fingers. In fact, I prefer one detailed finger beside two nearly bare ones because the contrast feels minimal and elegant.
A dainty leaf chain, one symbolic paisley, tiny dots, and open skin around every curve create a personal composition. The simple Arabic mehndi designs collection can help when you’re deciding whether extra detail is worth the time and paste.
If you’re learning, use a fine henna cone with a narrow opening and practice three lines on paper first. You’ll notice that steady pressure matters more than speed.
Don’t cover every knuckle. Knuckle spacing makes the pattern look sleek and understated while the paste dries. That balance matters when you’re working with one cone.
Try a tiny variation on each finger. One can carry a tiny leaf, another a dot trail, and a third a miniature paisley. The result feels crisp rather than copied.
2Build Traditional Arabic Mehndi Designs With Bold Wrist Vines (The Wrist-Anchor Method)
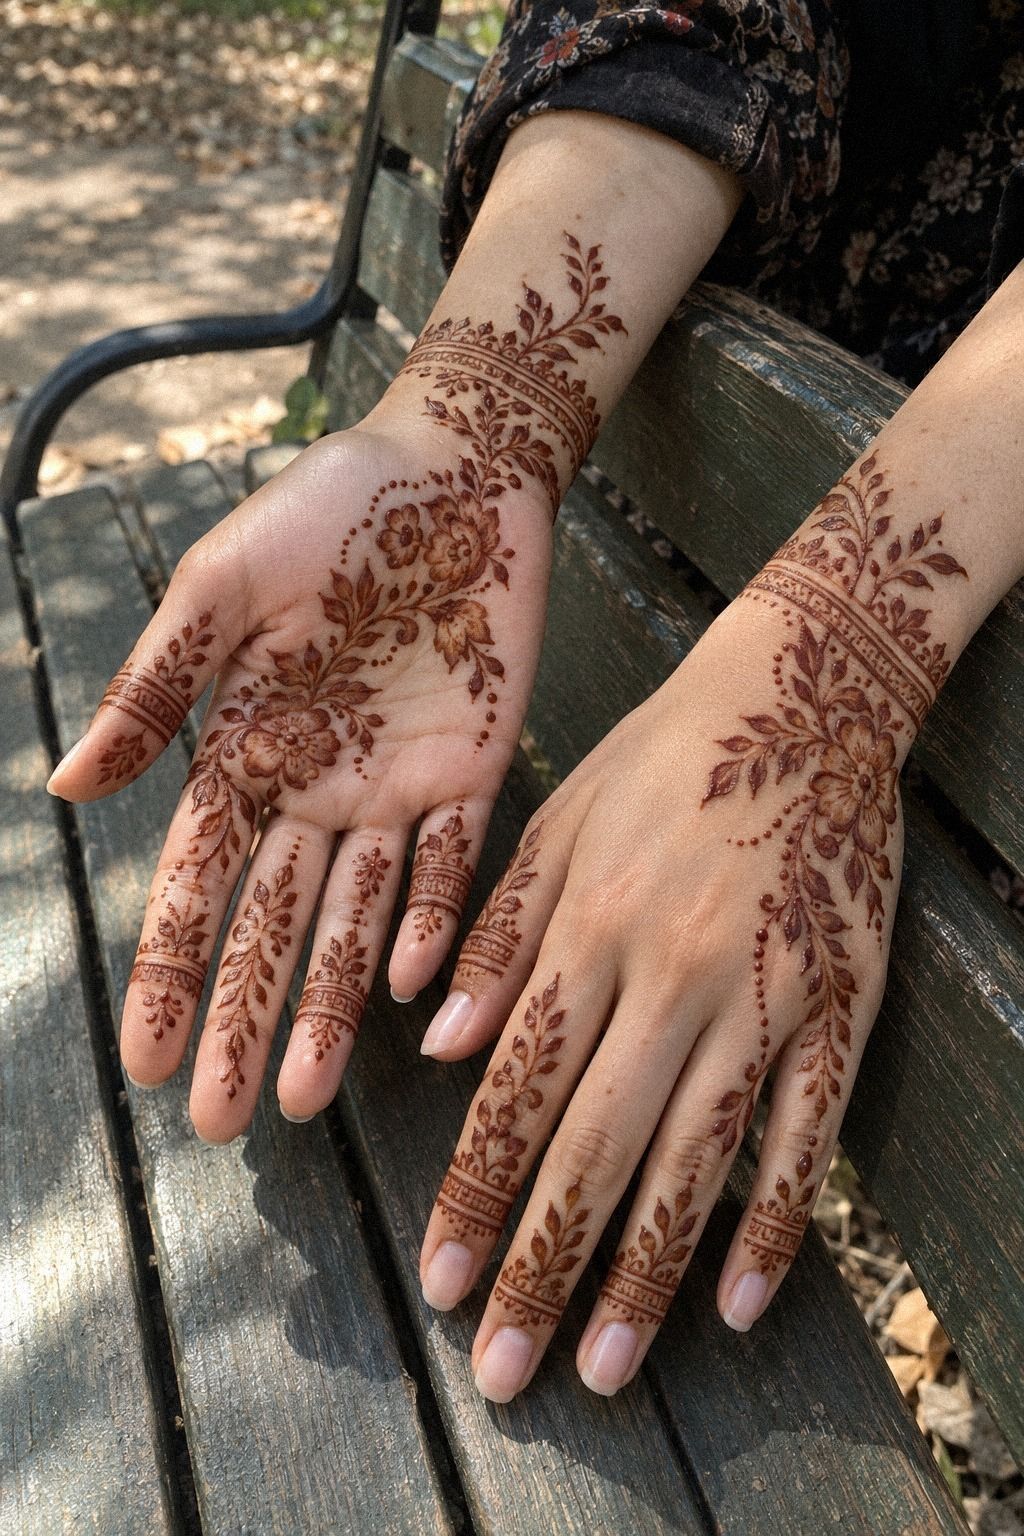
For a strong wrist design, draw one flowing vine from the base of the palm toward the inner wrist.
3Shape Latest Traditional Arabic Mehndi Designs For Palms (The Palm-Window Rule)
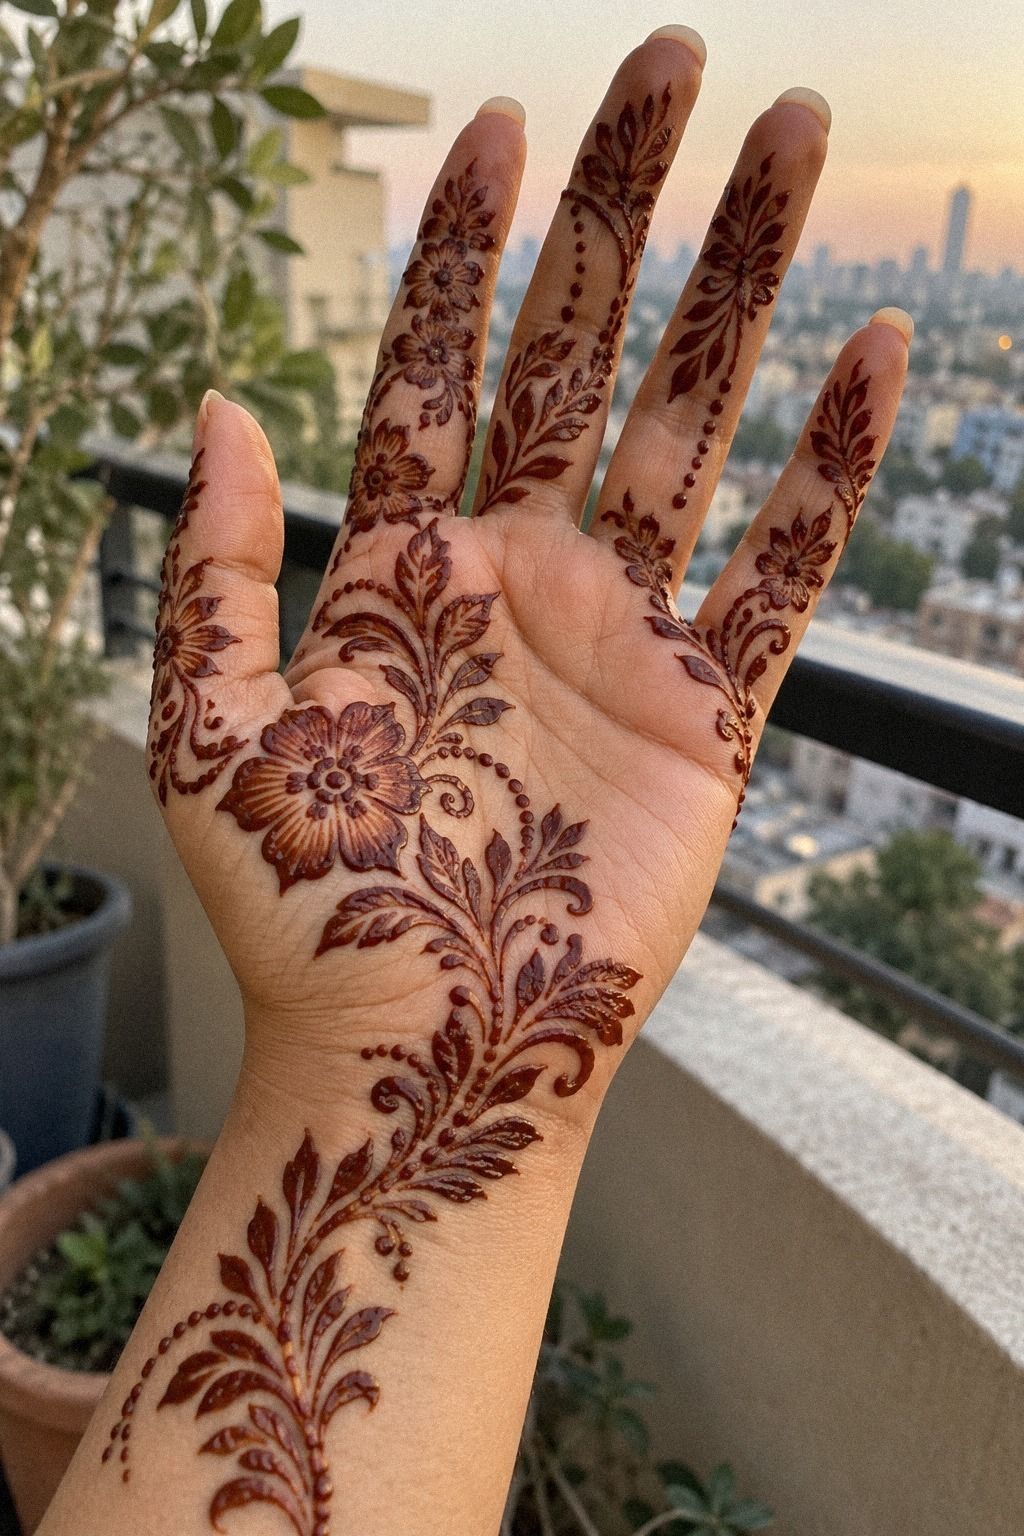
A palm design needs a clear center. Draw a rounded central flower, open mandala, or compact paisley in the middle, then build outward with curved leaves. This creates a striking frame while keeping the natural folds of your palm visible.
Your palm gets more friction than the back of your hand, so avoid tiny details that depend on perfect edges. Medium-width lines will give you a more reliable stain.
I tested overly fine dots on my palm once, and they disappeared before the rest of the pattern had darkened. If you’re weighing intricate detail, start with a larger motif and add small marks only if the composition still needs them.
Use one of these layouts:
– A four-leaf flower with a rounded center. – A paisley pointing toward the wrist. – A half-mandala along the thumb pad. – Two crossing vines across the lower palm.
If you’re drawing for Eid, a wedding, or a sangeet, you can add a second palm motif with a slightly different center. The Indo-Arabic simple mehndi designs collection shows how to combine open Arabic movement with detailed palm shapes.
Don’t seal the paste too early. Let it dry naturally for about 1 to 2 hours, and keep your palm relaxed while the raised lines set. The extra patience is worth it if you want a deeper result.
4Trace Traditional Arabic Mehndi Designs In Fine Linework (The Single-Flow Test)
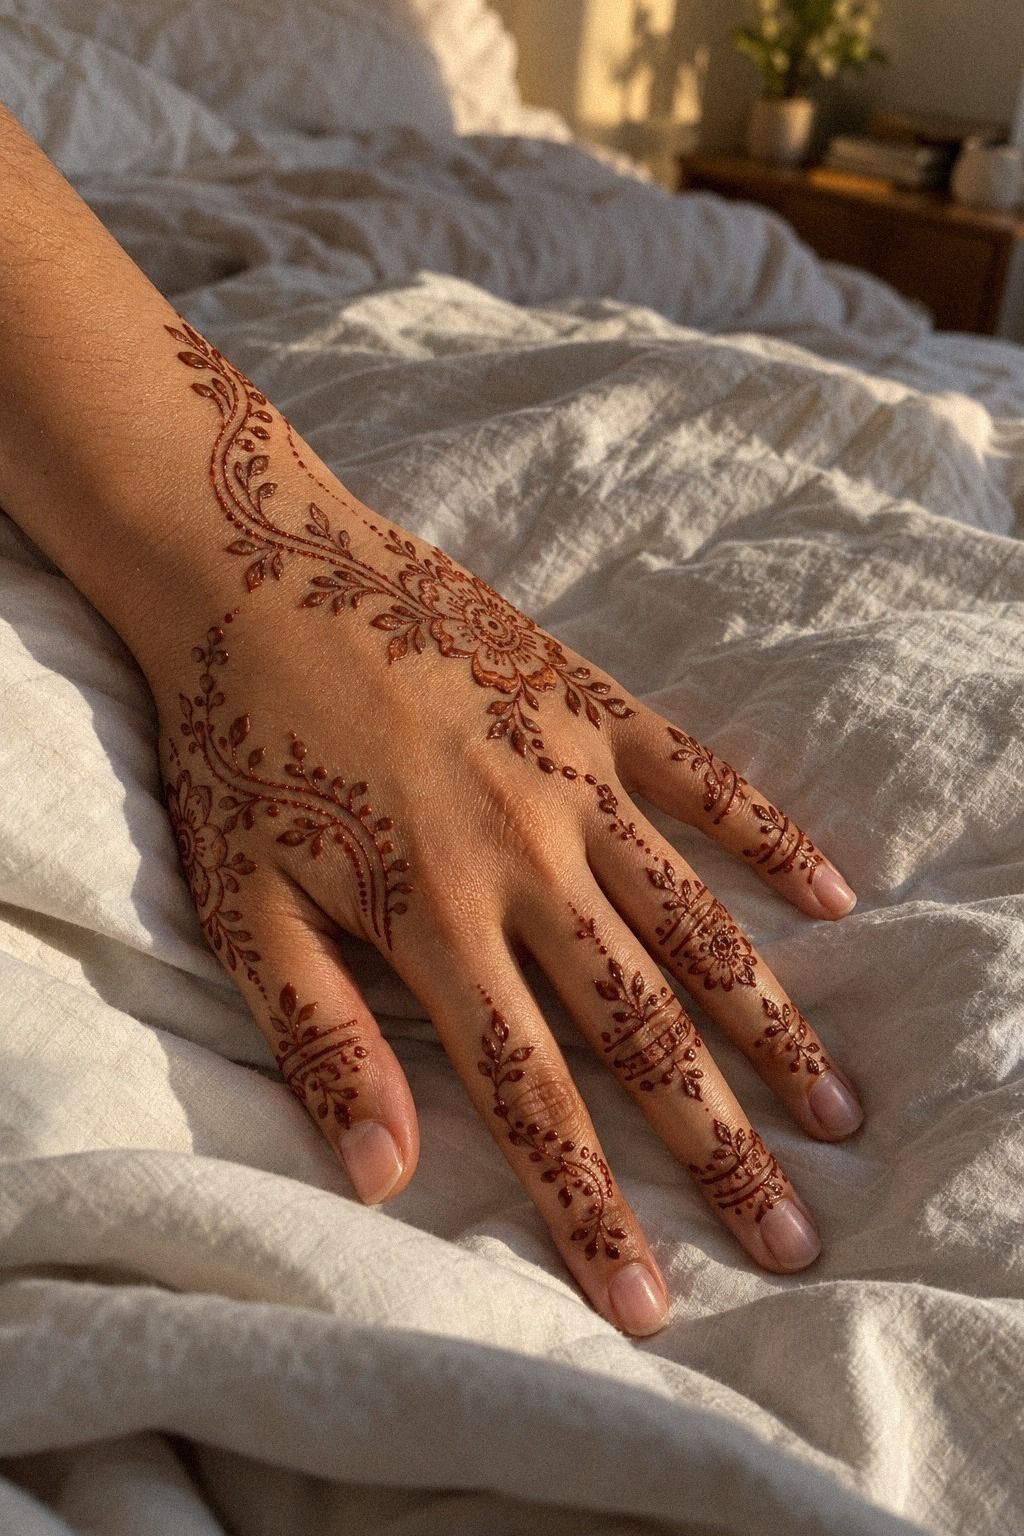
Fine lines suit Arabic mehndi when they travel in one confident direction. Begin with the longest curve first, then add leaves only where the route feels empty.
A single-flow line can connect a paisley, flower, and dot trail without making the design look assembled. It’s a polished approach when you’re practicing with limited paste.
Use steady pressure at the start of each curve. If the line becomes uneven, stop, let the tip clear, and continue from the nearest natural point.
A fine tip works well for delicate leaves, but don’t force every motif into miniature scale. Your design will look sharper when the smallest detail remains easy to read.
These modern Arabic mehndi designs can help you study how fine lines move through open areas.
5Shape Feet With Traditional Arabic Mehndi Designs And Symbolic Floral Motifs (The Petal-Path Rule)
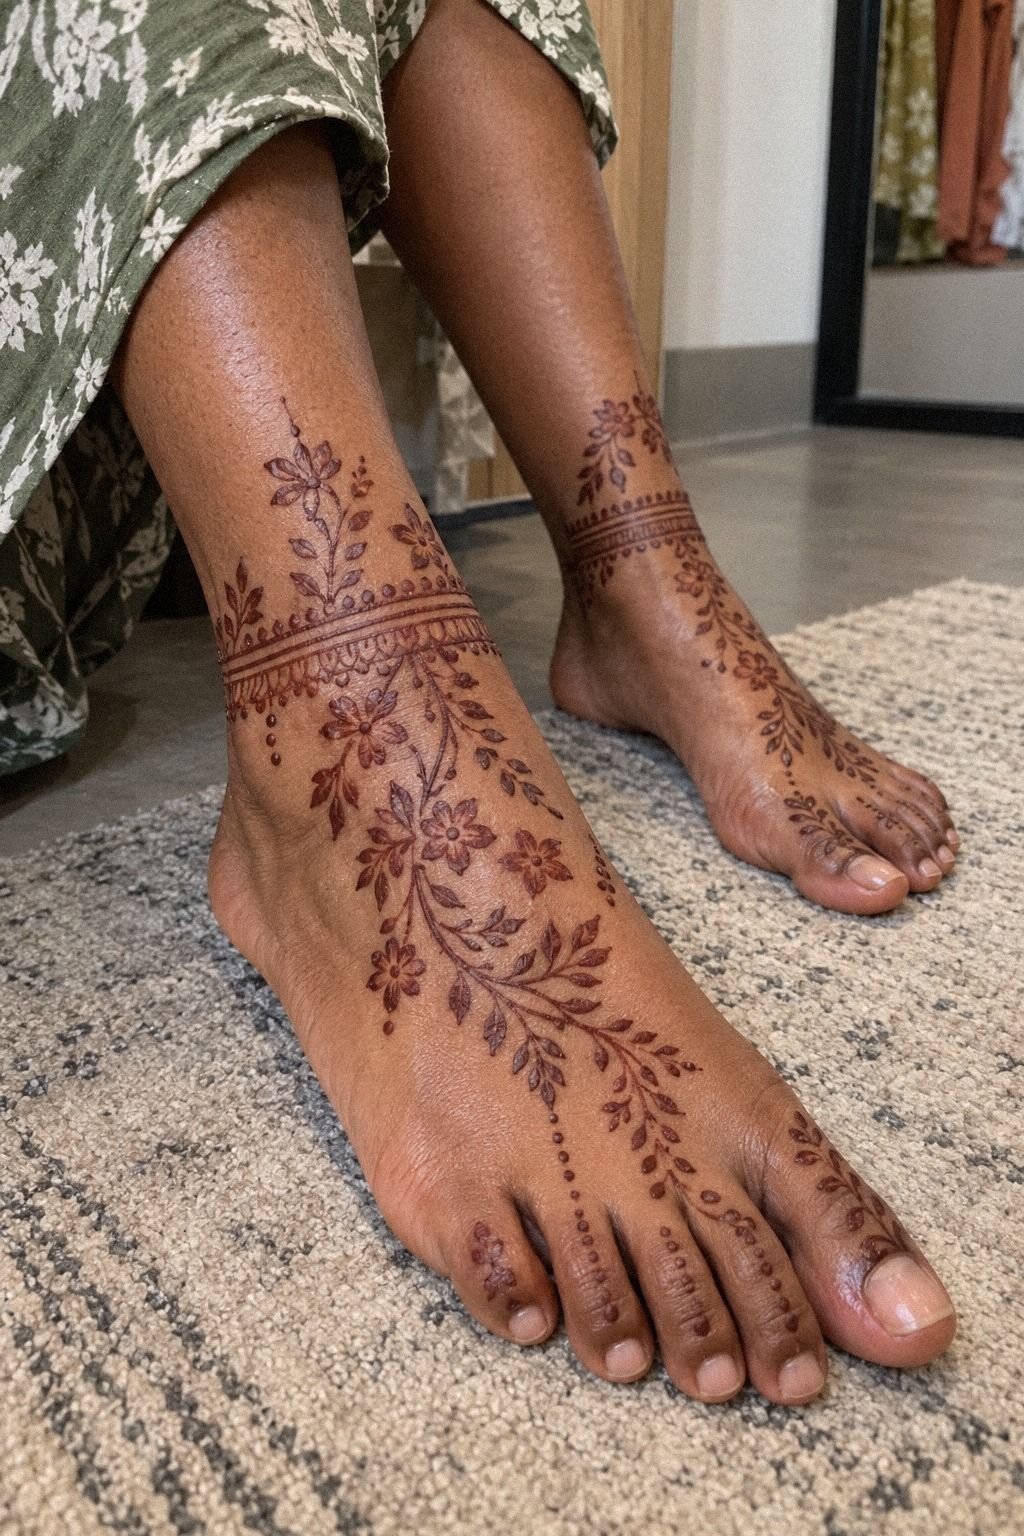
Arabic mehndi on the feet can be ornate without covering the entire surface. Start at the ankle with an ankle flower, then let a narrow trail descend toward the top of the foot.
The result feels symbolic and intentional, especially when the flowers represent celebration, affection, or family. A large floral anchor is usually easier to read than a crowded cluster.
The skin around the ankle and foot can experience movement and rubbing, so choose sturdy shapes. A curved leaf, a larger petal, and a few dots will read more clearly than a dozen tiny marks.
Try this sequence:
– One floral anchor at the ankle. – A curved stem toward the toes. – Three leaves on one side. – A small paisley near the foot’s center.
For a bridal occasion, you might prefer a fuller arrangement, while a family celebration may suit a single open flower. The Indo-Arabic bridal mehndi designs collection offers denser ideas if you want to build the motif gradually.
Keep your feet still while the dry paste sets. You won’t want socks touching the pattern, and you should avoid water until the paste has released naturally. That care can make the difference between a striking stain and a disappointing one!
6Draw Traditional Arabic Mehndi Designs Along The Ankle (The Open-Chain Method)
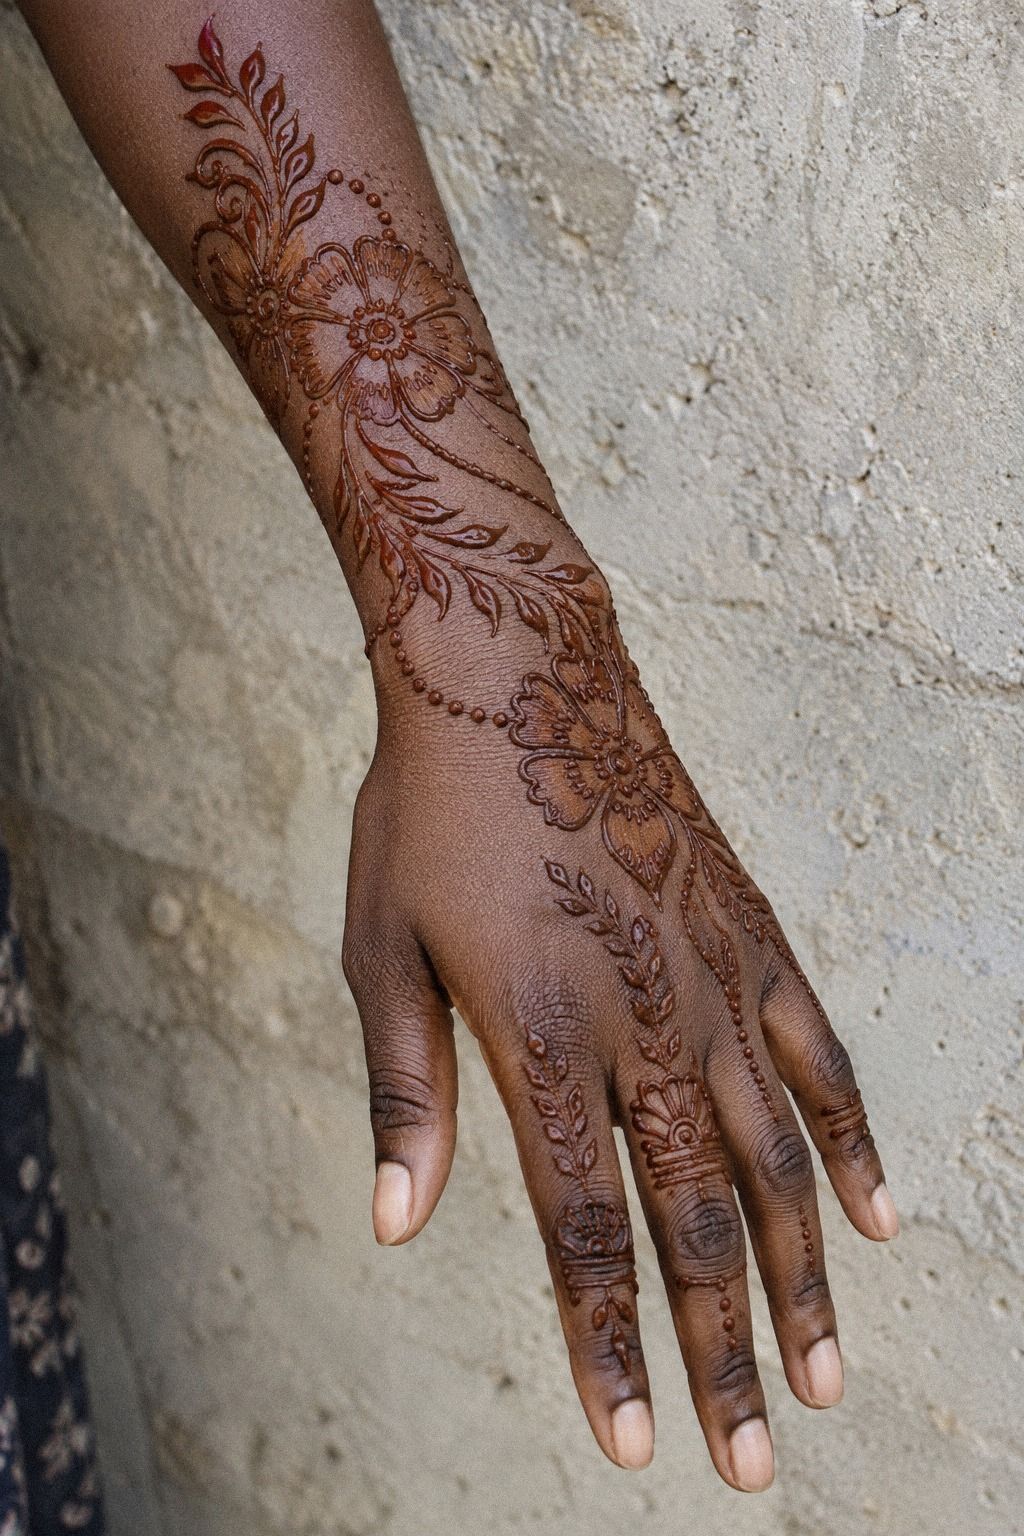
An ankle chain works best when it looks drawn rather than wrapped. Begin with three linked leaves on one side of the ankle, then add a soft curve toward the top of the foot.
This gives the design a delicate and flowing direction. A curved ankle stem can feel feminine without becoming overly formal.
Natural henna leaves a temporary stain, so you can try a slightly bolder composition here than you might choose for your palm. A central paisley, two flowers, and open dots create a playful finish.
If your ankle is narrow, shorten the shorter vine instead of shrinking every detail. Tiny marks can lose their clarity, while a shorter motif still looks polished.
Your placement matters. A design that sits directly beneath a sandal strap may rub away sooner, while one placed slightly above the ankle can stay clearer.
The easy Arabic mehndi designs guide includes simple trails you can adapt. I’d skip heavy filled bands around the ankle because the open chain has more graceful movement when you walk.
7Extend Delicate Traditional Arabic Mehndi Designs Along The Forearm (The Long-Vine Rule)
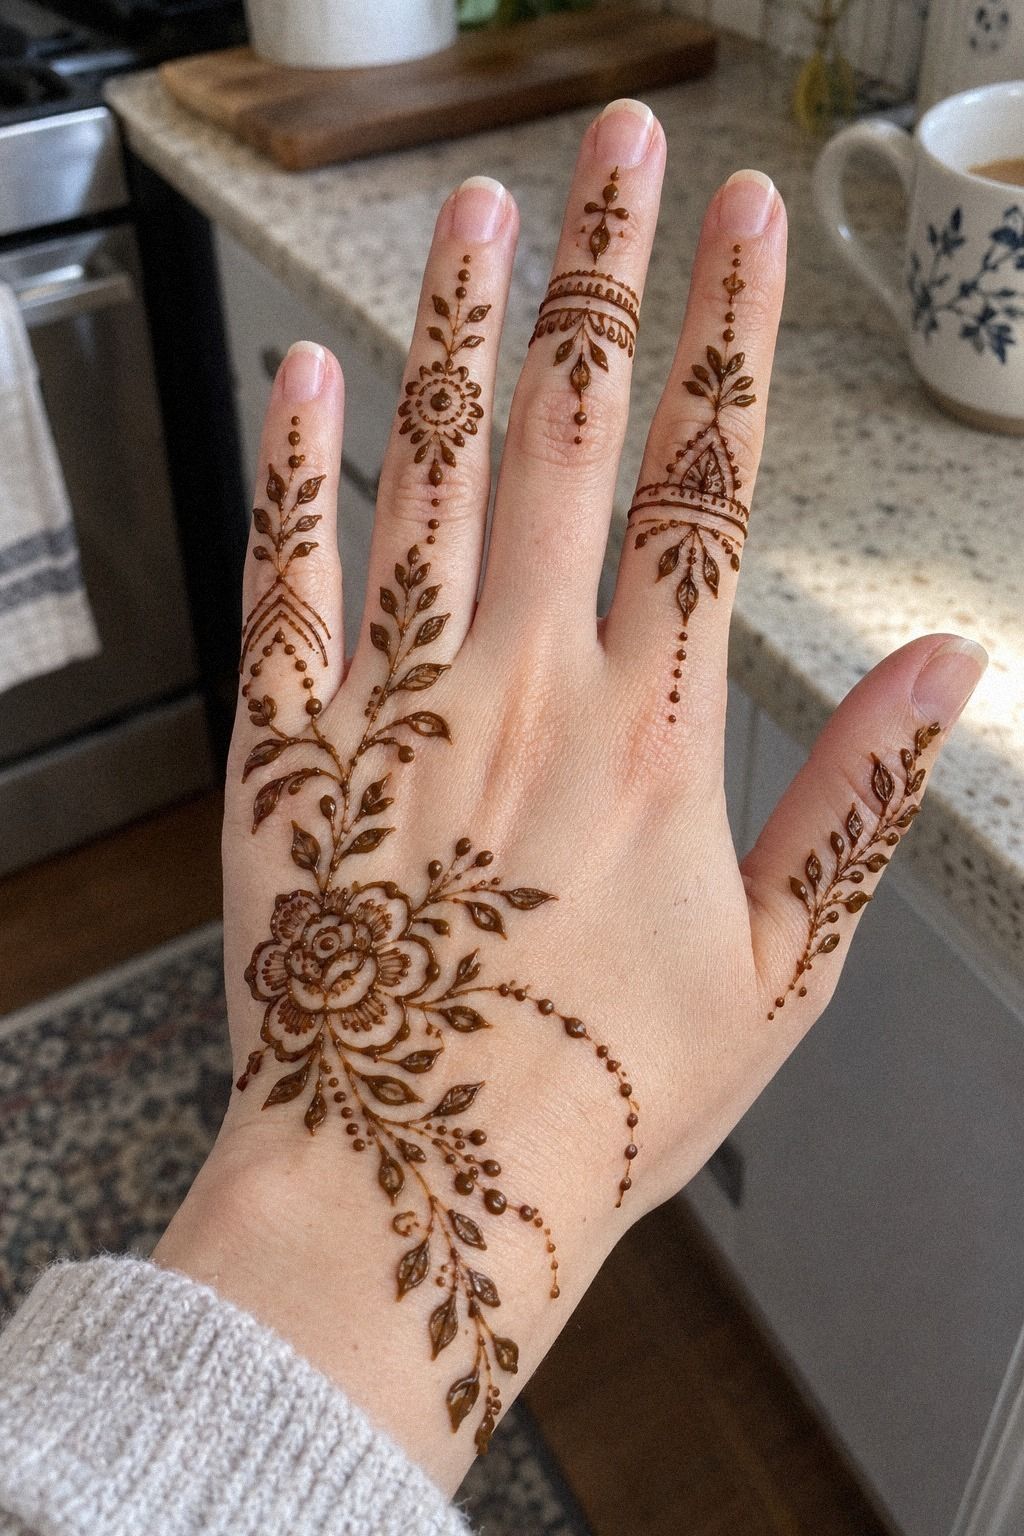
A forearm vine gives you more room to show Arabic mehndi’s signature movement. Start with a large paisley near the wrist, then extend the stem upward with leaves that change direction.
The pattern should feel bold at the base and more subtle toward the elbow. Open spacing keeps the full design readable at a distance.
You don’t need to draw a straight ladder of motifs. Let one leaf turn sideways, then give the next one a slightly different angle.
That irregularity keeps your pattern from looking stamped. I made my first forearm vine too symmetrical, and it looked stiff until I added an uneven leaf or two.
Keep your henna supplies simple:
– Reddish-brown paste. – A pointed plastic cone. – Lemon-sugar sealant, used lightly. – Eucalyptus oil, only if it’s suitable for your skin.
If you want a bridal variation, the Arabic new bridal mehndi designs collection shows how long vines can connect several motifs without filling every inch. The extra planning is worth it when the design needs to last through a long celebration.
Let the paste dry fully before you bend your arm. Your finished stain will usually deepen on the second day, so don’t judge the color while it’s still fresh.
8Can Traditional Arabic Mehndi Designs Use Geometric Negative Space? (The Open-Grid Rule)
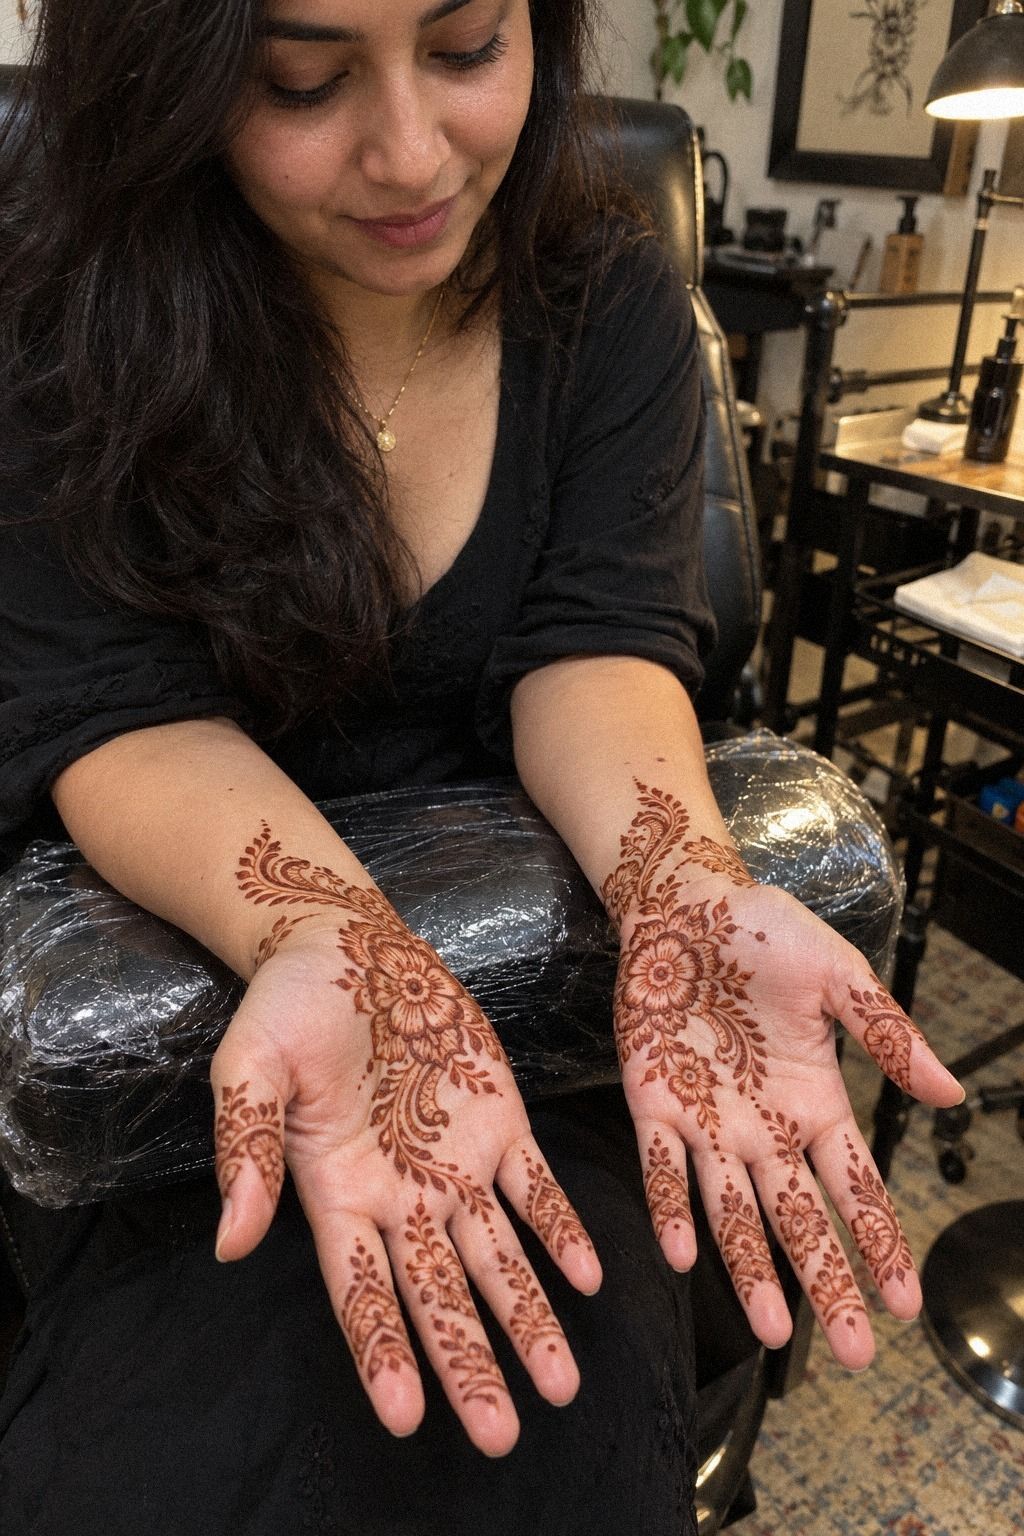
Yes, geometric gaps can make a floral Arabic design look edgy and sharp without losing its softness. Draw a diagonal band of small diamonds across the back of the hand, then interrupt it with one rounded flower.
The contrast between curved petals and clean gaps feels modern. A broken geometric band can give the hand a crisp focal point without demanding a large amount of paste.
The important part is proportion. Your geometric band should support the floral motif, not compete with it.
Keep the diamonds larger than the surrounding dots, and leave narrow strips of bare skin between the shapes. That open skin is what makes the pattern readable.
Use:
– Small diamond windows. – One curved flower. – Two pointed leaves. – A broken line near the wrist.
If you’re unsure whether the layout feels too busy, step back and inspect your hand. Your design should still show a clear center. These modern Arabic mehndi designs can help you study the relationship between geometric gaps and flowing motifs.
Don’t use unknown black paste to force a darker result. Natural henna develops gradually, and a safe, plant-based henna cone is the better choice for your skin. That choice is worth it for both comfort and predictable color!
9Choose Traditional Arabic Mehndi Designs For Hand Backs Over Dense Fill (The Open-Gap Choice)

The back of the hand is ideal for a timeless Arabic arrangement because the surface gives you one clear visual field. Start near the wrist and let the composition travel toward the fingers.
An open-gapped layout gives each motif room to breathe. You can use one flower, one paisley, and a few leaves without making the hand look unfinished.
Try a three-leaf cluster beside the thumb, then add a small trail toward the index finger. The contrast between covered and uncovered skin creates a stylish rhythm.
If you’re working with one cone, avoid repeating the same filler everywhere. A dot trail on one side and two leaves on the other will feel more personal.
For additional layouts, browse these modern Arabic mehndi designs and focus on the open areas rather than copying every motif.
10Add Traditional Arabic Mehndi Designs With Dramatic Peacock Details (The Peacock Curve)
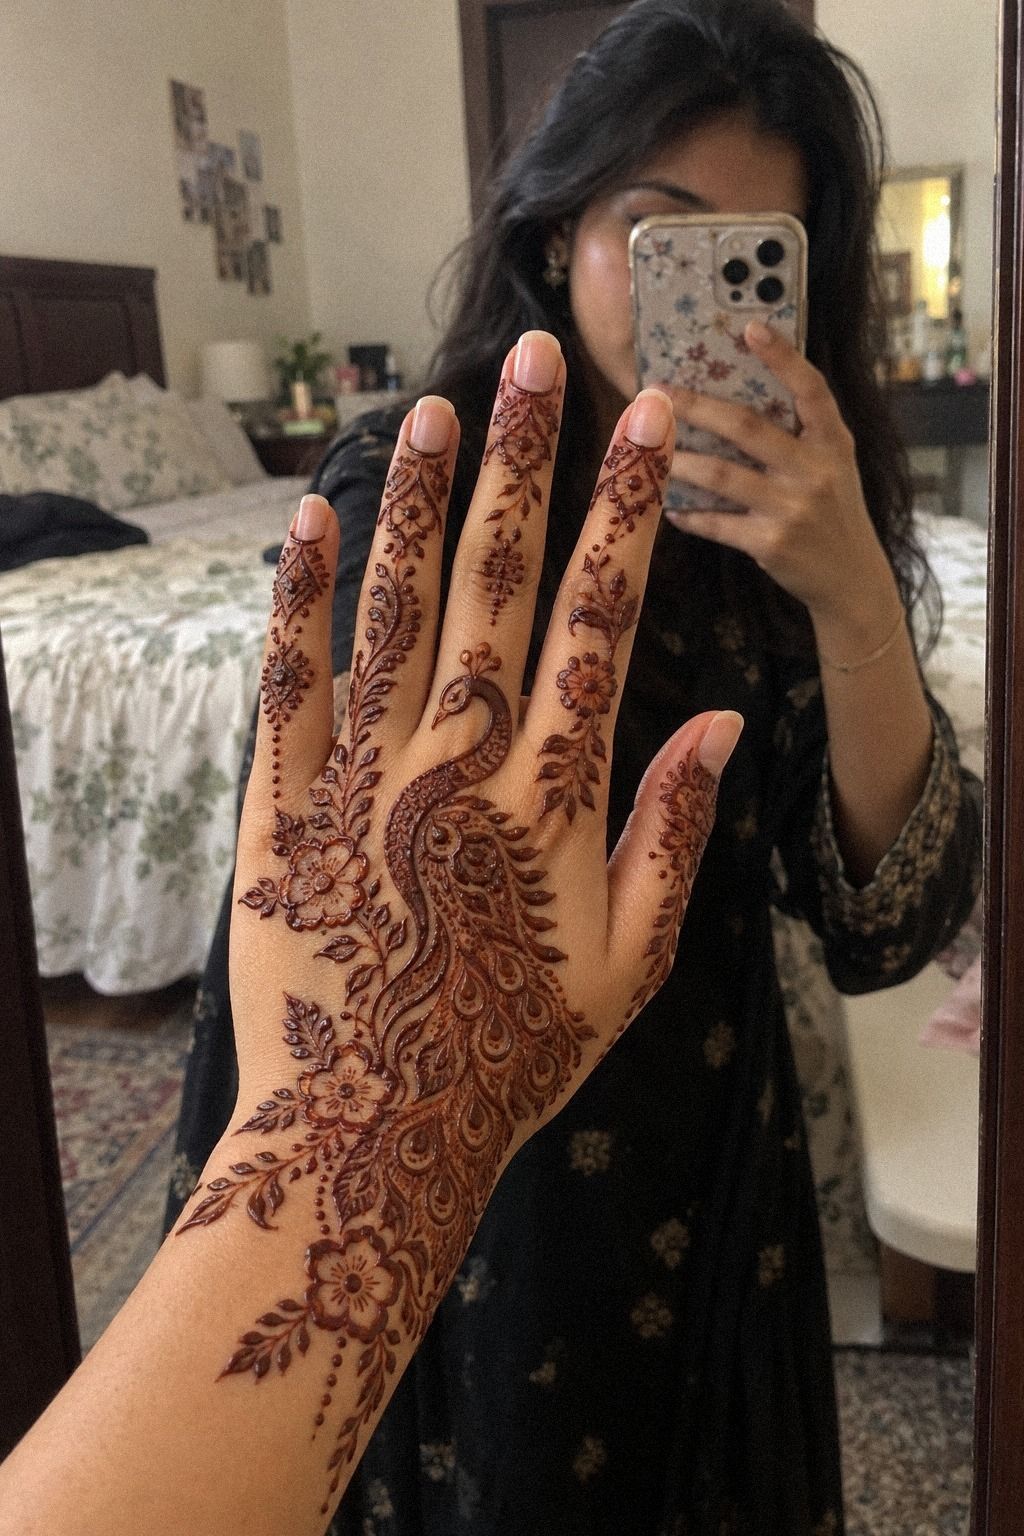
A peacock motif gives Arabic mehndi an iconic focal point, but it doesn’t need to become a full illustration.
11Keep Traditional Arabic Mehndi Designs Minimal With Deep Reddish-Brown Accents (The One-Cone Finish)
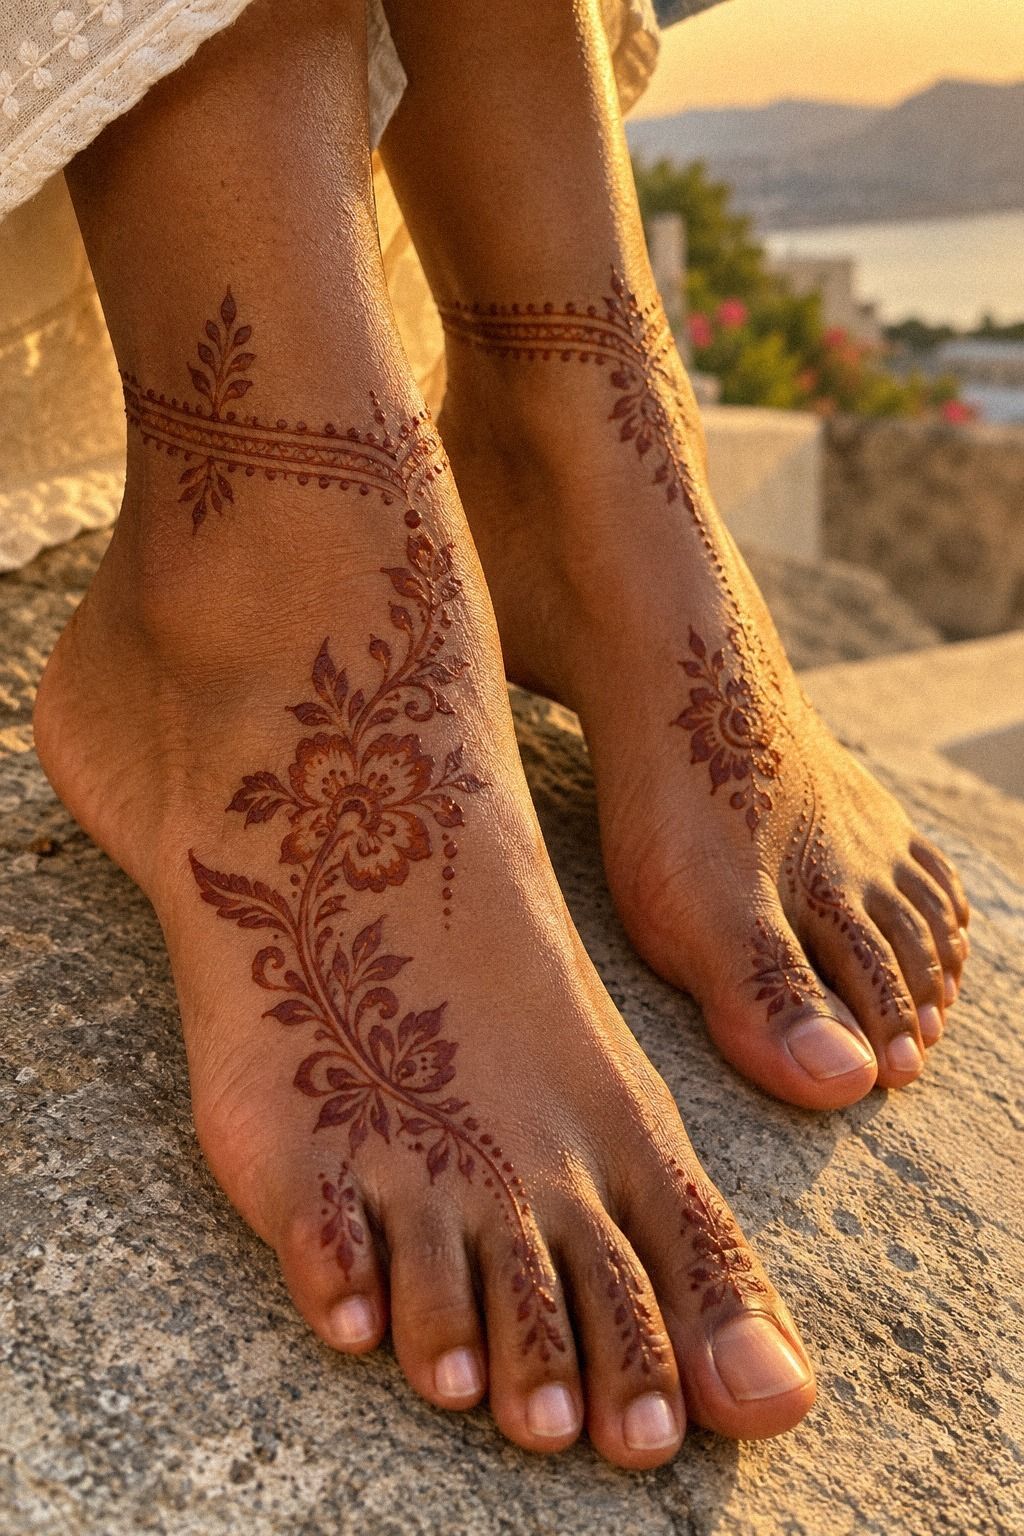
A minimal design can still look fierce when the lines are deliberate. Draw one narrow paisley along the foot or ankle, add two leaves, and finish with a small dot trail.
The reddish-brown stain will provide the color, so you don’t need extra paste piled on top. Fresh natural henna usually gives the most graceful development.
This is a good choice if you’re making your own mehndi for the first time. Your cone controls the whole result, and a clean cone tip lets you focus on steady pressure.
I’d rather see three confident curves than twenty uncertain ones. That choice feels refined, classic, and easier to repeat.
Keep these details in mind:
– Fresh natural henna paste. – A clean cone tip. – Open skin between motifs. – Gentle washing after the stain develops.
If you want more beginner references, browse these easy Arabic mehndi designs and simplify the motifs until they feel comfortable in your hand. You can always add a second vine later.
Don’t chase an instant dark stain. Natural henna starts lighter, deepens through the second day, and fades gradually over one to three weeks. That changing color is part of its charm!
What Makes a One-Cone Design Look Finished?
A finished design needs visual rhythm more than maximum coverage. Choose one main route, one supporting motif, and one type of filler.
Open skin acts like punctuation between the paisleys, leaves, and dots. If every gap is filled, even an ornate pattern can lose its direction.
You can also create contrast through scale. Pair one bold flower with delicate leaves, or place a crisp geometric detail beside a flowing vine.
When you’re trying to improve your result without increasing your budget, edit first. Removing one crowded cluster often makes the remaining pattern look more stylish and intentional.
For more examples, compare the simple Arabic mehndi designs collection and notice where the artist leaves space.
How Should You Plan the Motif Before Applying Paste?
Sketch the route with a washable cosmetic pencil or practice it on paper. Mark the starting point, the widest motif, and the direction of the final leaf.
A simple paper sketch can save paste and prevent awkward turns around knuckles, creases, and ankle bones.
Think about your occasion before choosing density. Eid may suit a compact hand design, while a wedding or sangeet may justify a more intricate composition.
If you’re working alone, begin with the least awkward area. Your hand will be steadier before the paste begins to dry, and your first motif will establish the style.
The Indo-Arabic simple mehndi designs collection can help you compare compact and fuller layouts.
What Changes the Final Stain?
Natural henna usually begins orange or light copper. It deepens after the paste releases and often reaches its richest reddish-brown tone on the second day.
Warmth and aftercare influence the final result, but placement matters too. Palms and feet often experience more friction than the forearm.
A light lemon-sugar sealant can help keep raised paste in place, but don’t soak the design. Let the paste dry naturally for about 1 to 2 hours.
Avoid unknown products promising instant black color. A safe, plant-based cone gives you a more predictable and meaningful result.
You can compare aftercare notes in these modern Arabic mehndi designs before choosing a more detailed motif.
Why Traditional Arabic Mehndi Still Feels Fresh
I think Arabic mehndi lasts in people’s minds because it understands editing. The strongest designs don’t try to describe every flower, leaf, and paisley at once.
They choose one route across the skin, then let the open spaces do some of the work. That balance feels haunting, expressive, and easy to recognize at a glance.
The style also moves well between occasions. A small finger vine can suit Eid, a family gathering, or an afternoon spent practicing.
A fuller palm or foot arrangement can feel more ceremonial. You can change the scale without losing the visual language, which is why the form remains versatile and meaningful.
I learned to respect the drying stage after rushing one design and smearing the wrist while reaching for a phone. The paste needs about 1 to 2 hours to dry, and the stain often darkens most noticeably on the second day.
Natural henna is also temporary by nature. Your design generally lasts 1 to 3 weeks, depending on placement, washing, friction, and skin.
I like that limit. It lets you try a daring peacock one month, a romantic floral trail the next, and a whimsical finger pattern after that without being locked into one decision.
If you’re choosing between a palm, ankle, or forearm, think about movement and friction first. Palms and feet can fade faster because they work harder, while a forearm trail may stay clearer.
The simple Arabic mehndi designs and modern Arabic mehndi designs collections make useful comparisons when you’re deciding which level of detail is worth your time.
Cost and Value: What Should You Budget?
The price depends on whether you’re applying the paste yourself, buying a natural cone, or hiring a mehndi artist for a larger occasion. A simple design can offer excellent value when the pattern uses open spacing.
These are planning ranges, not fixed quotes. Ask what the price includes, whether the paste is natural, and how much time the design requires.
For a single finger vine or wrist trail, a cone is usually the most budget-friendly choice. If you’re preparing for a wedding, paying for a skilled mehndi artist may be worth it because clean spacing and balanced motifs are difficult to rush.
The best value isn’t always the lowest price. It’s the result you’ll enjoy wearing, the ingredient quality, and the amount of paste that actually reaches your skin.
For more low-cost ideas, save these easy Arabic mehndi designs and choose motifs that use one main route.
The Questions I Get Asked Most
How much do traditional Arabic mehndi designs usually cost?
There isn’t one reliable price because the cost depends on the mehndi artist, design size, occasion, and region. Ask for a quote before the application, and confirm whether the fee covers paste application and aftercare guidance.
For DIY work, your main concern is ingredient quality rather than a fixed service rate. A clearly labeled natural cone can be a better budget choice than a suspiciously cheap product promising instant color.
Are traditional Arabic mehndi designs good for a first design?
Yes, they’re a strong choice because the style can be scaled from a tiny finger vine to a detailed palm composition. Open spacing makes the pattern easier to draw and easier to understand while you practice.
You can start with a simple paisley and three leaves, then add dots later. Your first design doesn’t need to cover the entire hand to feel finished, and that makes it worth trying.
How do I choose a mehndi artist?
Look for a portfolio showing clean curves, balanced spacing, and examples shown after the paste has been removed. Ask what ingredients are in the cone, especially if you have sensitive skin.
A careful artist should explain drying time, color development, and gentle aftercare. You’ll want someone who listens to your placement idea and can adjust the design to your skin.
What color will traditional Arabic mehndi be in 2026?
Natural henna usually begins orange or light copper, then develops into a deeper reddish-brown shade by the second day. Color development varies with the paste, skin, warmth, and aftercare.
Avoid any cone described as instant black or chemically darkening. Your finished stain may be more subtle than an example, and that natural variation is normal.
Can I draw these designs on a budget?
Yes. A single cone can create several small designs if you keep the tip clean and close it carefully between uses. Practice your paisleys and leaves on paper before touching your skin.
For a low-cost plan, choose one finger vine, one wrist curve, or one ankle flower. You’ll learn pressure control faster with a small design, and you won’t waste paste correcting a crowded layout.
How long should I leave the paste on?
Let the paste dry for about 1 to 2 hours, or until it has released without smearing. Keep the area still, and avoid water while the raised paste is setting.
After it comes away, wash gently and avoid aggressive rubbing. Your stain should continue deepening into the second day, then gradually fade over 1 to 3 weeks.
Which placement works best?
The forearm and back of the hand give you clear space for flowing vines, while the ankle and foot suit compact floral trails. Open placement usually reads more clearly than a fully packed design.
Your palms and feet may fade sooner because they experience more friction and washing. Choose the spot that fits your occasion, daily routine, and preferred level of visibility.
Where I’d Start First
If I had to pick one, I’d start with the simple finger vine. It’s delicate, quick to draw, and the open skin keeps every curve readable as the reddish-brown stain deepens.
Pin the easy Arabic mehndi designs collection for later and begin with one confident paisley. You can add a second leaf after the first motif dries, but you won’t need to spend more money or paste to make the design feel personal.