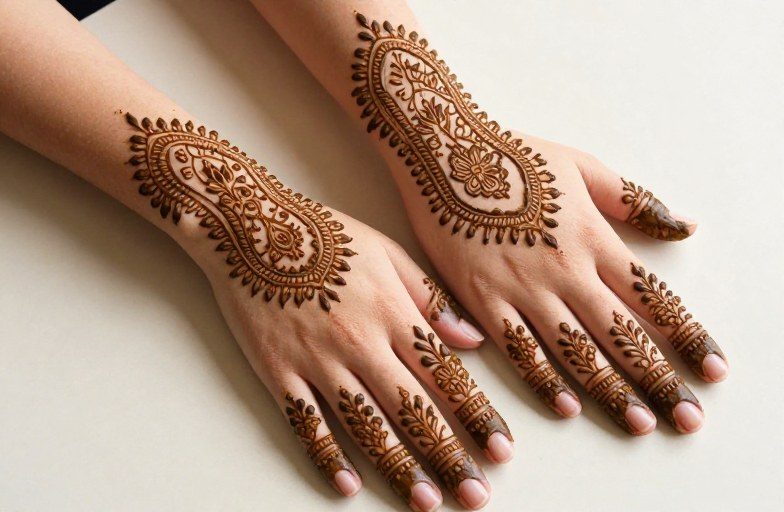
Making your own henna starts with mixing fresh paste from henna powder, lemon juice, sugar, and essential oils, then applying it to clean skin in your chosen design. The paste dries, cracks off after several hours, and leaves behind a stain that darkens over 24-48 hours. With practice, you can achieve crisp lines and rich color that lasts one to three weeks.
The Direct Answer
What You Actually Need
Skip the pre-made cones from questionable sources. Real henna paste takes twenty minutes to mix and rewards you with better color and zero mystery ingredients. Here’s the honest shopping list:
- Body art quality henna powder (B AQ grade, no additives)
- Fresh lemon juice (bottled works; the acid releases dye)
- White sugar (keeps paste pliable longer)
- Essential oil high in terpinolene: tea tree, cajeput, or frankincense
- Cone or squeeze bottle, plus tape and scissors
Mix powder and lemon juice to a yogurt consistency. Add one to two tablespoons sugar per quarter cup powder. Stir in a few drops of essential oil. Cover the surface with plastic wrap pressed directly against the paste, then seal the bowl. Let it sit at room temperature for six to twelve hours for dye release. You’ll know it’s ready when the surface turns dark brownish-red underneath the wrap.
Making and Filling Your Cone
While commercial mylar cones exist, a rolled cellophane triangle works fine. Cut a rectangle about six by twelve inches, roll it into a tight cone with a pinhole tip, tape the seam, and fill two-thirds full. Twist the top closed, secure with rubber band or tape, and snip the tip to your desired line weight. Thinner for detail, slightly thicker for fills.
Pain & Comfort
What Henna Actually Feels Like
There’s no broken skin and no pain to speak of. The paste goes on cool and slightly gritty. Some people feel mild tingling from the lemon juice, especially on sensitive areas or freshly shaved skin. If it burns, wash it off immediately; that’s not a normal henna reaction, but either a bad product or individual sensitivity.
Positioning for Long Sessions
Unlike machine tattooing where you grit through it, henna’s challenge is boredom and stillness. The paste needs to stay undisturbed for hours. Plan your design placement around what you can realistically not touch. Inner forearms beat hands if you need to use your phone. Ankles work well for sleeping since you can loosely sock over them once the paste dries.
Cost Factors
DIY vs. Professional Pricing
Home setup runs fifteen to thirty dollars for supplies that yield multiple sessions. Professional henna artists charge anywhere from twenty dollars for simple palm coverage to a hundred-plus for bridal-style full hand and forearm work. The price gap reflects skill, time, and the convenience of not sitting with paste on your skin for half a day.
Where Money Gets Wasted
Pre-made cones from import stores often contain stale powder, chemical dyes, or undisclosed additives. “Black henna” containing PPD (para-phenylenediamine) can cause blistering, permanent scarring, and lifelong sensitization. It’s illegal for skin use in the US but still appears at beach vendors and festival booths. Real henna never looks black immediately; it stains orange-brown and darkens over time. Paying more for genuine materials protects your skin and your results.
Tips From the Chair
Application Technique That Actually Works
Clean skin with plain soap, no lotion residue. Work from one side of the design to the other to avoid smearing. Keep the cone tip touching the skin lightly; hovering creates wobbly lines. For consistent flow, squeeze from the top with steady pressure, not the middle, which risks uneven paste spots. Let thick lines and dots sit proud of the skin; don’t spread them thin trying to stretch your paste.
Common Beginner Fixes
Smudged line? Wipe immediately with damp cotton swab and redo. Paste too runny? Add more powder. Too thick and won’t flow? More lemon juice, tiny amounts at a time. Design bleeding at edges usually means you’re pressing too hard or moving too slow. Practice on paper or glass first; the muscle memory transfers directly.
Realistic Expectations
Color Development Reality
Freshly removed paste reveals a pale orange stain that looks disappointing. Don’t panic. Over the next twenty-four to forty-eight hours, oxidation deepens the color to rich reddish-brown. Hands and feet stain darkest due to thicker skin and more keratin. Upper arms, backs, and thighs yield lighter, shorter-lasting results. Individual body chemistry varies, some people simply stain lighter than others regardless of technique.
What Limits Longevity
Water is the enemy. Swimming, long showers, dishwashing without gloves, and exfoliating scrubs all strip stain faster. Chlorine and salt water are particularly aggressive. The stain lives in the top layers of dead skin; as you naturally exfoliate, it fades. Expect one to two weeks on most body areas, potentially three on hands and feet with careful care.
Stain Timeline
The First 24 Hours
Keep the paste on as long as possible, minimum four hours, ideally six to eight. Once it dries and starts cracking, avoid picking. Some people wrap loosely with medical tape or tissue to prevent flaking off during sleep. The paste itself doesn’t stain deeper with longer contact, but the sustained warmth and moisture against skin helps dye penetration.
Aftercare for Best Results
Scrape off dried paste with a butter knife or credit card edge, don’t wash immediately. Apply a thin layer of natural oil or unscented lotion to protect the fresh stain. For the first day, avoid water contact when possible. Some artists recommend a lemon-sugar dab after paste removal to set the stain, though results vary. Once developed, moisturize regularly to slow exfoliation. No special products needed; whatever you use for dry skin works fine.
Final Thoughts
Homemade henna rewards patience and punishes shortcuts. The best results come from fresh paste, clean skin, steady hands, and realistic expectations about how temporary this art truly is. Start small, a simple vine on your forearm, a mandala on your shoulder, before attempting complex designs. The skill builds quickly with practice, and the low stakes of a fading stain make experimentation genuinely fun. Respect the material, avoid anything promising instant black results, and you’ll have a satisfying, safe tradition you can return to whenever the mood strikes.
Frequently Asked Questions
How do I know if my henna powder is still good for making paste?
Fresh henna powder smells earthy and slightly grassy, not musty or scentless. Mix a small test batch; if the surface doesn’t turn reddish-brown within 24 hours, the dye has degraded. Store powder airtight in a freezer for maximum shelf life.
Can I use henna on skin that has a permanent design underneath?
Yes, henna stains over existing permanent designs without affecting them underneath. The henna stain will fade normally while the underlying design remains unchanged. Avoid applying henna over fresh designs while the skin is still healing.
Why did my henna turn out orange instead of dark brown?
Immediate orange color is normal and will deepen over 48 hours. If it stays pale, your paste may have had weak dye release, your skin type stains lightly, or you washed too soon. Hands and feet always develop the darkest color.
Is it safe to do henna on children?
Natural henna without additives is generally considered safe for older children, but their skin can be more reactive. Patch test first, keep application time shorter, and never use “black henna” products containing PPD on anyone, especially children.

Leave a Reply