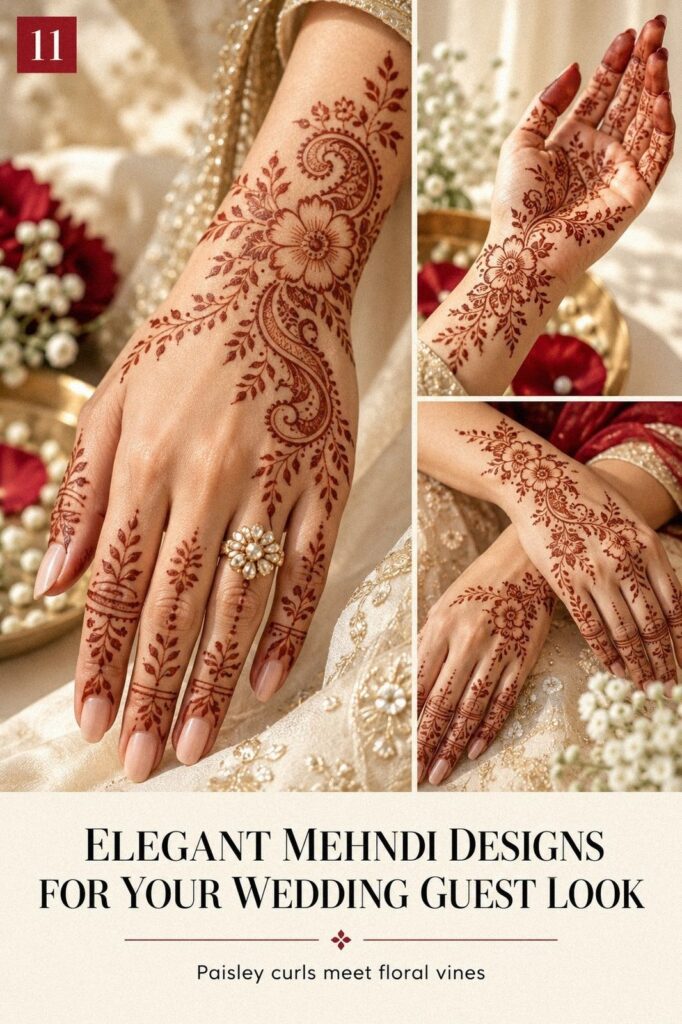
Elegant mehndi designs can stay delicate, meaningful, and richly detailed with one cone of fresh henna paste. I once chased every motif at once, and the result looked busy instead of graceful. A cleaner plan uses 1 to 2 hours of drying time, then lets the color deepen on day 2. Simple wins here!
- Start With Fine Finger Lines
- Why Keep the Wrist Delicate?
- Build an Intricate Palm Mandala
- Minimal Ankles, Maximum Grace
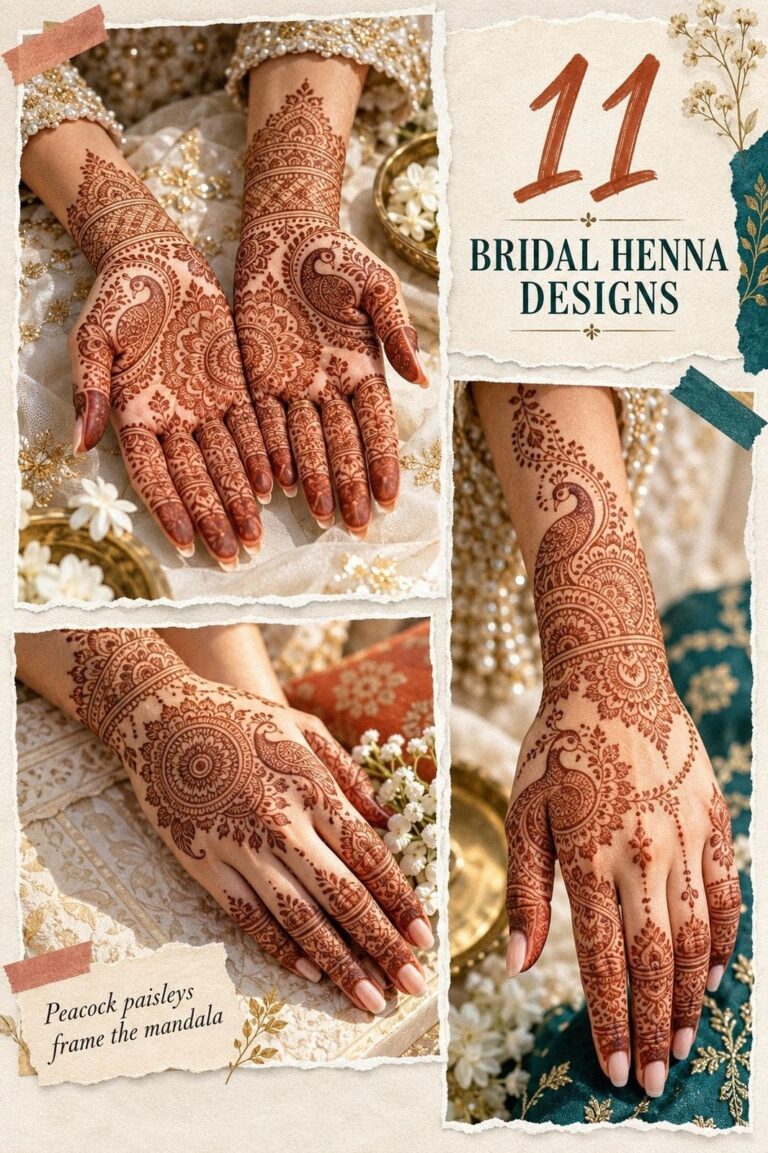
- Let the Peacock Lead on the Backhand
- Follow a Flowing Forearm Vine
- A Symmetrical Foot Pattern for Sangeet
- Choose One Sacred Shoulder Symbol
- Start With Fine Finger Lines
- Why Keep the Wrist Delicate?
- Build an Intricate Palm Mandala
- Minimal Ankles, Maximum Grace
- Let the Peacock Lead on the Backhand
- Follow a Flowing Forearm Vine
- A Symmetrical Foot Pattern for Sangeet
- Choose One Sacred Shoulder Symbol
- The Bridal Mandala That Holds Its Shape
- Geometry Along the Collarbones
- Leave the Flower Open
1Start With Fine Finger Lines
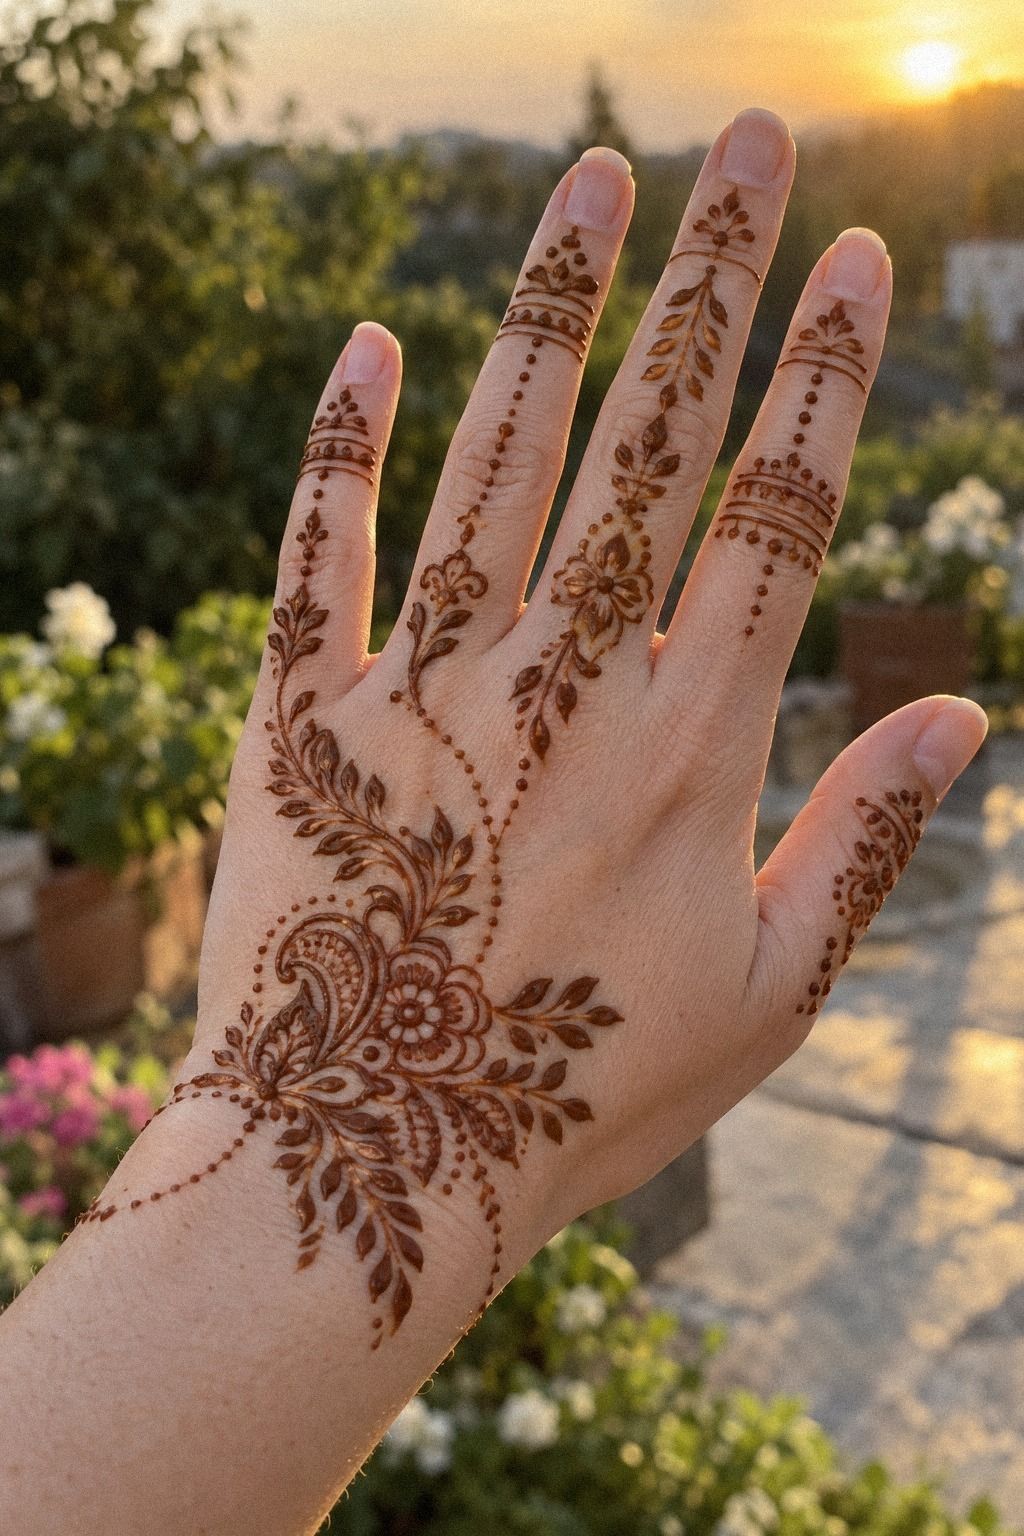
Fine finger patterns look striking because they leave open skin between each reddish-brown strand. Keep the back of the hand mostly clear, then let natural henna paste travel across two fingers in small paisleys, dots, and curved leaves. You’ll get an intricate result without covering every inch.
I’d use a narrow cone opening for this design, especially if you’re working at home. Your pressure should stay steady, not forceful.
If the paste spreads into thick blobs, the delicate rhythm disappears. A simple wrist curl and three repeated dots can look more polished than six unrelated symbols.
The best value comes from a clear focal shape rather than a large supply list. A lemon-sugar sealant can help the dried paste stay in place, but you don’t need a glossy layer. If your fingers are short, move the largest paisley toward the back of your hand so the pattern feels longer.
For more ideas, compare this approach with simple very simple mehndi designs. You’ll notice the same principle in both: one focal shape, gentle spacing, and a refined finish.
2Why Keep the Wrist Delicate?
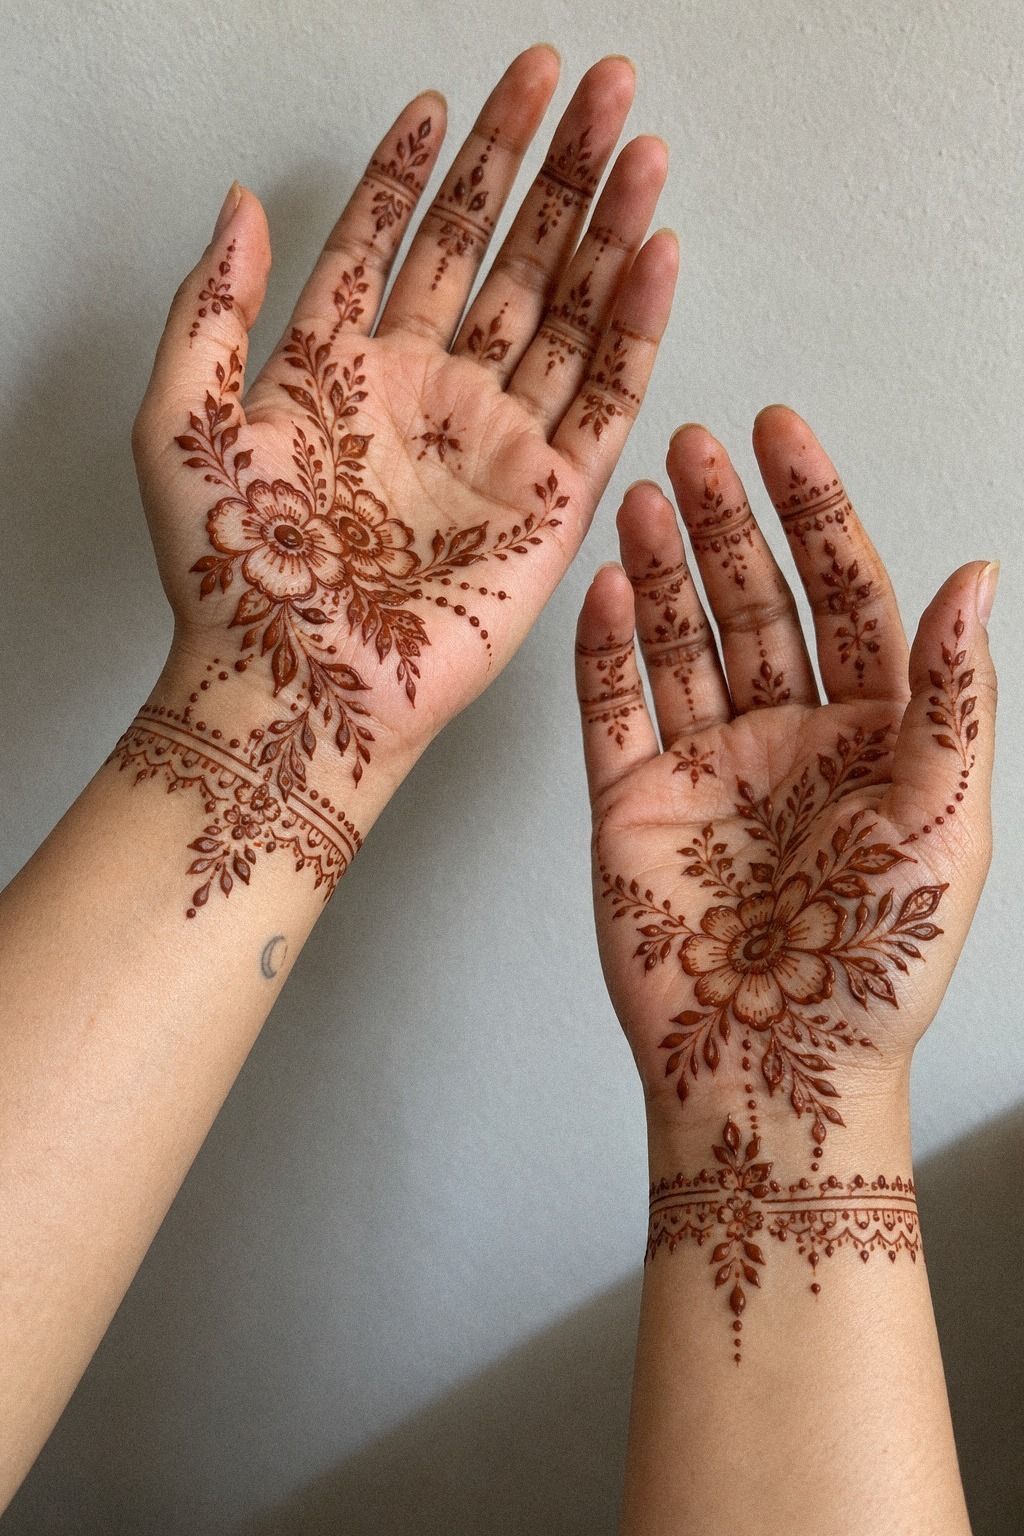
A delicate wrist design feels feminine and symbolic when the pattern opens toward the palm. Start with a narrow band of fresh henna paste, then add one graceful vine that curves toward the base of the thumb. Your palms can carry small petals while the wrist stays lighter.
I’d skip a fully filled wrist band here. It’s bold, but it can make a soft pattern look rigid and less expressive.
Instead, leave two tiny gaps in the band and repeat them near the palm. That small cost in paste can be worth it!
For a personal detail, hide initials inside a paisley or tuck a tiny moon beside the vine. You’ll know where it is, while everyone else will see an understated mark. A cotton swab is useful for cleaning the edge before the paste dries.
If you’re planning a celebration, browse simple trendy mehndi designs for current shapes that still feel timeless. Your wrist needs a clean beginning, a graceful curve, and enough open skin for the reddish-brown color to look intentional.
3Build an Intricate Palm Mandala
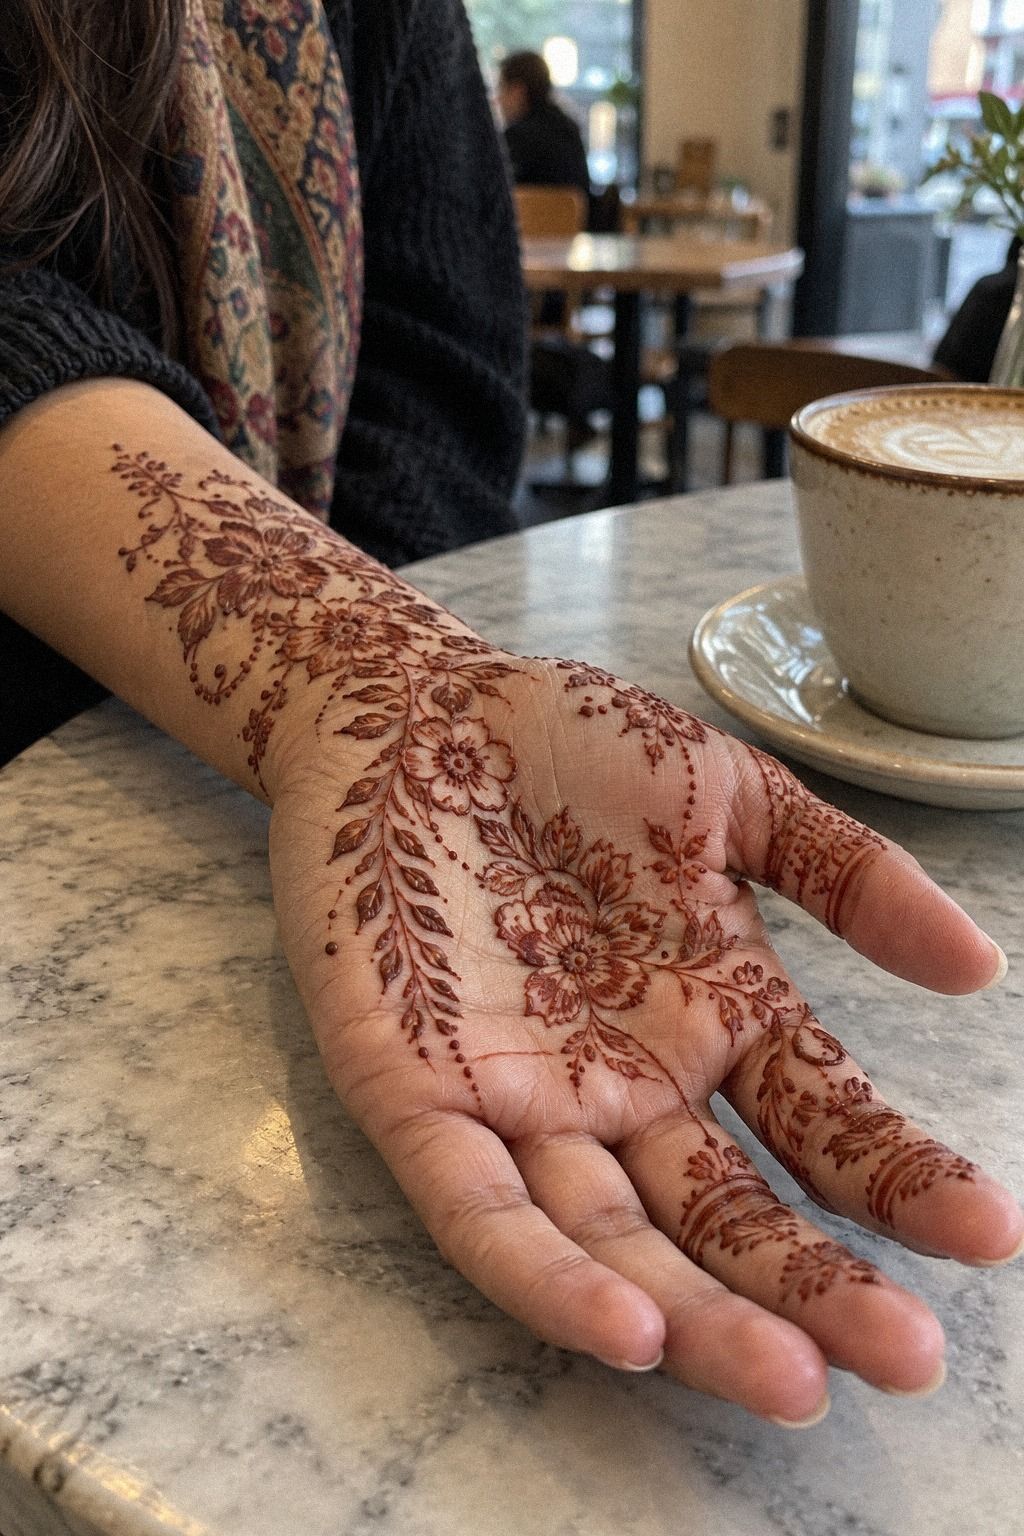
Palm patterns can look ornate without becoming crowded when you build them from one central circle. Place a small mandala center in the middle of your palm, then surround it with petals, scallops, and a narrow jaal pattern. Your fingers can echo the same shapes with smaller dots.
I like palms with a clear center and softer edges. The temptation is to fill every corner, but that’s where an intricate design can lose its elegance.
Five precise petals often have more impact than twelve hurried ones. If your paste feels too runny, let the cone rest for a few minutes.
The palm often develops a deep, warm stain because of contact and warmth. Keep natural henna powder mixed into a smooth paste, and allow the dried design to remain undisturbed for about 1 to 2 hours. After the paste flakes away, the color may look light before it deepens on the second day.
For another structured palm idea, see simple stylish mehndi designs for front hand. You can borrow its balance without copying every motif. A recognizable mandala gives you strong value from a single cone.
4Minimal Ankles, Maximum Grace
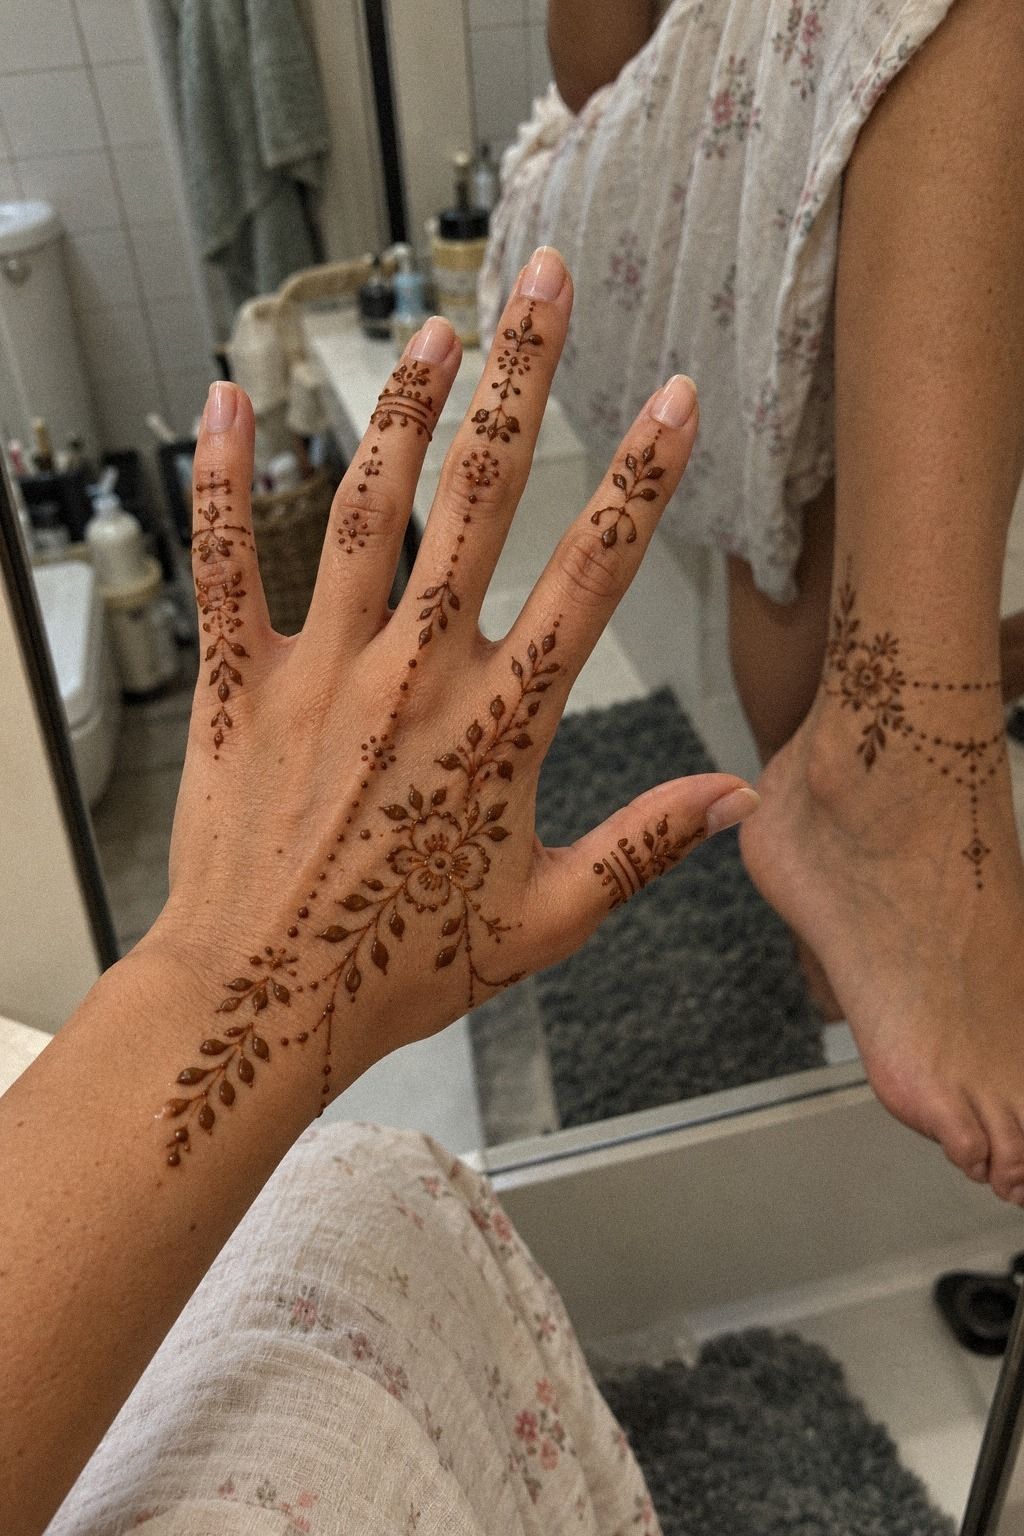
Minimal ankle patterns are graceful when they follow the natural curve of the bone instead of wrapping too tightly. Try one fine paisley trail with three leaves and a few open dots. Your ankle will still look decorated, but the pattern won’t compete with sandals or moving feet.
I’d avoid a heavy filled border around the ankle. It can look dramatic in a sketch, yet it often feels less delicate once the reddish-brown paste dries. A broken chain of petals gives you a more playful and timeless effect, especially if you leave a small gap above the heel.
Use a cone with a controlled tip and test the paste on paper first. You’ll see whether your dots hold their shape or flatten. A lemon-sugar mixture can keep the paste attached while it dries, but your layer should remain thin enough to flake away cleanly.
If you want a softer starting point, explore simple modern mehndi designs. Your best ankle pattern may be the one with fewer symbols, not more. It should feel crisp when you first see it and remain readable after several days.
5Let the Peacock Lead on the Backhand
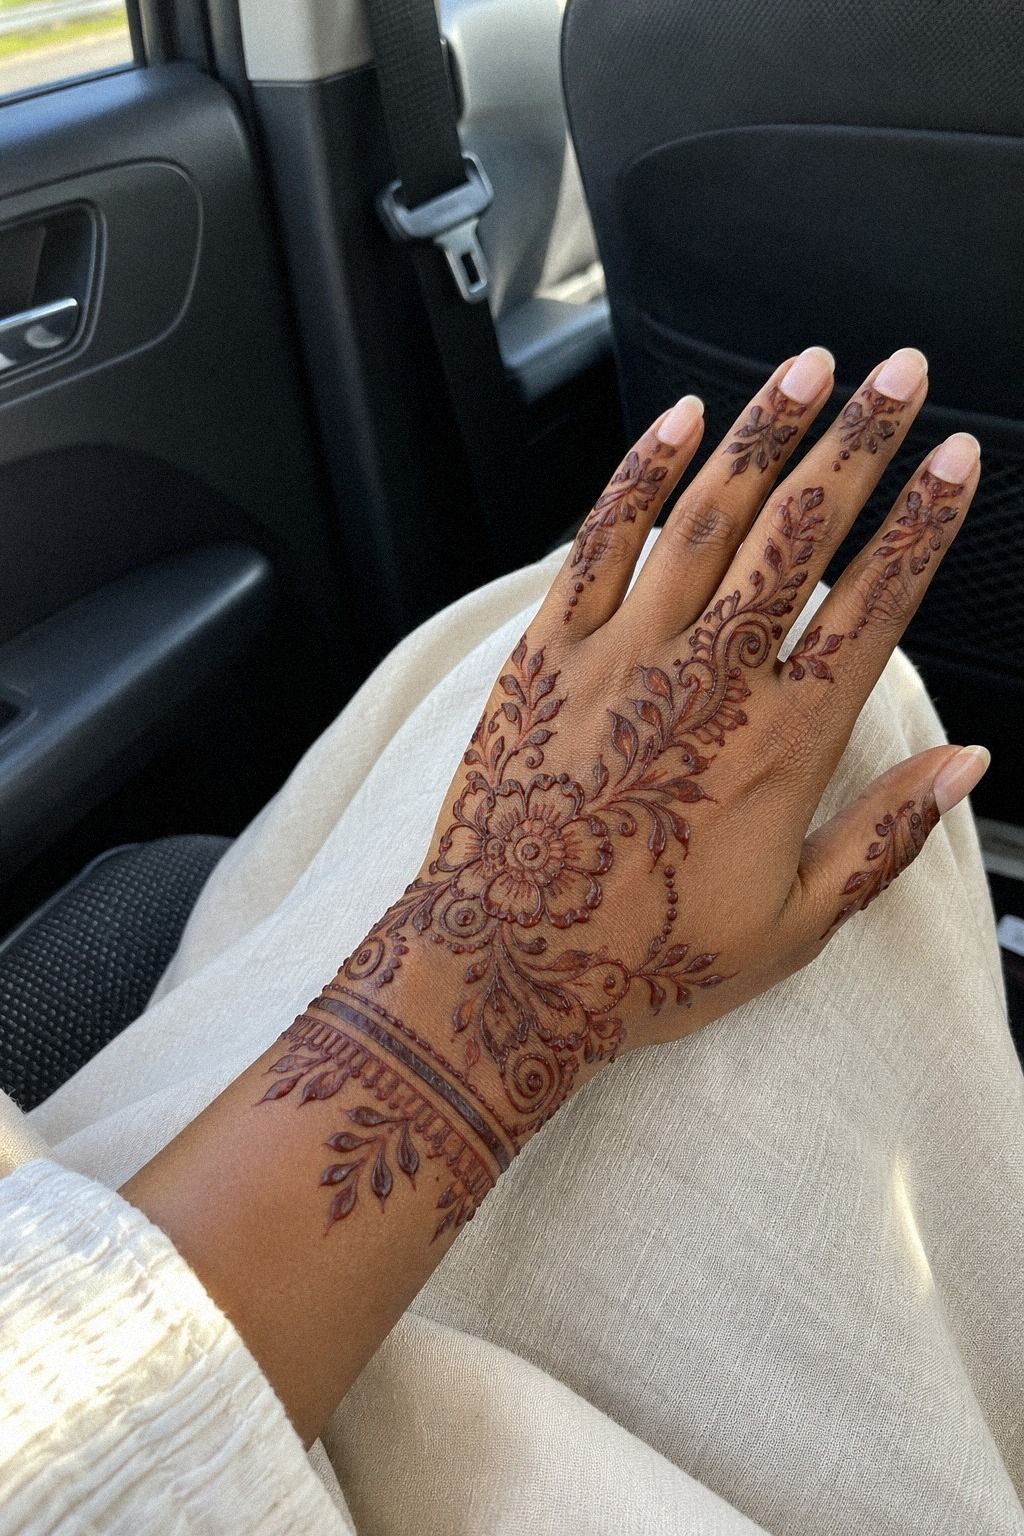
A bold backhand composition can still feel elegant when one large motif carries the design. Use a peacock-inspired paisley as the anchor, then frame it with curved feathers, dots, and small scallops. Your fingers can hold repeating leaf tips while the center remains open.
I’d place the peacock shape slightly off-center rather than forcing perfect symmetry. That small shift makes your hand look expressive and organic. The pattern will feel less stamped and more personal, which is why one cone can offer such good cost control.
Keep the outer edges crisp with a pointed cone and a steady wrist. If you’re working across deep brown skin, fresh paste and longer contact time can help the stain develop richly, though the final color will vary. Freshly sifted henna powder gives you a smoother flow.
For a bolder reference, look through simple peacock mehndi designs. You don’t need every feather drawn separately. A few expressive curves will suggest the bird beautifully, and the open skin will make the motif feel striking.
6Follow a Flowing Forearm Vine
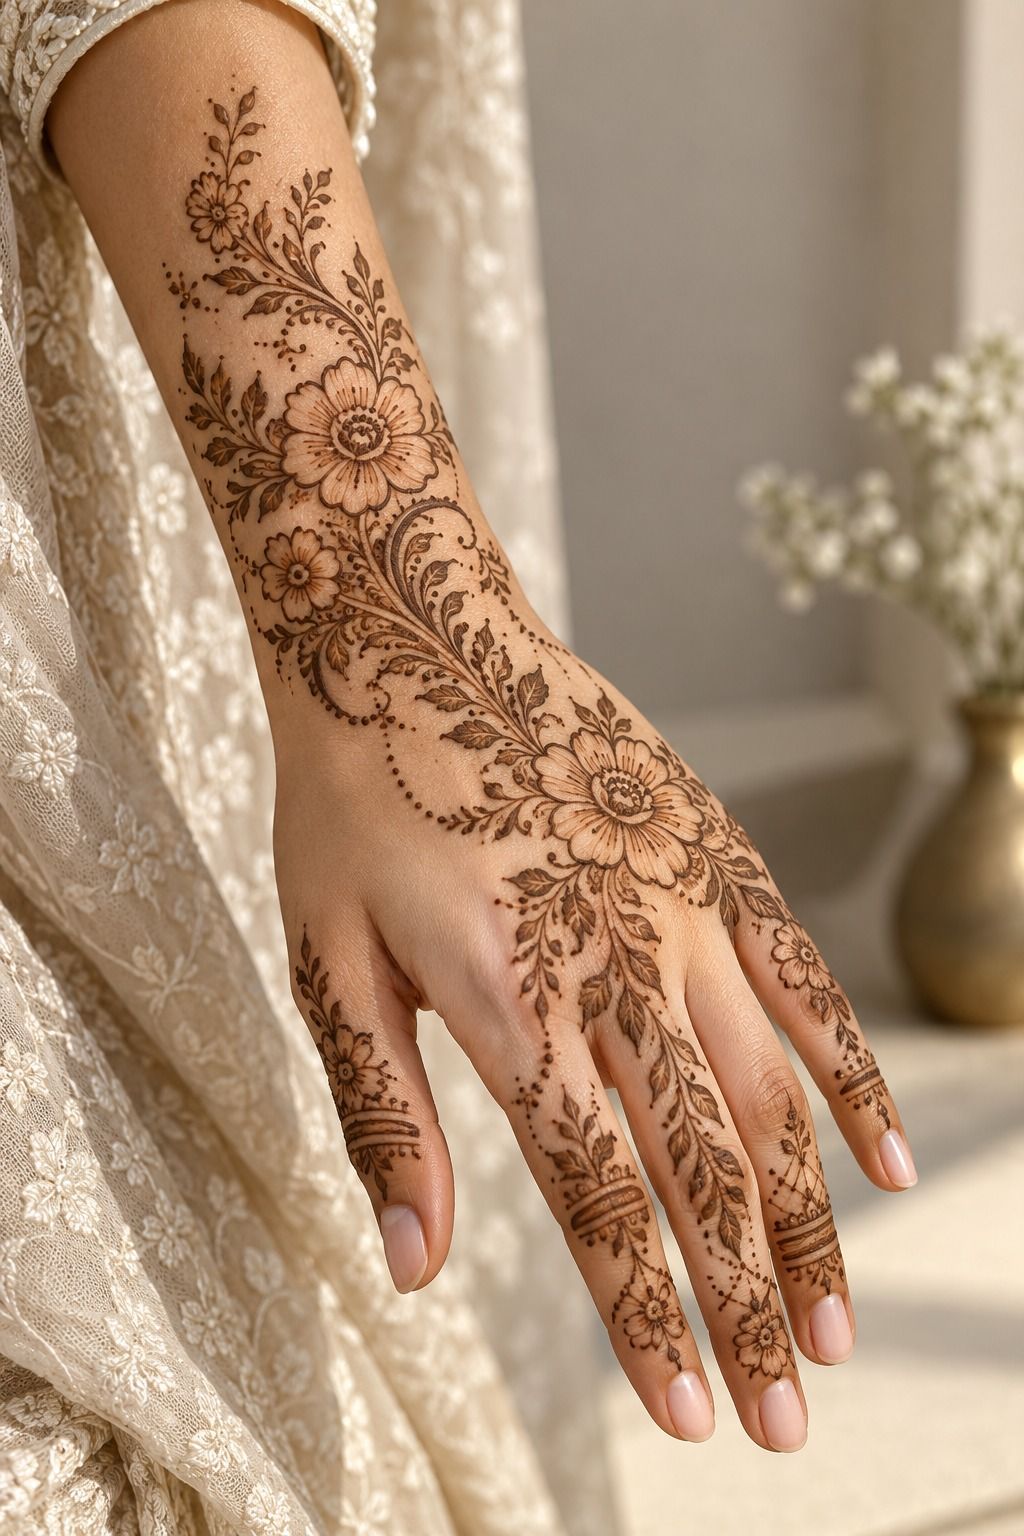
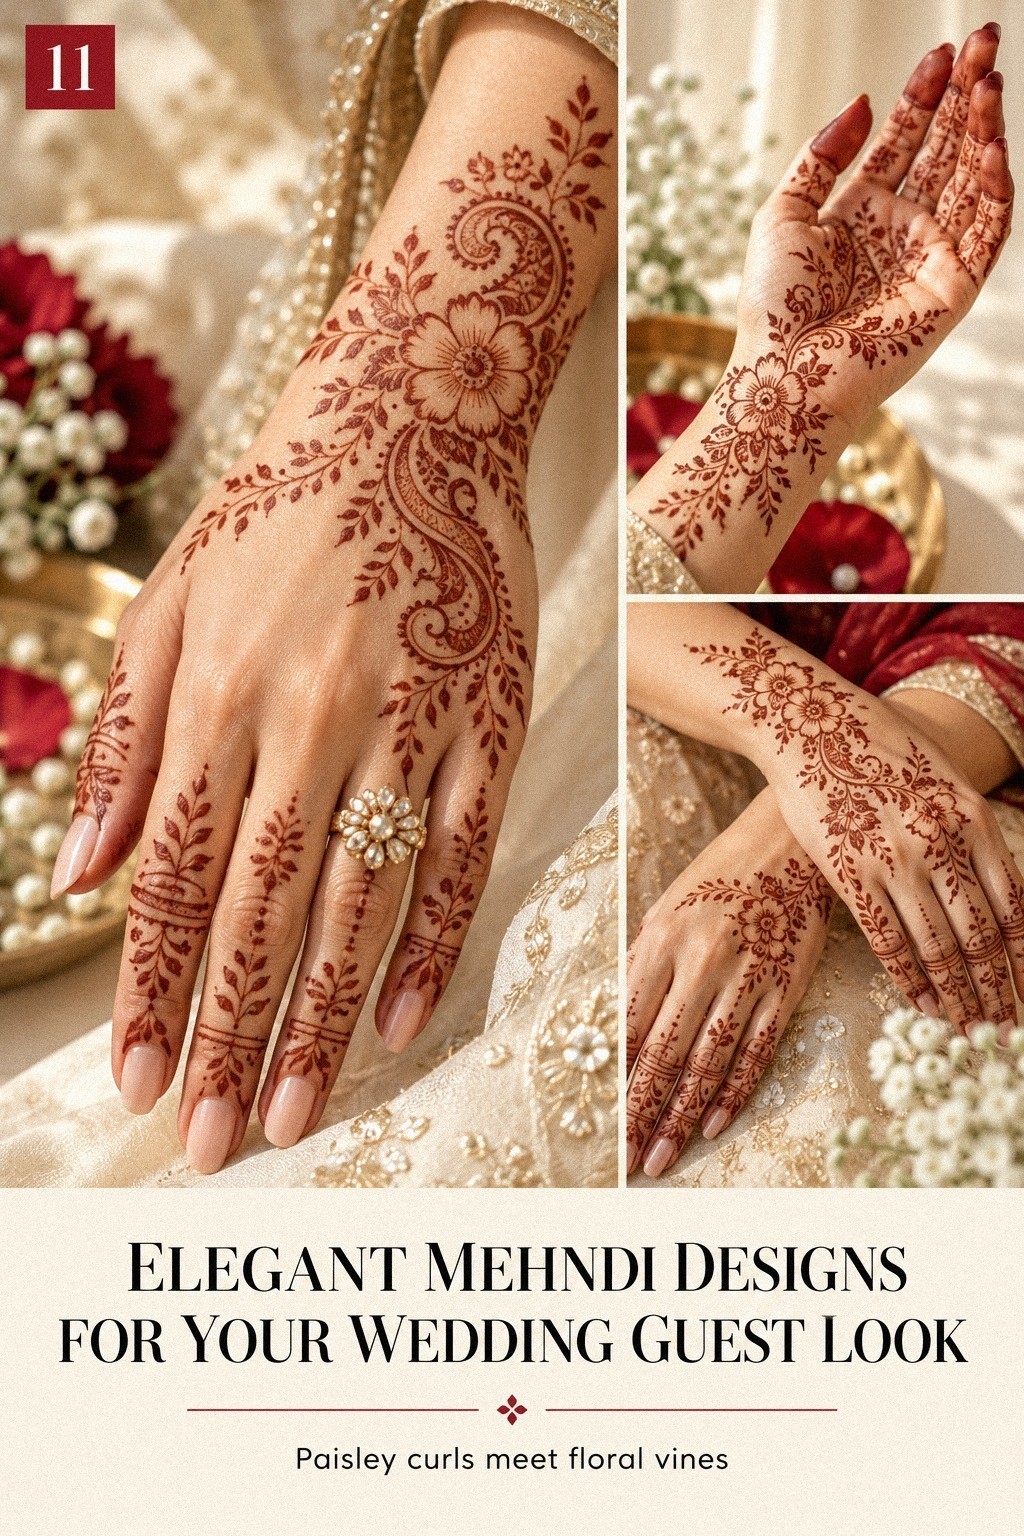
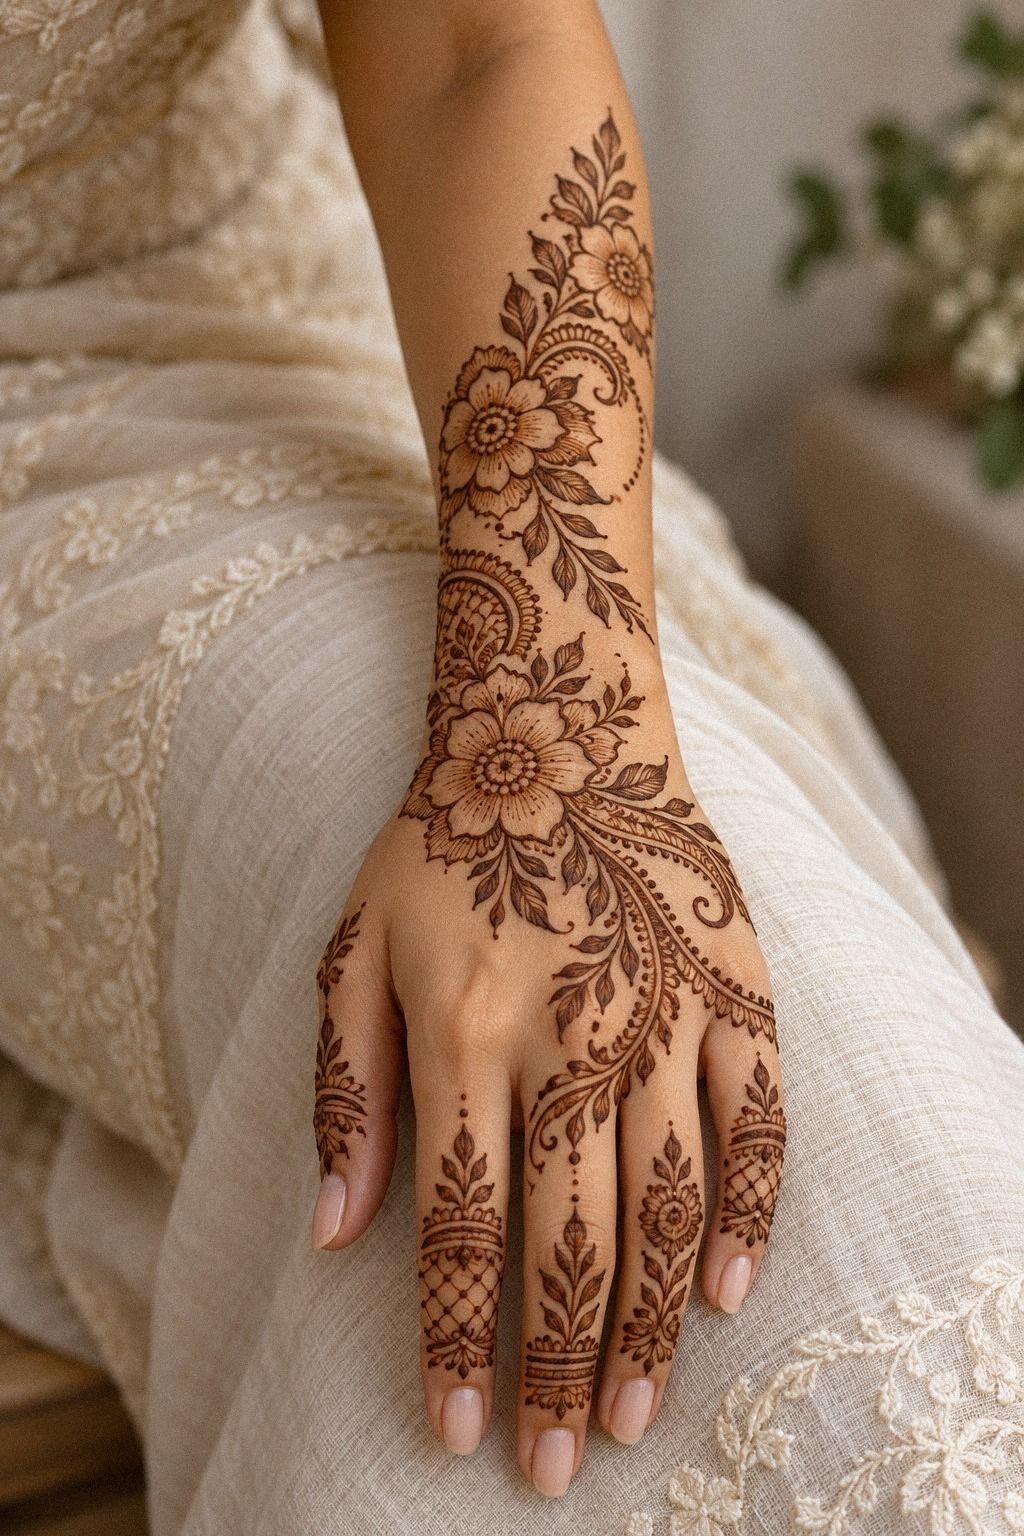
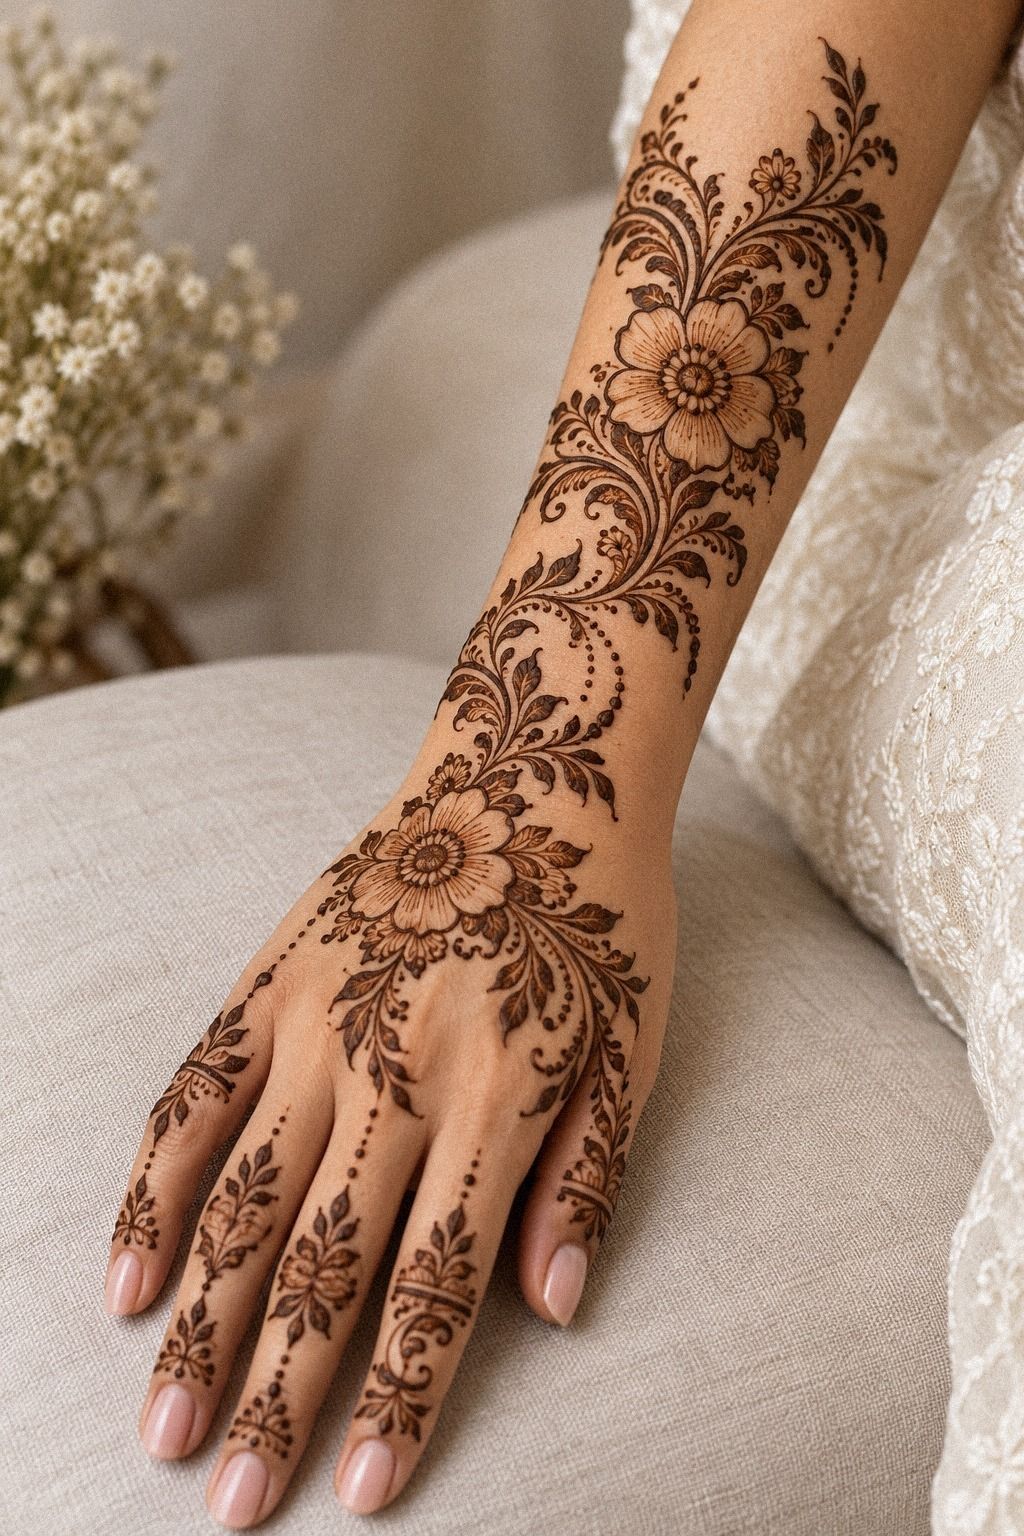
Forearm patterns suit long, flowing shapes because your eye naturally follows the length of the arm. Start with a curved floral vine near the wrist and let it widen gradually toward the forearm. Your leaves can alternate sides while open petals keep the design light.
I prefer an uneven vine here. Perfectly repeated leaves can look stiff, while small changes in size give your pattern a handmade character. If you’re drawing on yourself, rest your elbow on a table and turn your arm slowly rather than twisting your wrist.
A flowing design works well for a sangeet, Eid, or family celebration because it feels festive without becoming overwhelmingly ornate. Add a tiny eucalyptus oil note only if your chosen preparation suits it and your skin tolerates it. Patch testing matters.
You can compare the movement with simple Pakistani mehndi designs. Your forearm doesn’t need a solid column of paste. Let one vine move, let the spaces stay visible, and the result will feel more refined.
7A Symmetrical Foot Pattern for Sangeet
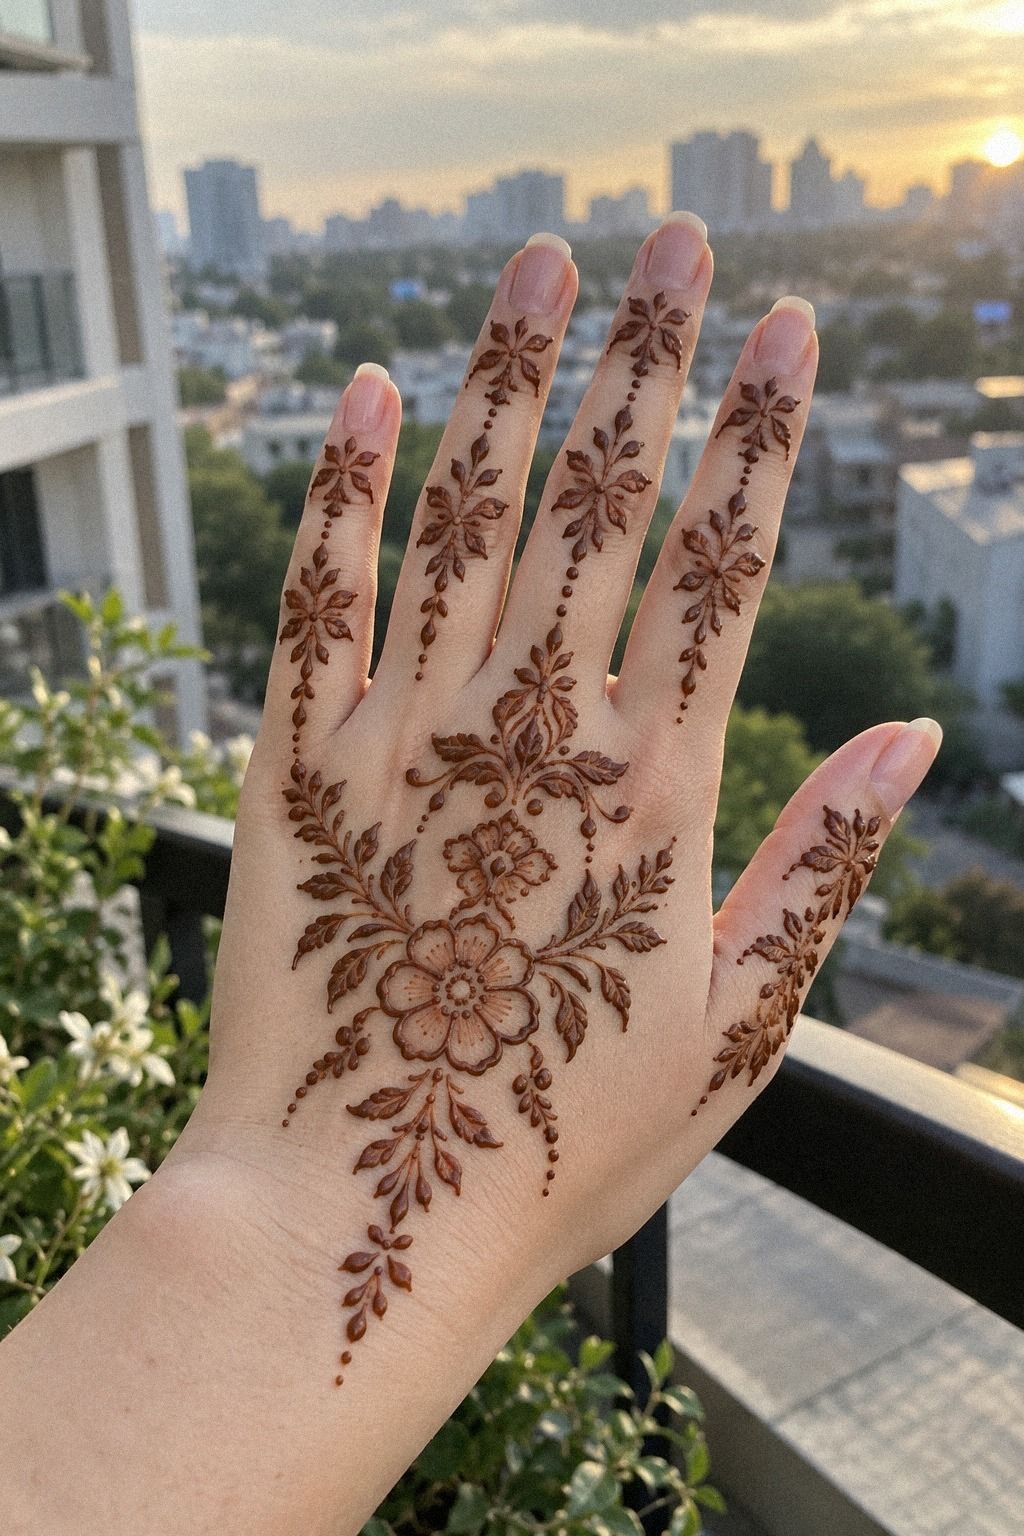
Symmetry on the foot looks captivating when both sides share a center rather than matching every tiny mark. Begin with a central floral medallion near the top of the foot, then mirror two leaves and two curved trails toward the toes. Your feet will look coordinated without feeling stiff.
I’d keep the toe details smaller than the central shape. Oversized motifs can blur visually when you walk, while little dots and petals retain their charm. If you’re preparing for a wedding, leave enough open skin around the medallion for jewelry or embroidered fabric to remain visible.
Feet can be sensitive to friction, so allow the paste to dry fully before putting on socks or closed shoes. A thin cotton cloth can protect the dried design if you need to move around, but don’t wrap it tightly. One to 2 hours of setting time is usually worth the effort.
For a simpler direction, study simple bridal mehndi designs. Your foot design can borrow the ceremonial feeling without becoming dense. Hand-drawn symmetry should feel alive, not machine-made.
8Choose One Sacred Shoulder Symbol
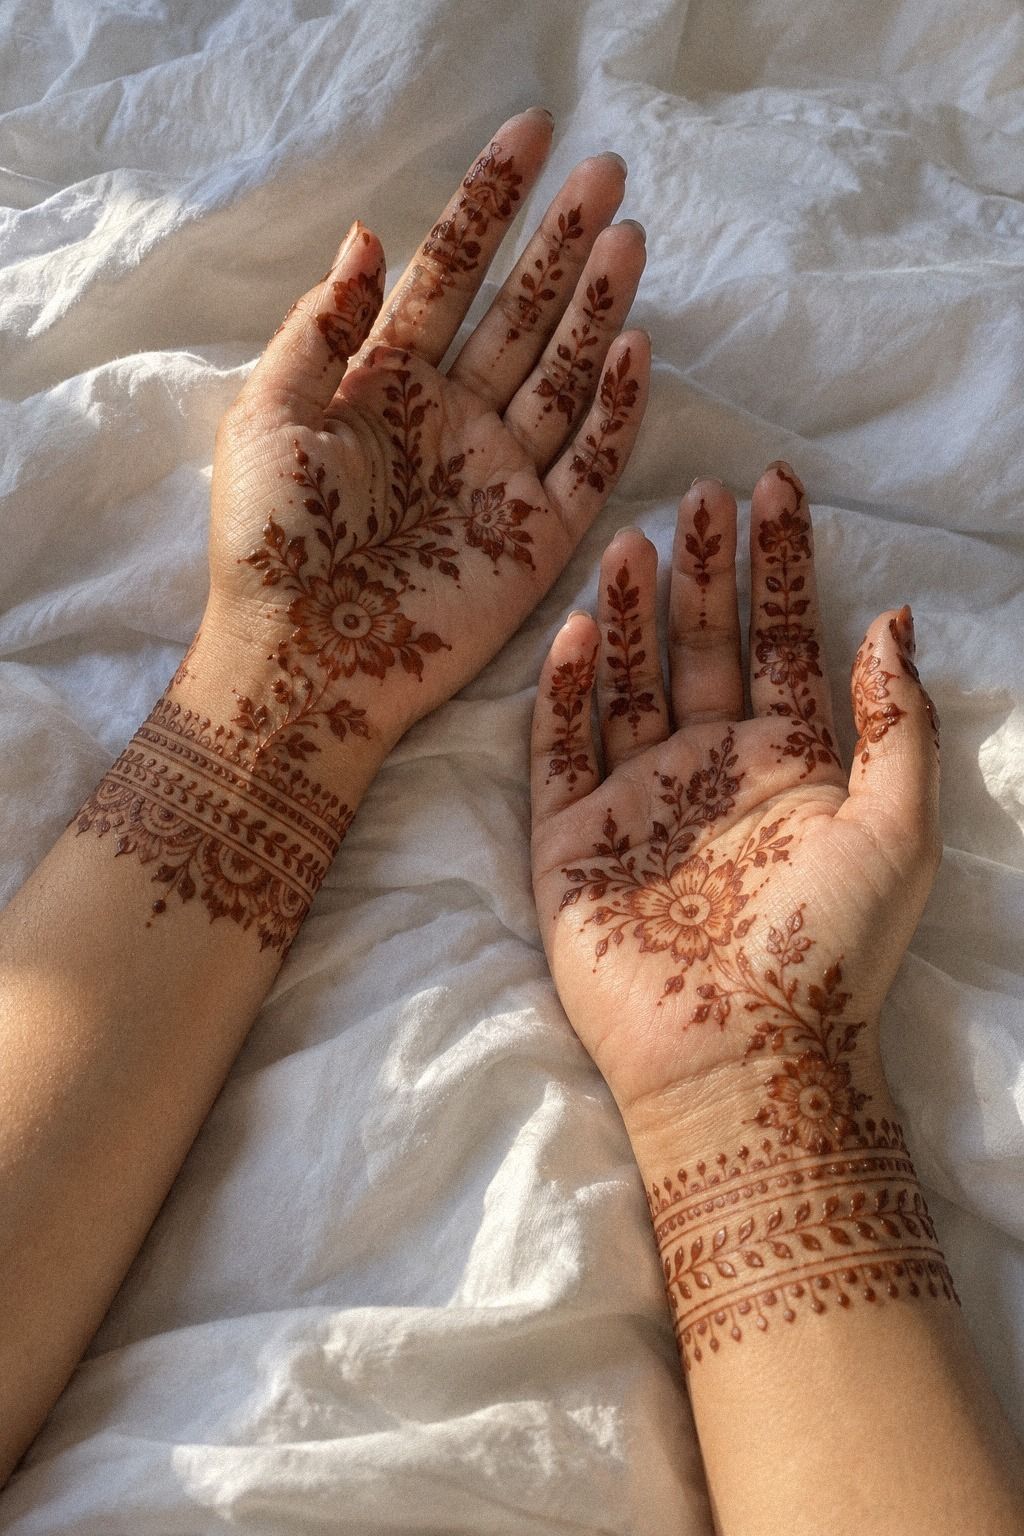
A symbolic shoulder pattern can be subtle, sacred, and unexpectedly elegant when it uses one meaningful emblem. Choose a small crescent motif or a single paisley, then give it a few dots and curved leaves for support.
I’d keep the surrounding skin open so the symbol remains easy to read. A tiny sun, moon, flower, or protective mark can carry more feeling than a crowded collection of unrelated signs. The shoulder gives you enough space for a personal detail without requiring a large amount of paste.
If you want the design to feel more personal, connect the emblem to a celebration, family story, or private intention. A fine henna cone gives you control around small curves, while a cotton swab can tidy an edge before the paste sets.
9The Bridal Mandala That Holds Its Shape
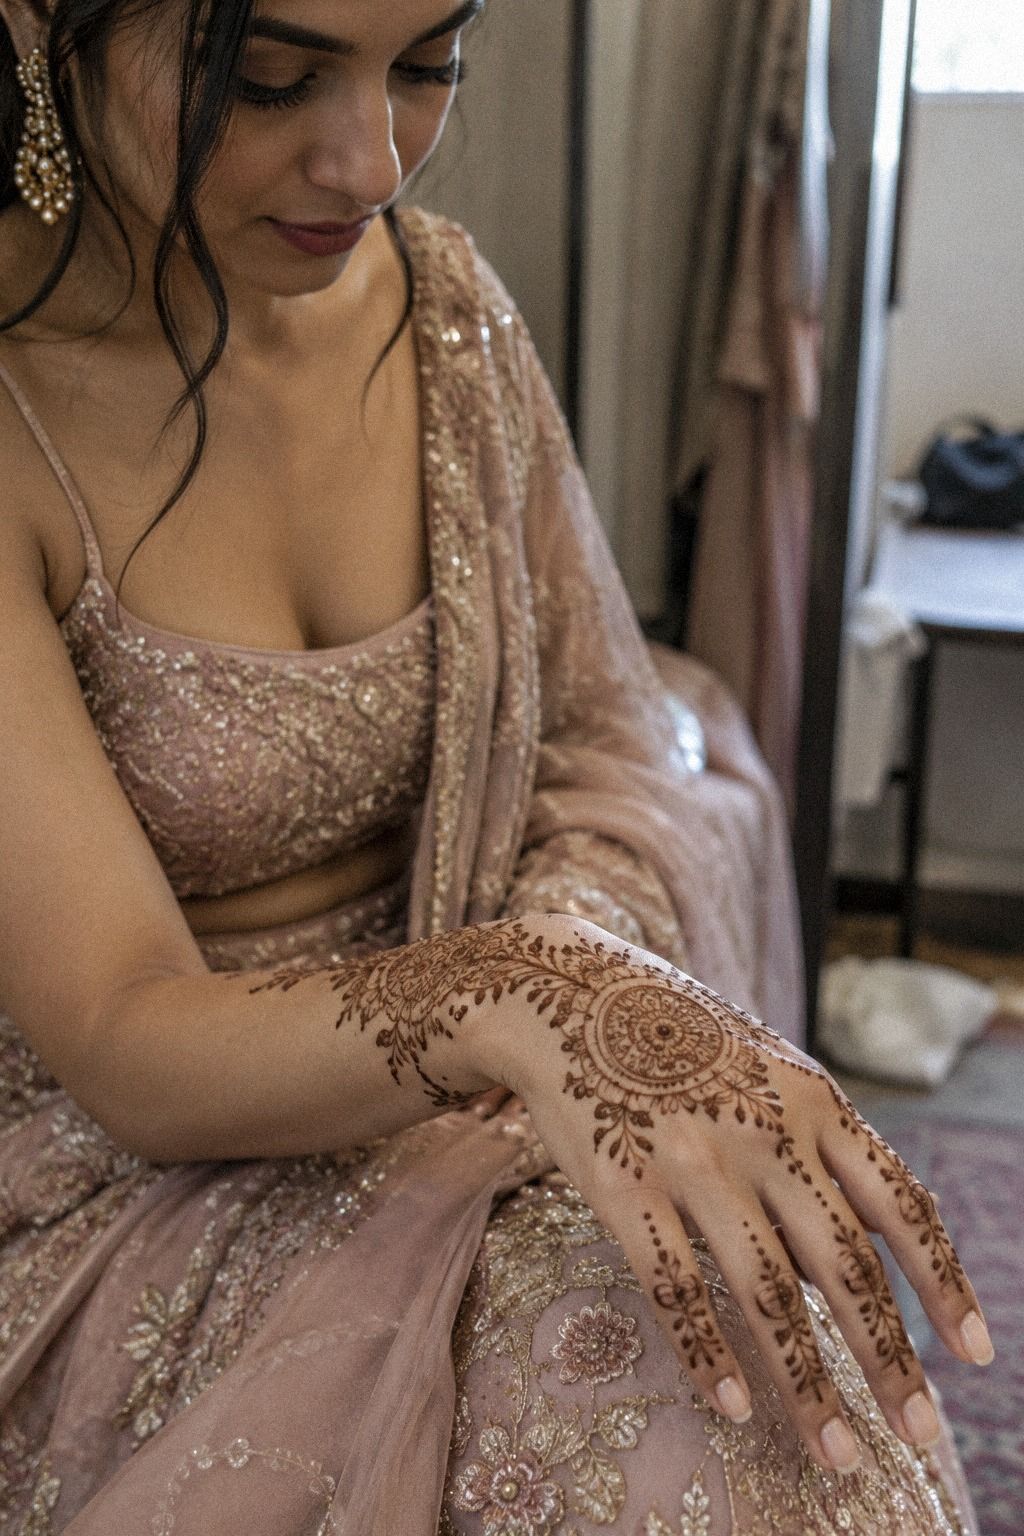
Bridal mehndi can be ornate and still look polished when every detail belongs to one visual family. Build from a round mandala, then repeat its petals across the wrist, palm, or fingers. Your jaal can fill selected spaces while tiny paisleys create movement.
I’d choose one dominant motif instead of trying to show every traditional symbol. The mandala should be the first thing your eye sees, with floral borders acting as support. If you’re preparing for a wedding, matching one detail with the bride’s jewelry can be worth the extra time.
Fresh paste matters more than buying a complicated kit. Use sifted henna powder with a smooth texture, and let the dried design stay on your skin for 1 to 2 hours. The stain can deepen during the second day, so don’t judge the final color immediately.
For a traditional direction, compare simple Pakistani mehndi designs with simple new bridal mehndi designs. Your bridal pattern can be detailed without feeling heavy. Keep the mandala clear, and it will remain expressive throughout the celebration.
10Geometry Along the Collarbones
Geometric patterns near the collarbones look sharp when they follow the natural line of the body. Try a repeating diamond chain with small dots at each point, leaving narrow gaps between the shapes.
I’d avoid covering the entire area with paste. A few connected triangles or fine arcs can feel modern and precise while still leaving the skin visible. Keep the central shape slightly larger, then let the marks become smaller as they move outward.
Test the pattern on paper before applying it to your skin. A wooden applicator stick can help you plan the spacing, but the cone should make the final marks. This placement works especially well for a meaningful symbol that you want to keep understated.
11Leave the Flower Open
Negative space is the easiest way to make one cone look restrained and refined. Create a bold open flower on the foot or ankle, then let untouched skin form the petals between the lines. Your eye will complete the shape, making the design feel ethereal without extra paste.
I’d choose negative space over dense filling when your motif needs to stay readable for several days. Thick areas can lose crispness as the stain fades, while open shapes keep their identity. A few sharp dots near the toes or ankles can guide the eye.
Let the paste dry naturally and avoid rubbing it away too early. After the dried flakes lift, the color may look orange before becoming deeper on the second day. Lemon-sugar sealant can help the paste remain attached, but skip harsh products.
If you want another open pattern to study, look at simple very simple mehndi designs. Your best negative-space design may use fewer marks than expected. That restraint makes the final result feel polished, delicate, and memorable!
The One-Cone Rule for Elegant Mehndi
I’ve learned that elegant mehndi doesn’t come from squeezing more motifs onto the skin. It comes from choosing one visual language and repeating it with care. If your design uses paisleys, let the paisleys lead.
If it uses mandalas, let the circles establish the rhythm. A single henna cone can create an intricate result when your plan is clear.
The one-cone rule also makes the process approachable. You won’t need several colors, complicated tools, or a long list of supplies.
Fresh paste, a clean tip, a steady hand, and patience will take you further than a crowded stencil. If the first curve is imperfect, a small leaf or dot can turn it into part of the pattern.
For me, the most successful designs balance a striking center with delicate edges. That might mean a mandala on the palm, a peacock near the wrist, or a flowing vine across the forearm. Your choice should match the occasion and placement, but it should also feel like you.
Save a few references from simple trendy mehndi designs and simple stylish mehndi designs for front hand before you begin. You’ll spot the shapes you keep returning to, and that’s probably your style.
Why One Cone Still Feels Personal in 2026
Mehndi is having a refined moment because people want designs that feel expressive without looking overworked. I understand the appeal.
A delicate vine can carry a memory, while a bold mandala can mark a celebration. Your pattern doesn’t need to announce everything about you to feel meaningful.
I’ve noticed more interest in placement-led designs, especially fingers, ankles, wrists, and small shoulder motifs. The most successful examples respect the body’s movement. They follow the skin, leave deliberate gaps, and let the reddish-brown stain do some visual work.
The strongest choice for you may be the design that suits your occasion. Bridal mehndi can be ornate and sacred.
Eid patterns may feel symmetrical and polished. A small family gathering may call for something playful, delicate, and quick to dry.
The best value is a motif that fits the moment instead of copying a trend exactly.
I’d keep returning to the same rule: choose one focal shape, one supporting motif, and one open area. That formula can look modern, traditional, feminine, bold, or understated depending on your cone work. When the color fades after 1 to 3 weeks, you can begin again.
These are planning ranges, not fixed prices. For a simple personal design, an at-home setup can offer strong value. A larger bridal appointment may cost more because the artist’s time and detail level change the total.
How to Keep Elegant Mehndi Clean While It Dries
The drying stage decides more about the final result than most people expect. Keep fresh paste on the skin for about 1 to 2 hours, and try not to bend the area repeatedly. If you’re working on your hand, place it flat and keep your fingers relaxed.
A small amount of lemon-sugar mixture can help the paste stay attached, but more isn’t better. Too much moisture can make the surface sticky and blur your details. You’ll want a light touch, especially around fingers, palms, and ankles where movement is constant.
Once the paste flakes away, avoid judging the color right away. It often begins orange and develops into a deeper reddish brown on the second day.
Eucalyptus oil is sometimes used in henna preparation, but your skin should tolerate every ingredient first. Patch testing is sensible.
Try to limit strong soap, long soaking, and chlorinated water while the stain is fresh. Your design will fade naturally over 1 to 3 weeks, depending on placement and washing. For more simple options, revisit simple mehndi designs and choose a pattern you’ll enjoy wearing.
Which Elegant Mehndi Design Should You Choose?
Choose the finger design if you want something delicate and visible. Pick the mandala if your palm needs a striking center. A flowing forearm vine will feel graceful and expressive, while an ankle trail gives you a quieter, understated option.
I’d also think about contrast. A bold backhand motif stands out against open skin, while a negative-space flower feels lighter and more playful.
If you’re attending a wedding, a bridal mandala may feel right. If you’re celebrating Eid, a symmetrical palm or wrist pattern can look sacred.
For a small family event, you can keep the design simple and still make it meaningful. Reddish-brown henna stain has enough presence on its own, so you don’t need to crowd your hand with extra symbols. If you’re unsure, start with the motif you can imagine looking at repeatedly.
You can compare options through simple peacock mehndi designs and simple modern mehndi designs. Which design would you still love after the color softens? That’s usually the one to choose.
My Honest Take on the One-Cone Approach
I used to think a more impressive mehndi design had to include every detail I admired. I’d save ornate palms, dense jaal patterns, peacocks, florals, and geometric borders, then try to combine them all. The result wasn’t always bad, but it rarely felt graceful.
Now I’d rather choose one memorable shape and let it breathe. A mandala with three petal layers can feel more powerful than a palm covered edge to edge. A single flowing vine can look more timeless than a dozen disconnected flowers.
Your skin is already part of the design, so the untouched areas matter.
The practical side matters too. One cone is easier to control, carry, and clean up. You’ll spend more time enjoying the pattern and less time switching between mixtures.
If a line goes wrong, you can soften it with a dot, leaf, or small scallop. That makes the small cost feel sensible.
I’d choose the negative-space flower for myself. It’s delicate but not timid, symbolic without explaining itself, and easy to adapt for an ankle, foot, or hand.
You may choose differently, and that’s the point. Elegant mehndi should support your mood, occasion, and personal meaning.
A Few Things Worth Answering
How long do elegant mehndi designs last?
Elegant mehndi usually remains visible for about 1 to 3 weeks, depending on placement, washing, and daily movement. Palm and finger designs may fade sooner because they’re used constantly, while a shoulder or forearm pattern can last longer with gentle care.
Your color may look orange at first, then deepen on the second day. Keep the area away from harsh soap, long soaking, and swimming while the stain develops. You’ll see the pattern soften gradually.
Where can I buy supplies for elegant mehndi designs?
You can buy natural henna powder, pre-filled cones, or cone-making supplies from reputable mehndi shops, cultural markets, and established online sellers. Look for ingredient information and avoid products marketed as instant black henna.
Your cone should contain a clear preparation rather than an unknown fragrance-heavy mixture. If you’re buying premade paste, check the date and patch test before using it across a large area.
Is natural henna safe for everyone?
Natural henna is generally used as a plant-based paste, but patch testing is still important because individual skin can react to ingredients in the mixture. Avoid instant black henna, which may contain substances that cause serious reactions.
Test a small area and wait before applying a full design. If your skin becomes itchy, swollen, or painful, remove the paste and seek medical advice. You’ll want the occasion to feel joyful, not stressful.
How long should henna paste stay on the skin?
Henna paste usually stays on the skin for about 1 to 2 hours while it dries and sets. Your exact timing depends on the mixture, placement, and how well you can keep the area still.
Let the paste dry naturally and avoid rubbing it off early. Once it flakes away, keep water and strong soap away for a while so the stain can develop into its deeper reddish-brown color.
What color should elegant mehndi be in 2026?
The most timeless color remains natural reddish brown, with shades ranging from warm orange to deep terracotta. Your final tone depends on the henna mixture, skin warmth, placement, and how long the paste stays attached.
A rich natural stain looks more refined than an artificially dark result. You’ll get a classic finish that works with bridal clothing, Eid outfits, sangeet celebrations, and everyday styling.
What is the best placement for elegant mehndi designs?
The best placement depends on your occasion and how visible you want the design to be. Wrists and forearms offer readable space, while palms and fingers create a more traditional effect. Ankles and feet feel quieter and more intimate.
Your skin’s movement also matters. Choose open motifs for fingers and curved vines for forearms or ankles. If you want a symbolic detail, a small shoulder or collarbone design can feel personal and understated.
Where I’d Start First
If I had to pick one, I’d start with the negative-space flower on the ankle. It’s delicate but readable, and the untouched skin keeps one cone from looking busy.
Pin simple modern mehndi designs for later, then let your own curve lead. Keep it simple!